Skip to content
 Installing a hardwired dash cam not only ensures the device functions while driving but also provides parking monitoring capabilities. This comprehensive guide will walk you through the installation process, ensuring your dash cam remains powered and operational. Whether you’re a beginner or a DIY enthusiast, this article will provide clear instructions and practical tips.
For a general dash cam installation guide, you can check out our previous article: Dash Cam Installation Guide. It offers a step-by-step approach for installing a regular dash cam, perfect for users who are new to dash cam setups.
Video Tutorial
Tools and Materials:
- Hardwire kit: Includes power cables, fuse taps, ground wires, etc.
- Fuse puller or pliers: Used to remove and insert fuses.
- Zip ties: To secure wires and keep them tidy.
- Car user manual: Helps locate the fuse box and identify fuse types.
- Circuit tester (optional): For confirming fuse types, though not essential.
Installation Steps
Choose the Installation Location
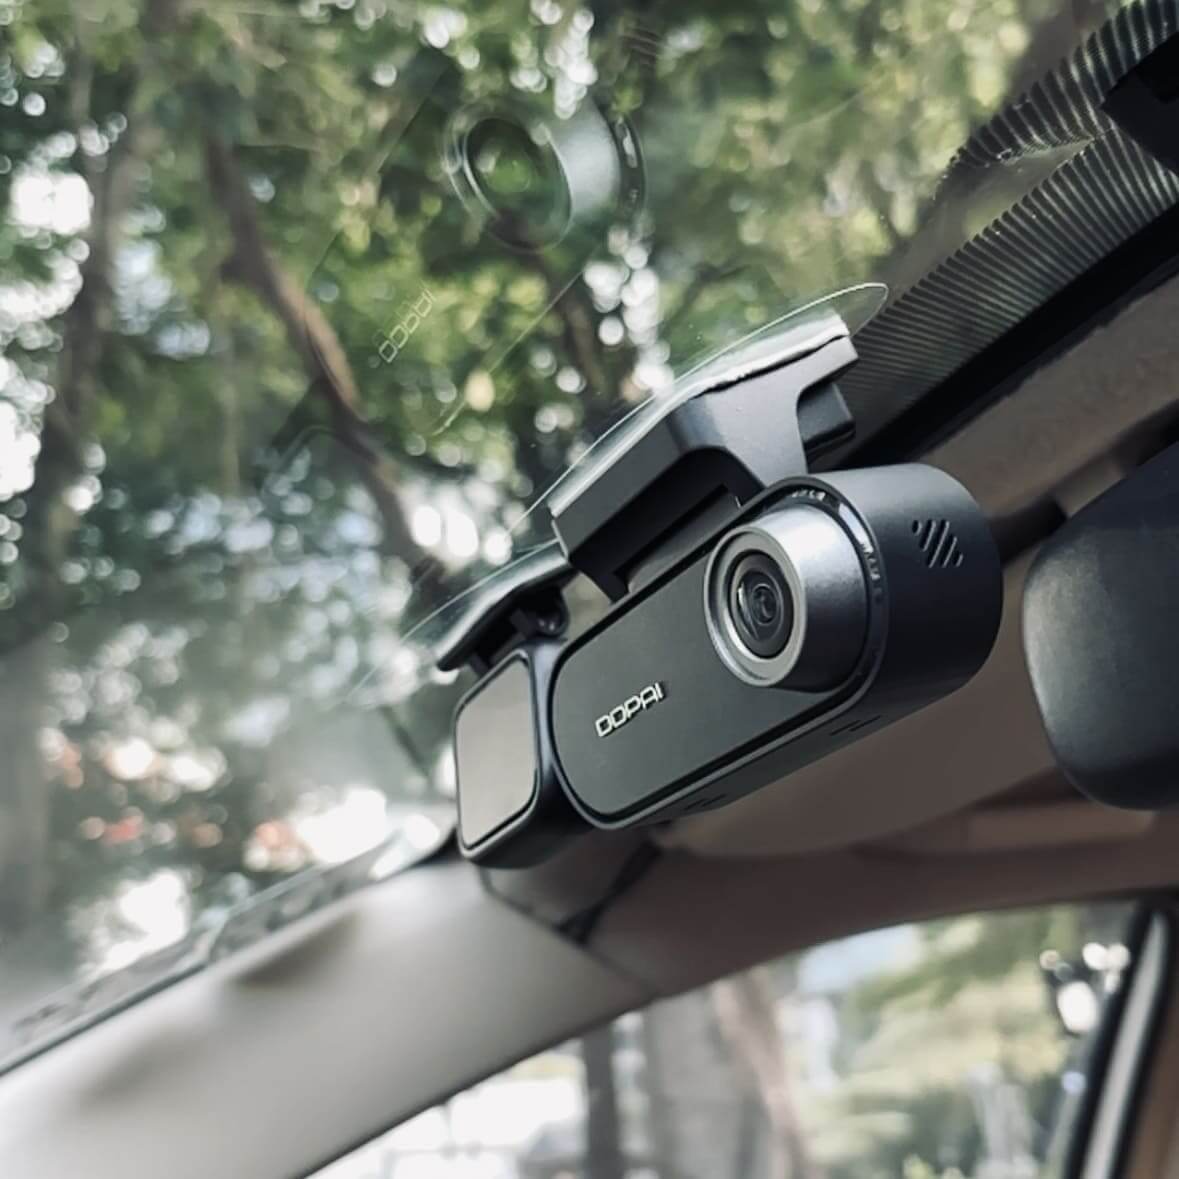
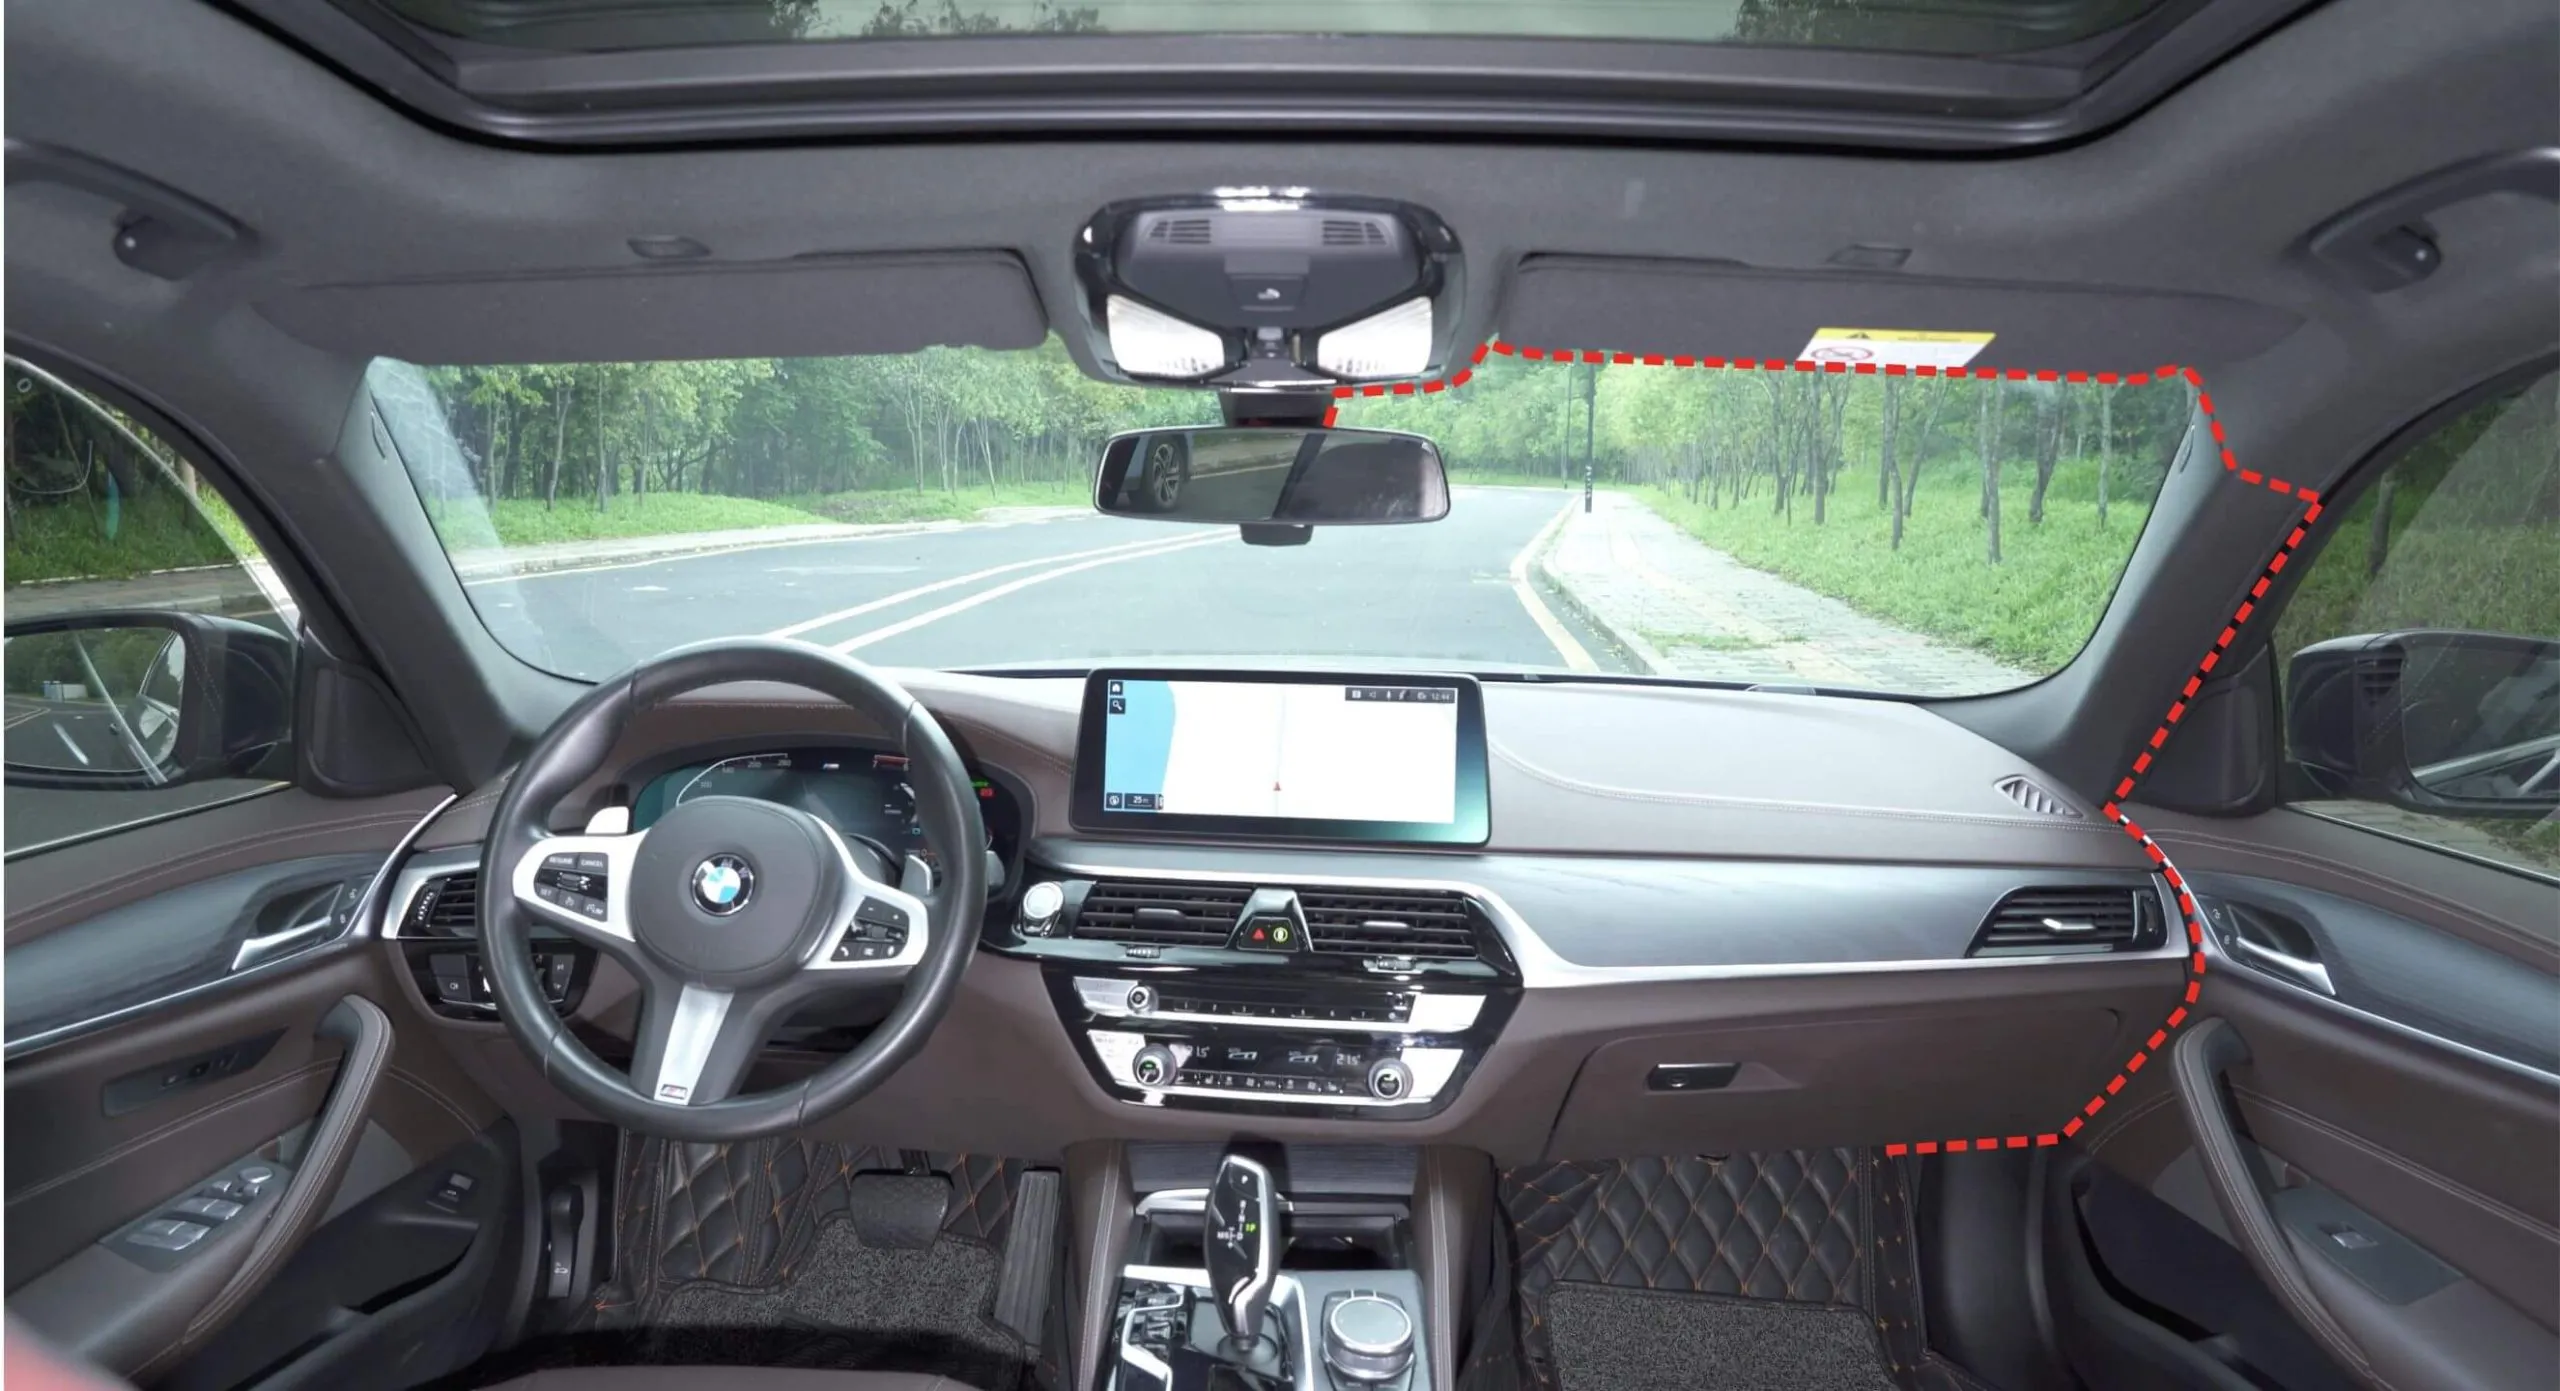
Run the Wiring
Start from the dash cam and run the power cable along the headliner down to the fuse box. Use a plastic pry tool or a similar tool to tuck the cable into the gaps between the trim and the headliner. Ensure the cable is hidden neatly and does not affect the car’s interior appearance.
Locate the Power Source
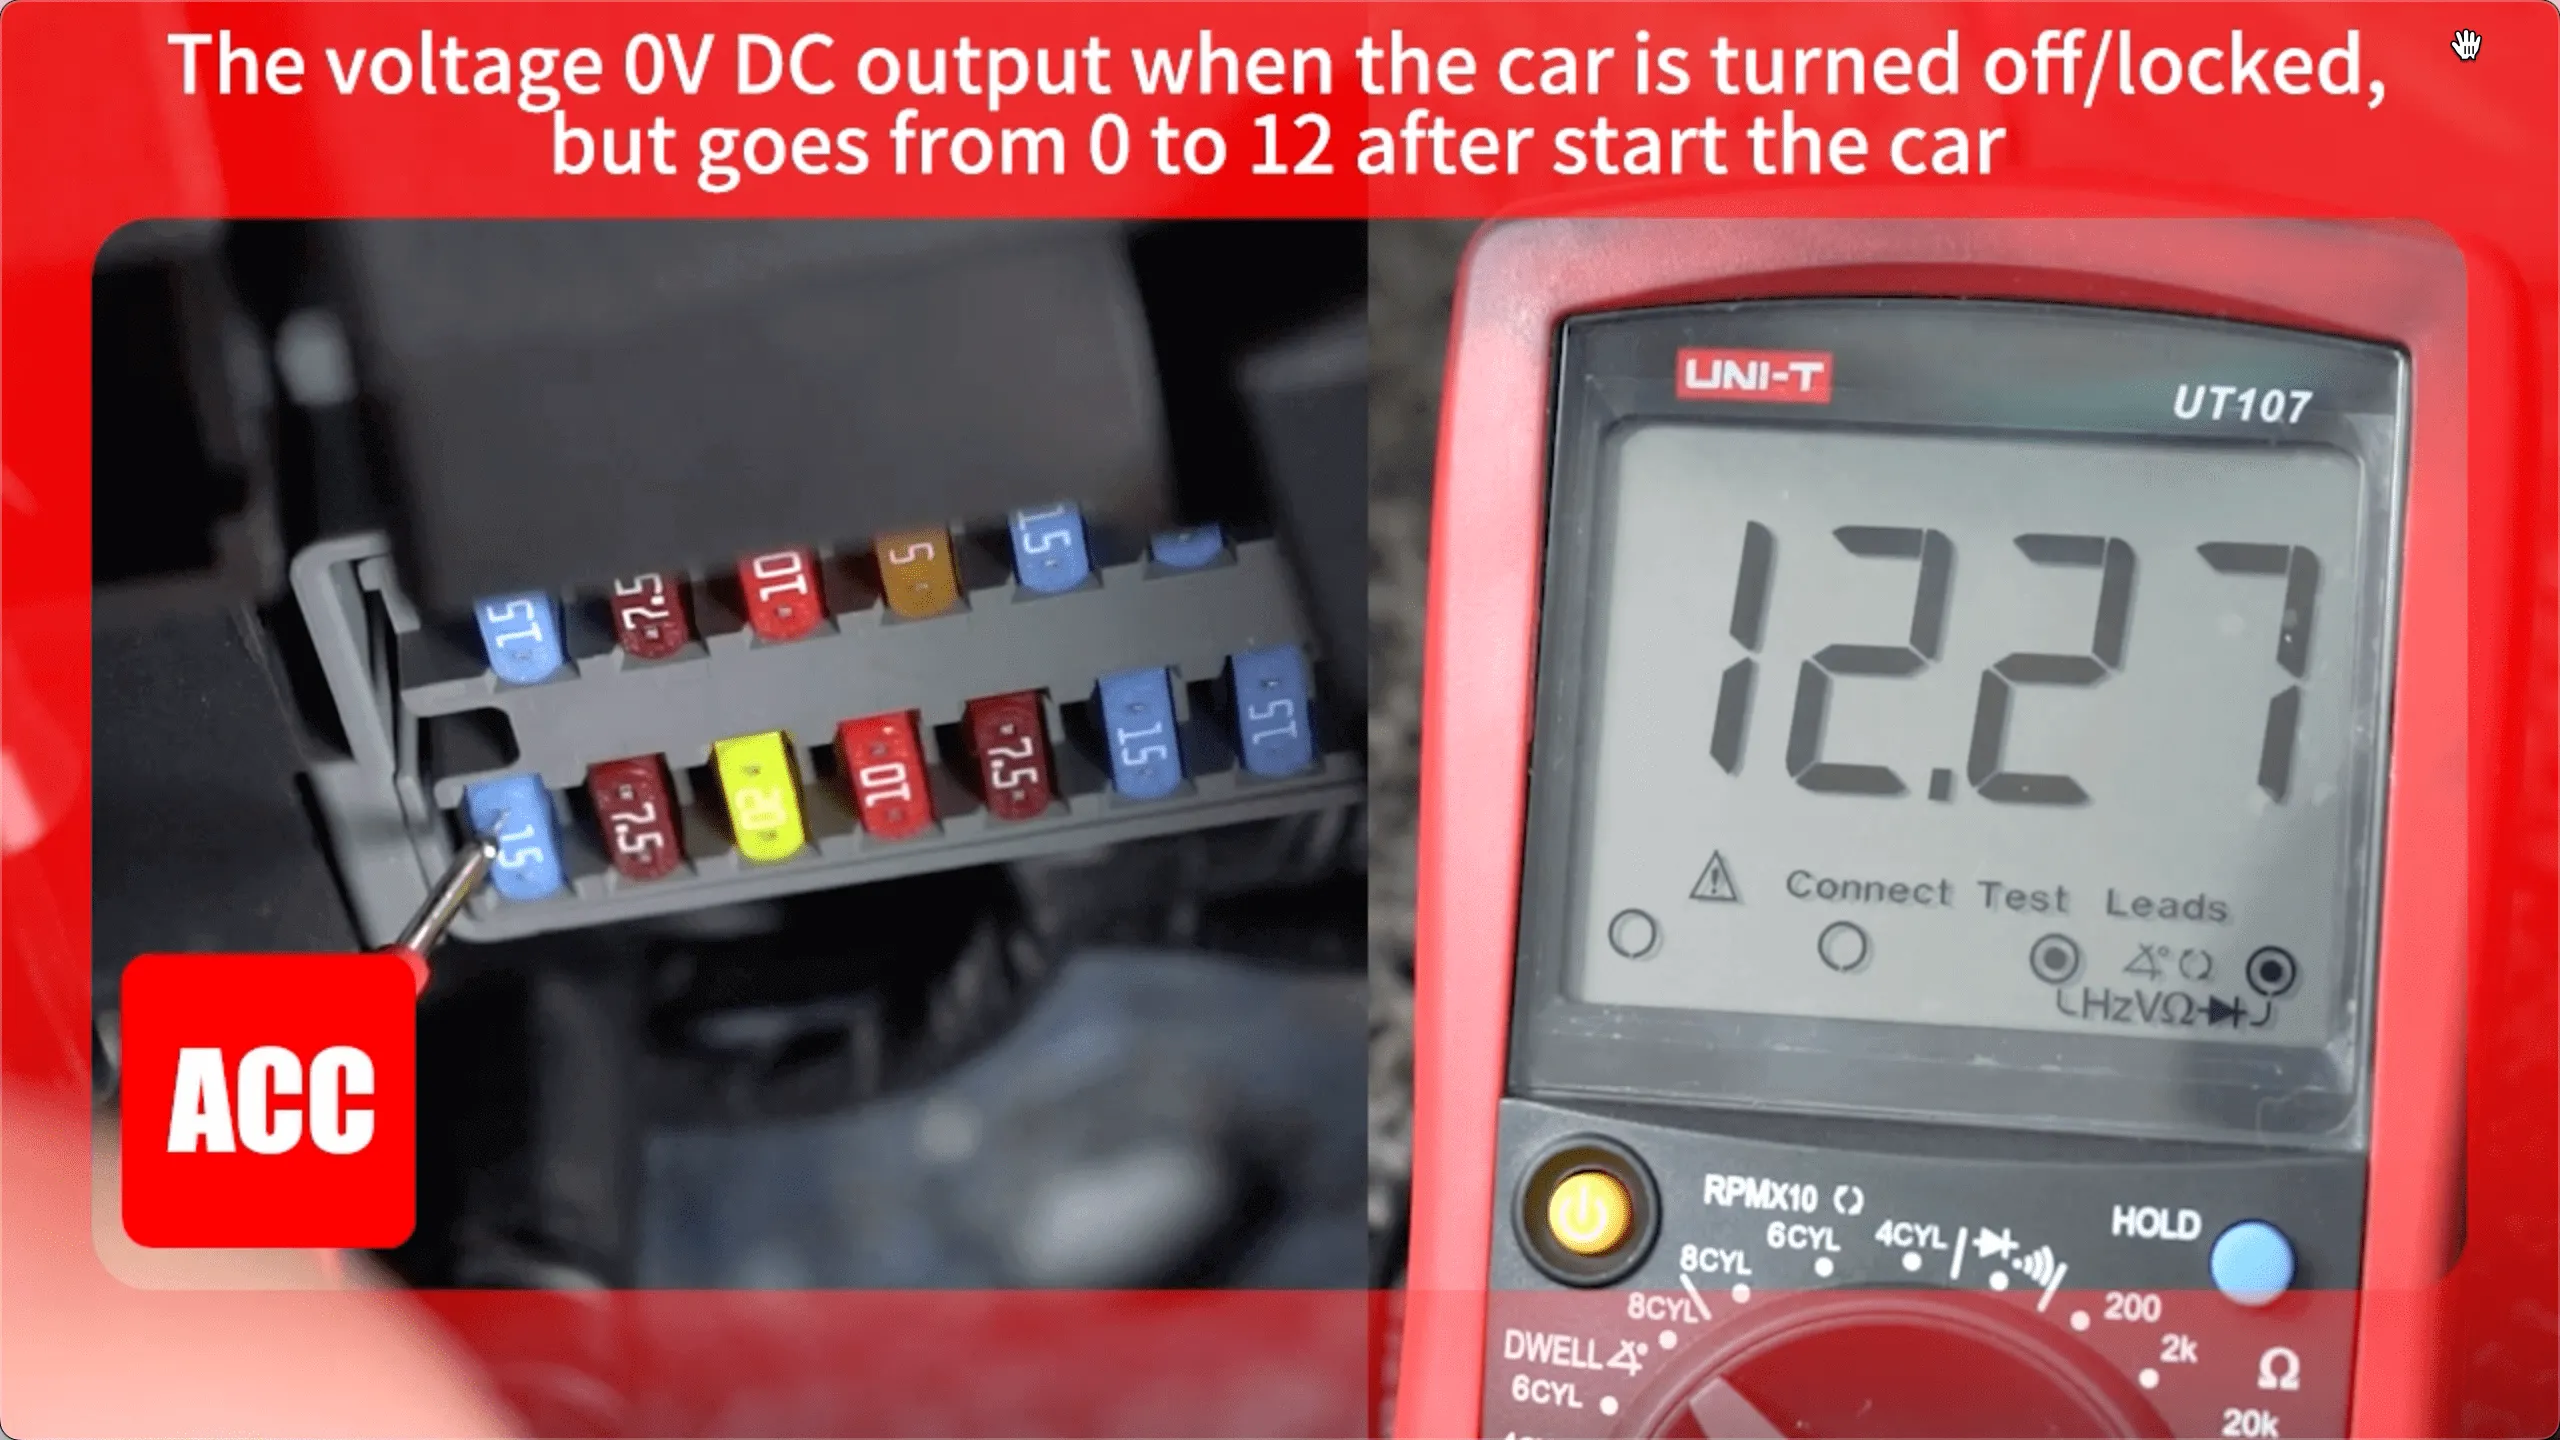
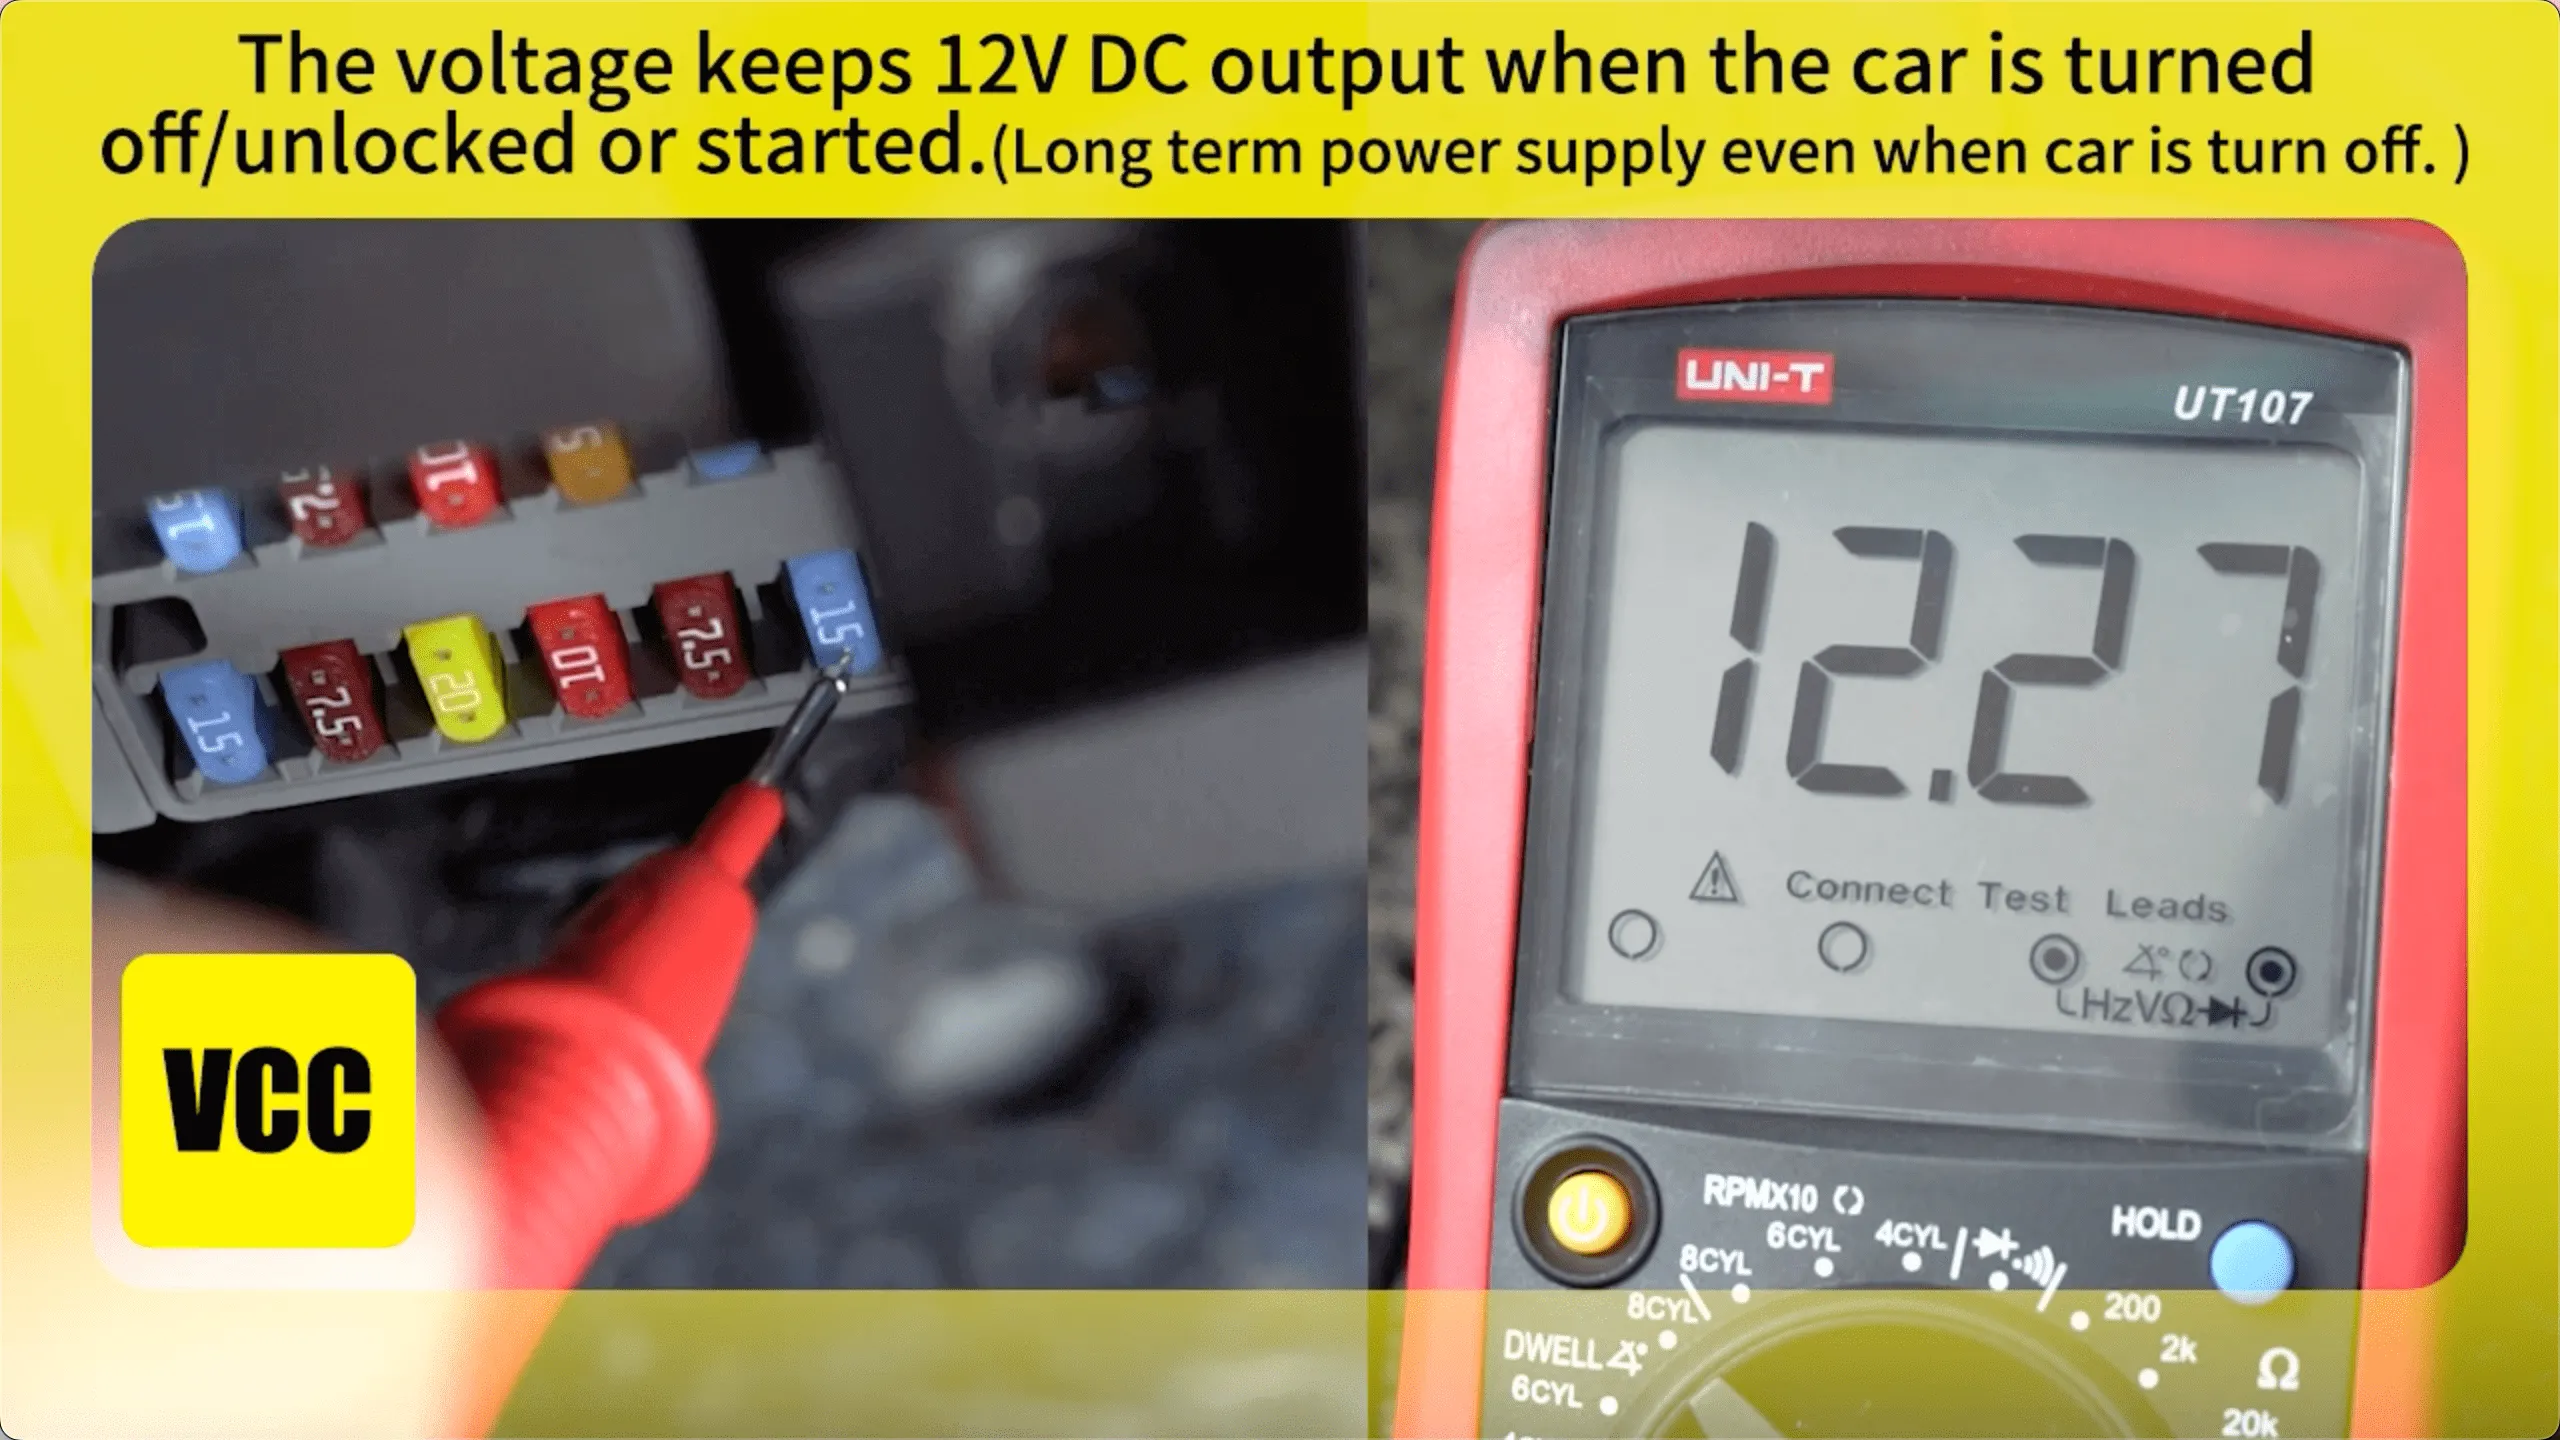
Identifying ACC and VCC Fuses
ACC Fuse (Accessory Power): This fuse provides 12V power only when the car is turned on.
VCC Fuse (Constant Power): This fuse provides 12V power even when the car is turned off.
Using the Car User Manual
- Refer to the fuse diagram in the car user manual to locate the ACC and VCC fuses.
- If the manual does not clearly mark these fuses, consult the car brand’s customer service or use online resources to find the correct fuse layout for your car model.
Connect the Hardwire Kit
Removing ACC and VCC Fuses
Use the fuse puller or pliers to remove the identified ACC and VCC fuses.
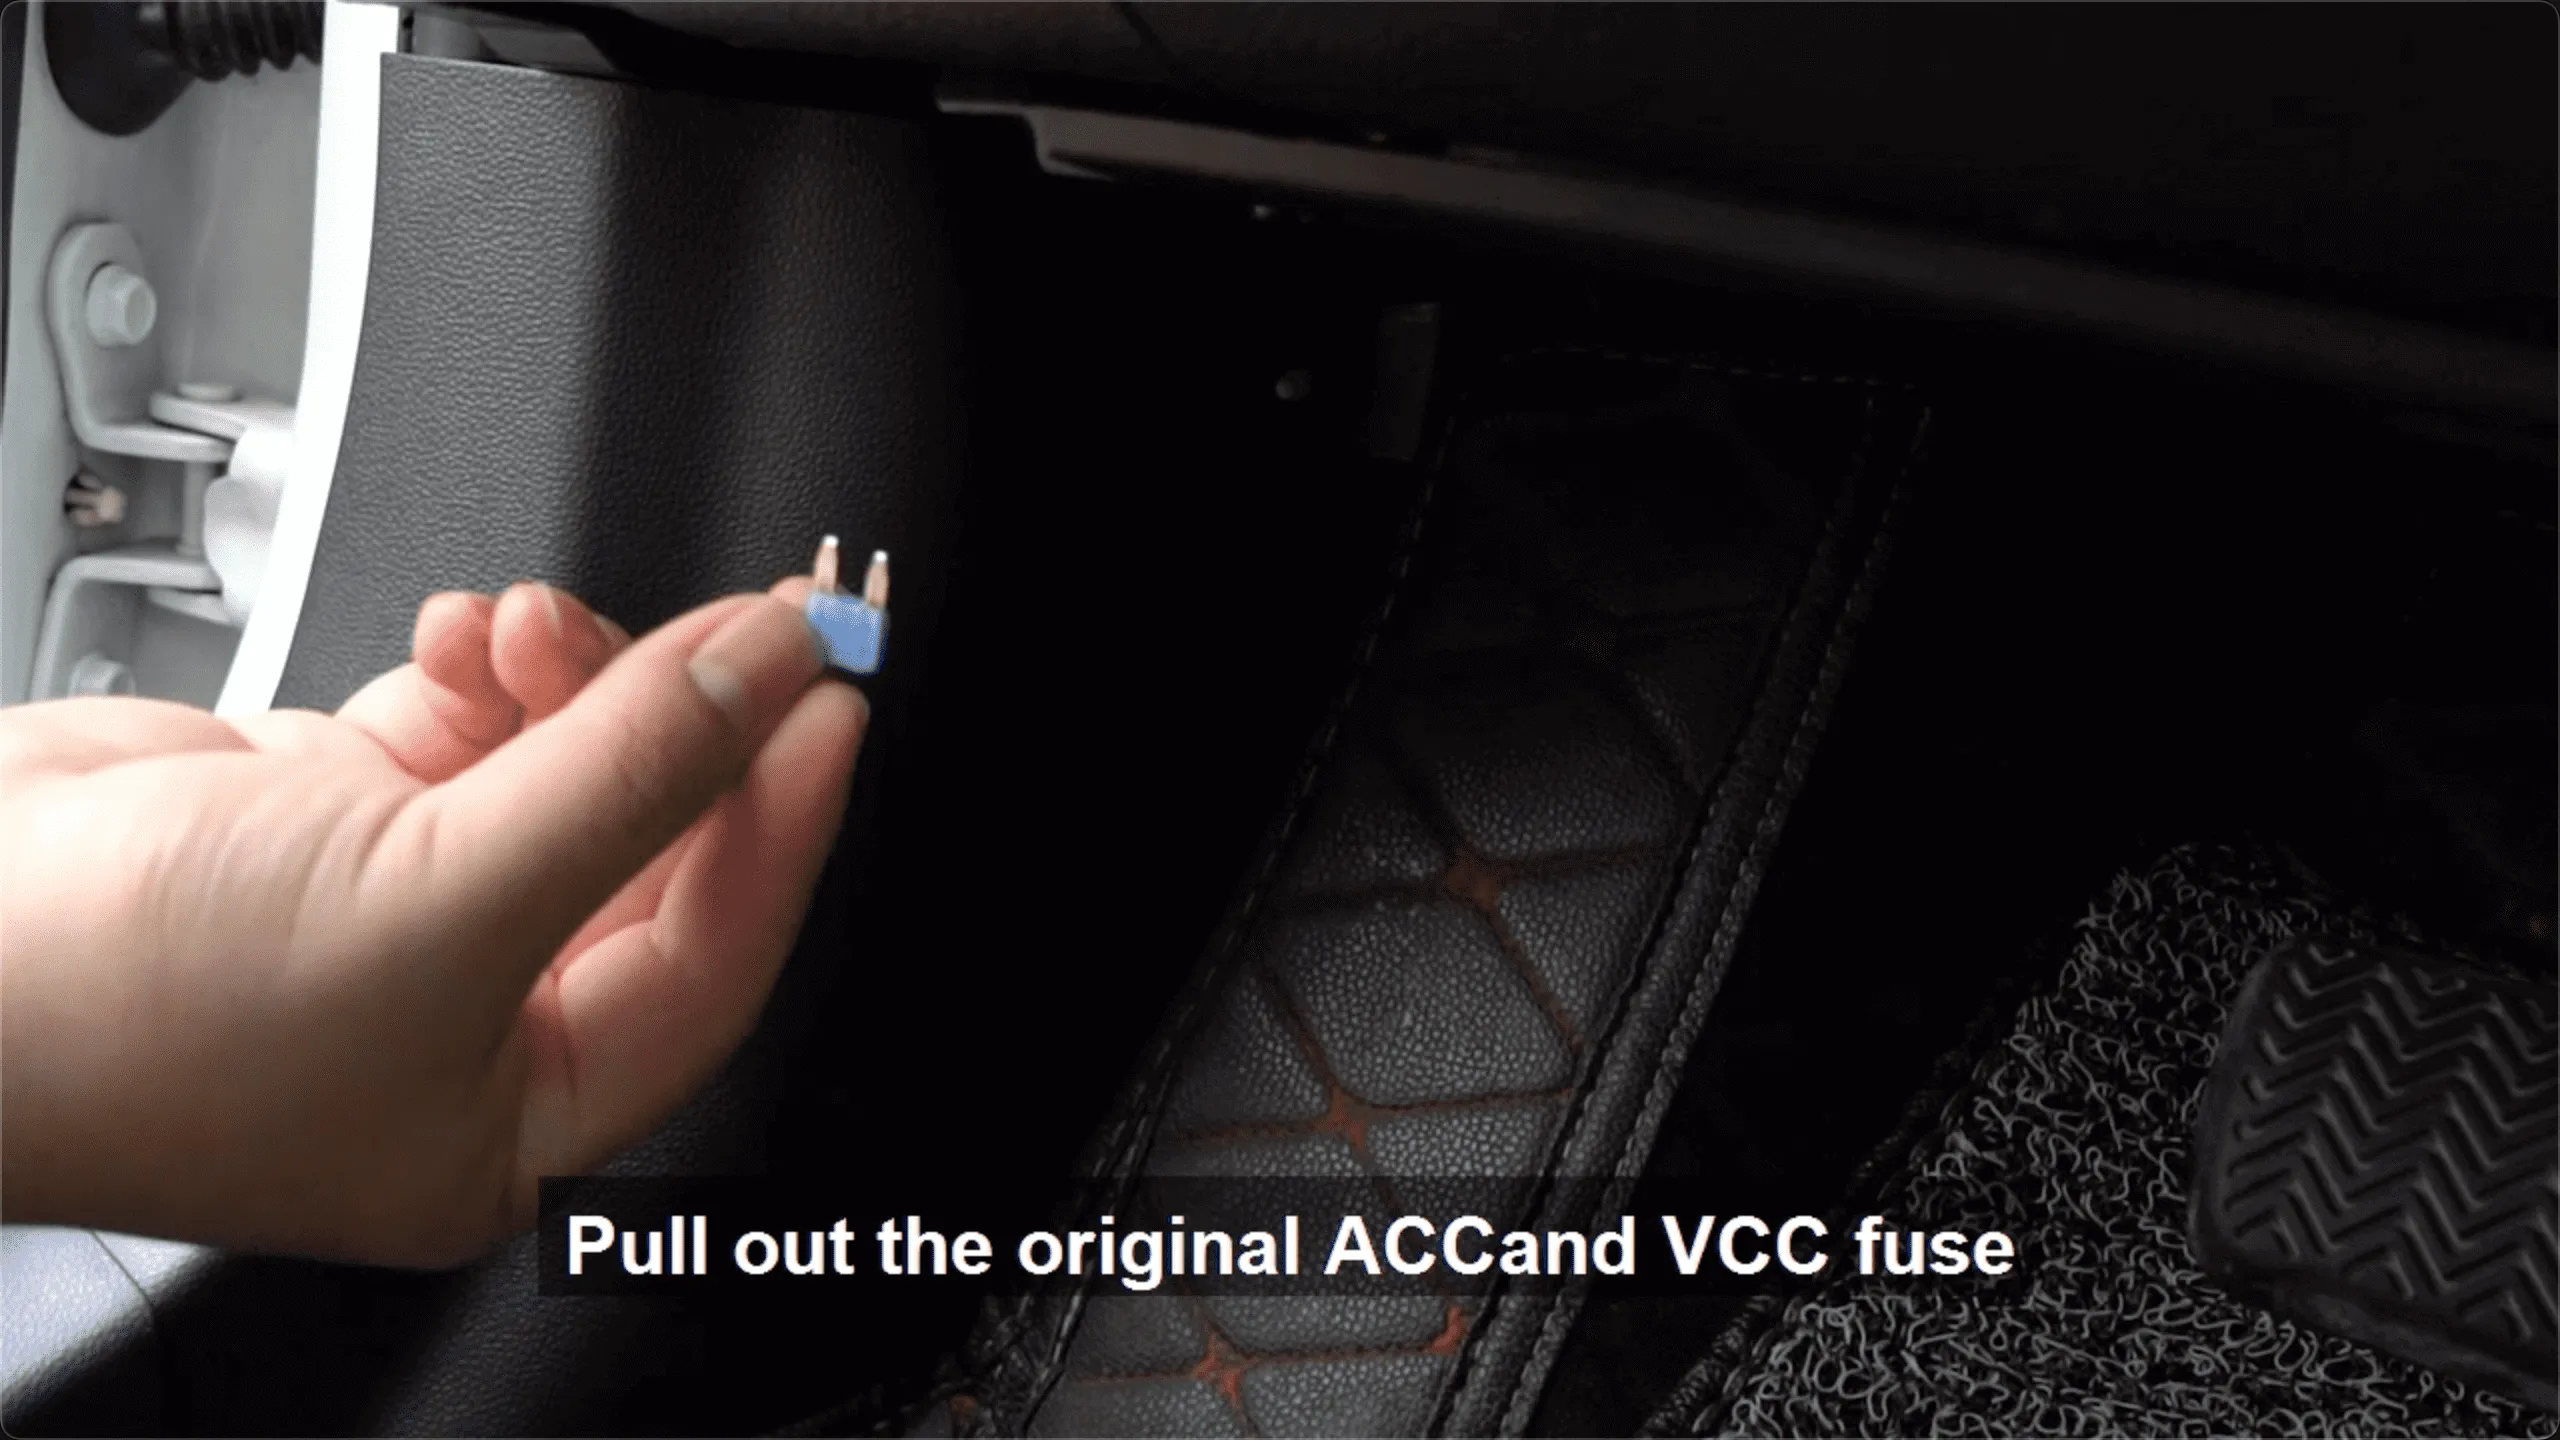
Set aside the removed fuses for later use.
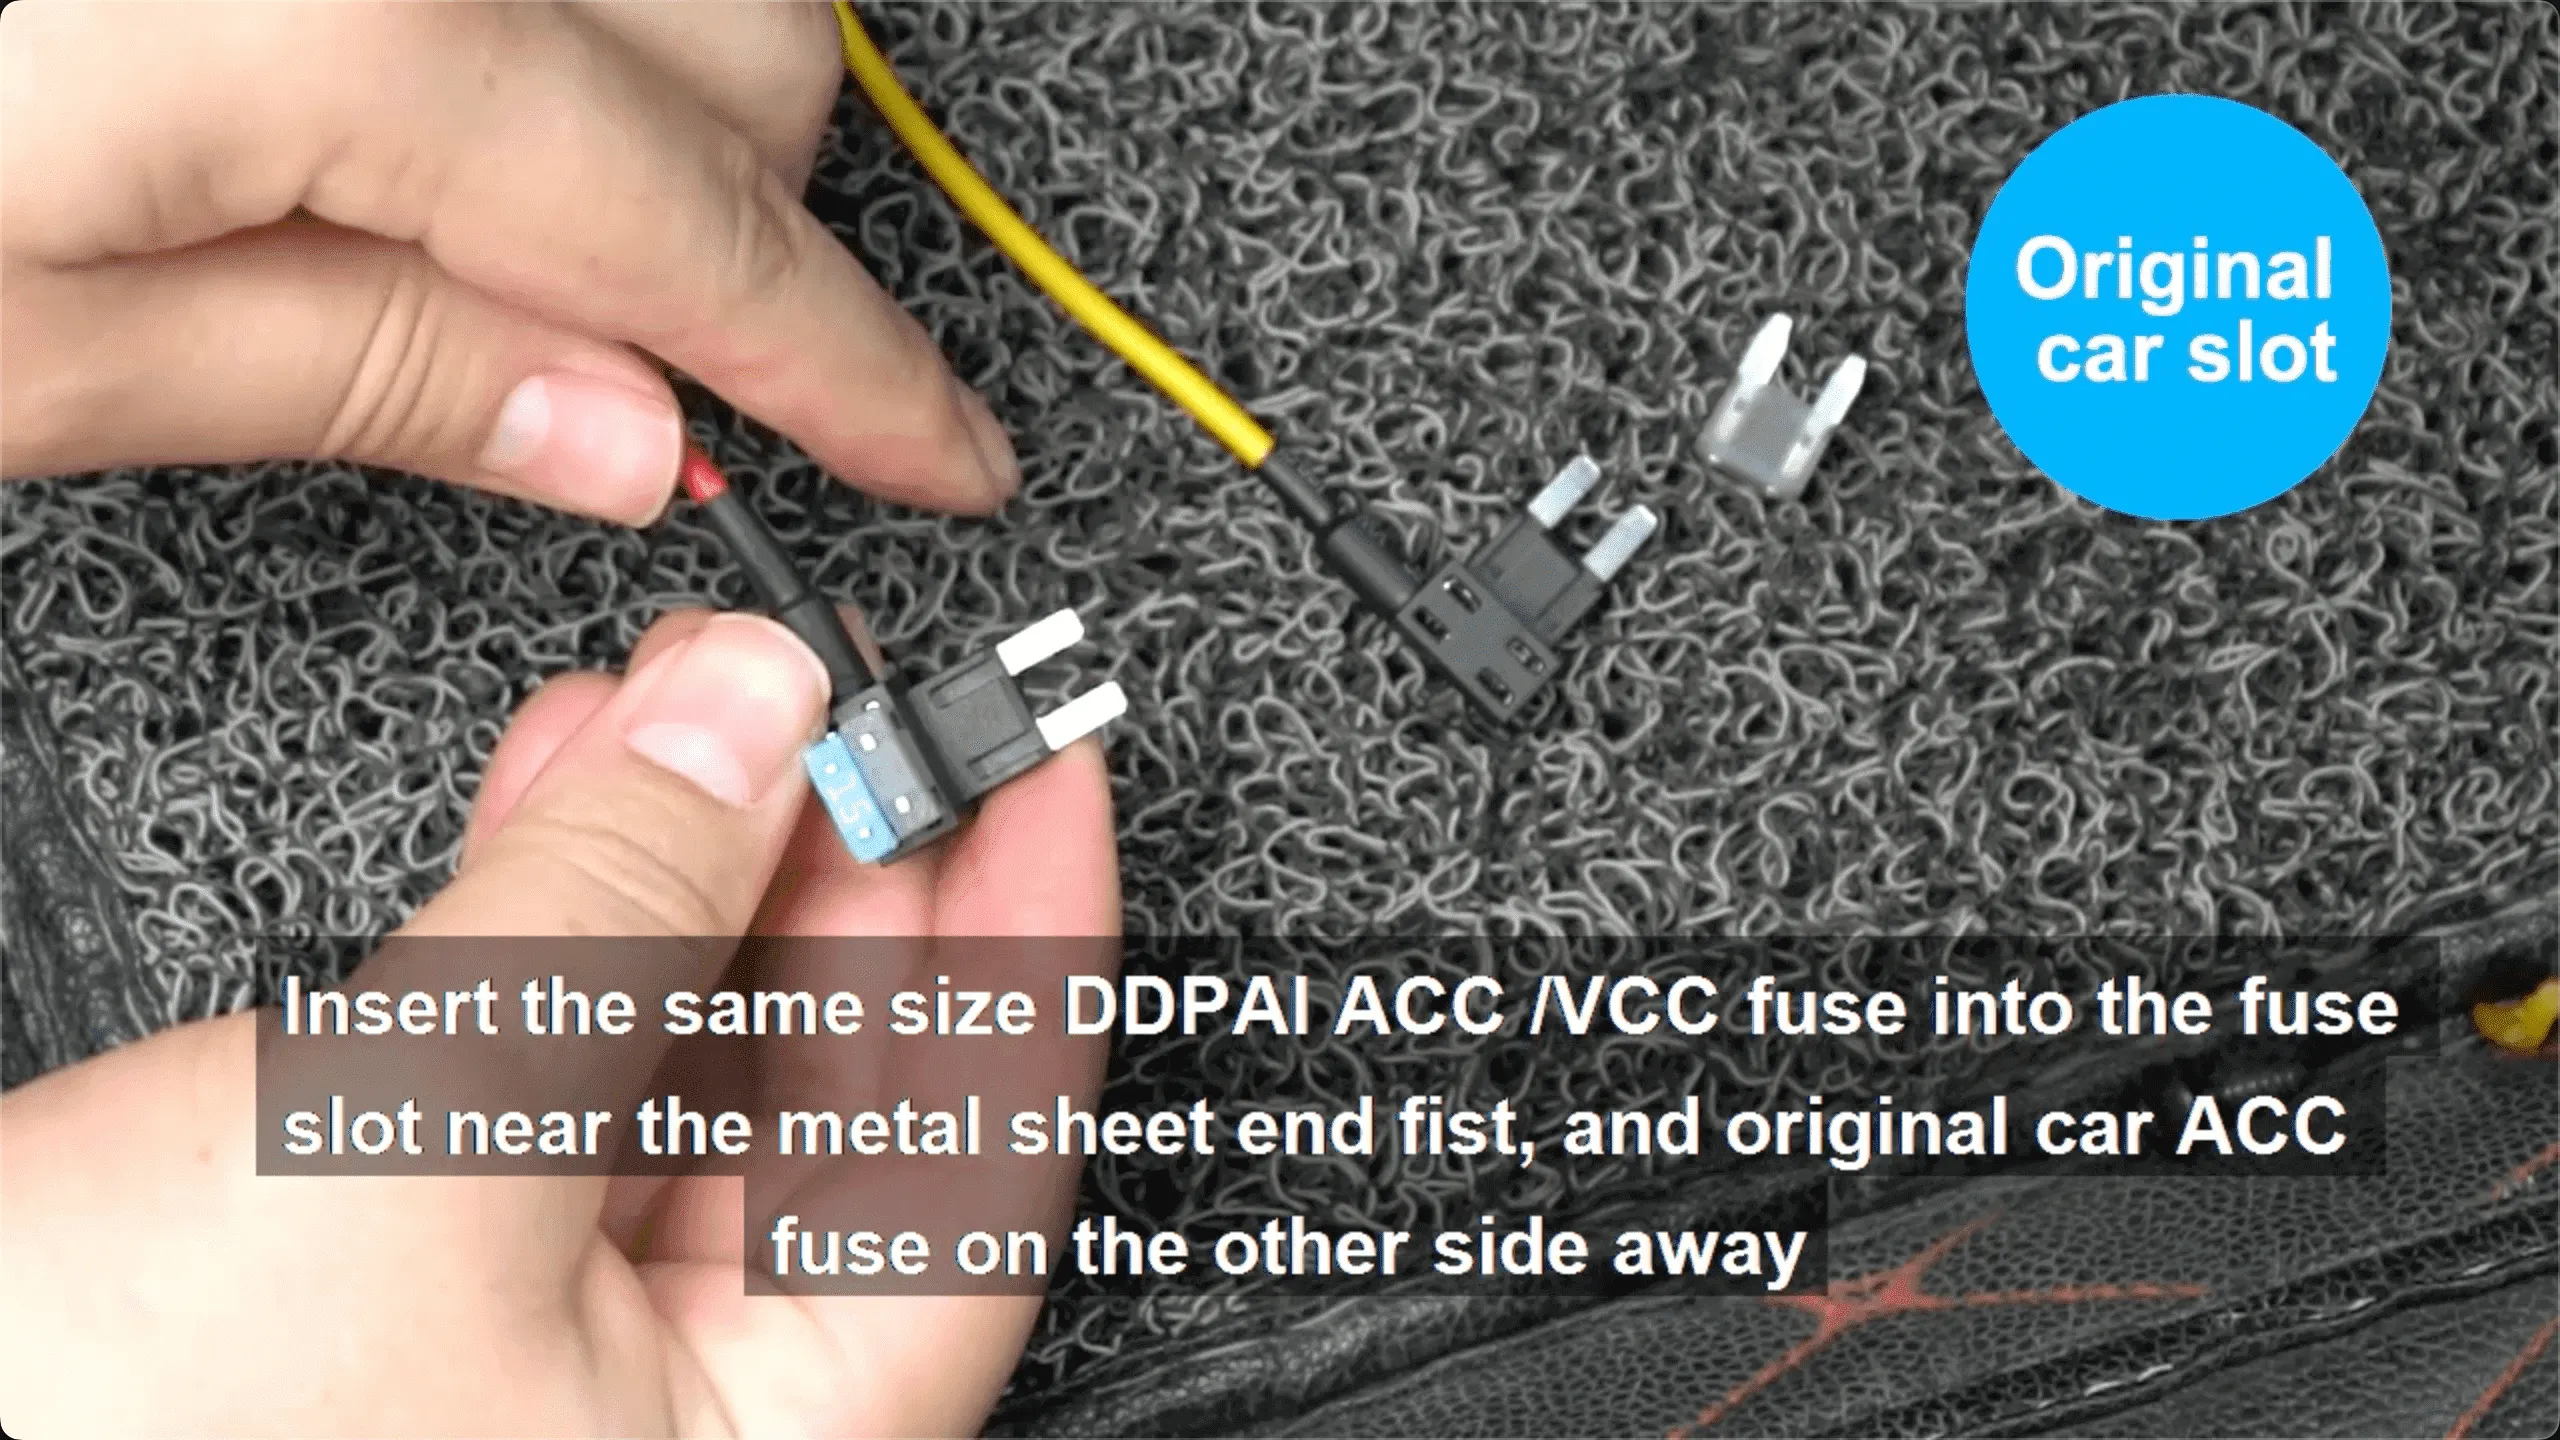
Matching Fuse Types
Confirm the fuse type in your car (Mini, Low profile Mini, Micro2 or ATO).

Remove the matching fuse tap and fuse from the hardwire kit.
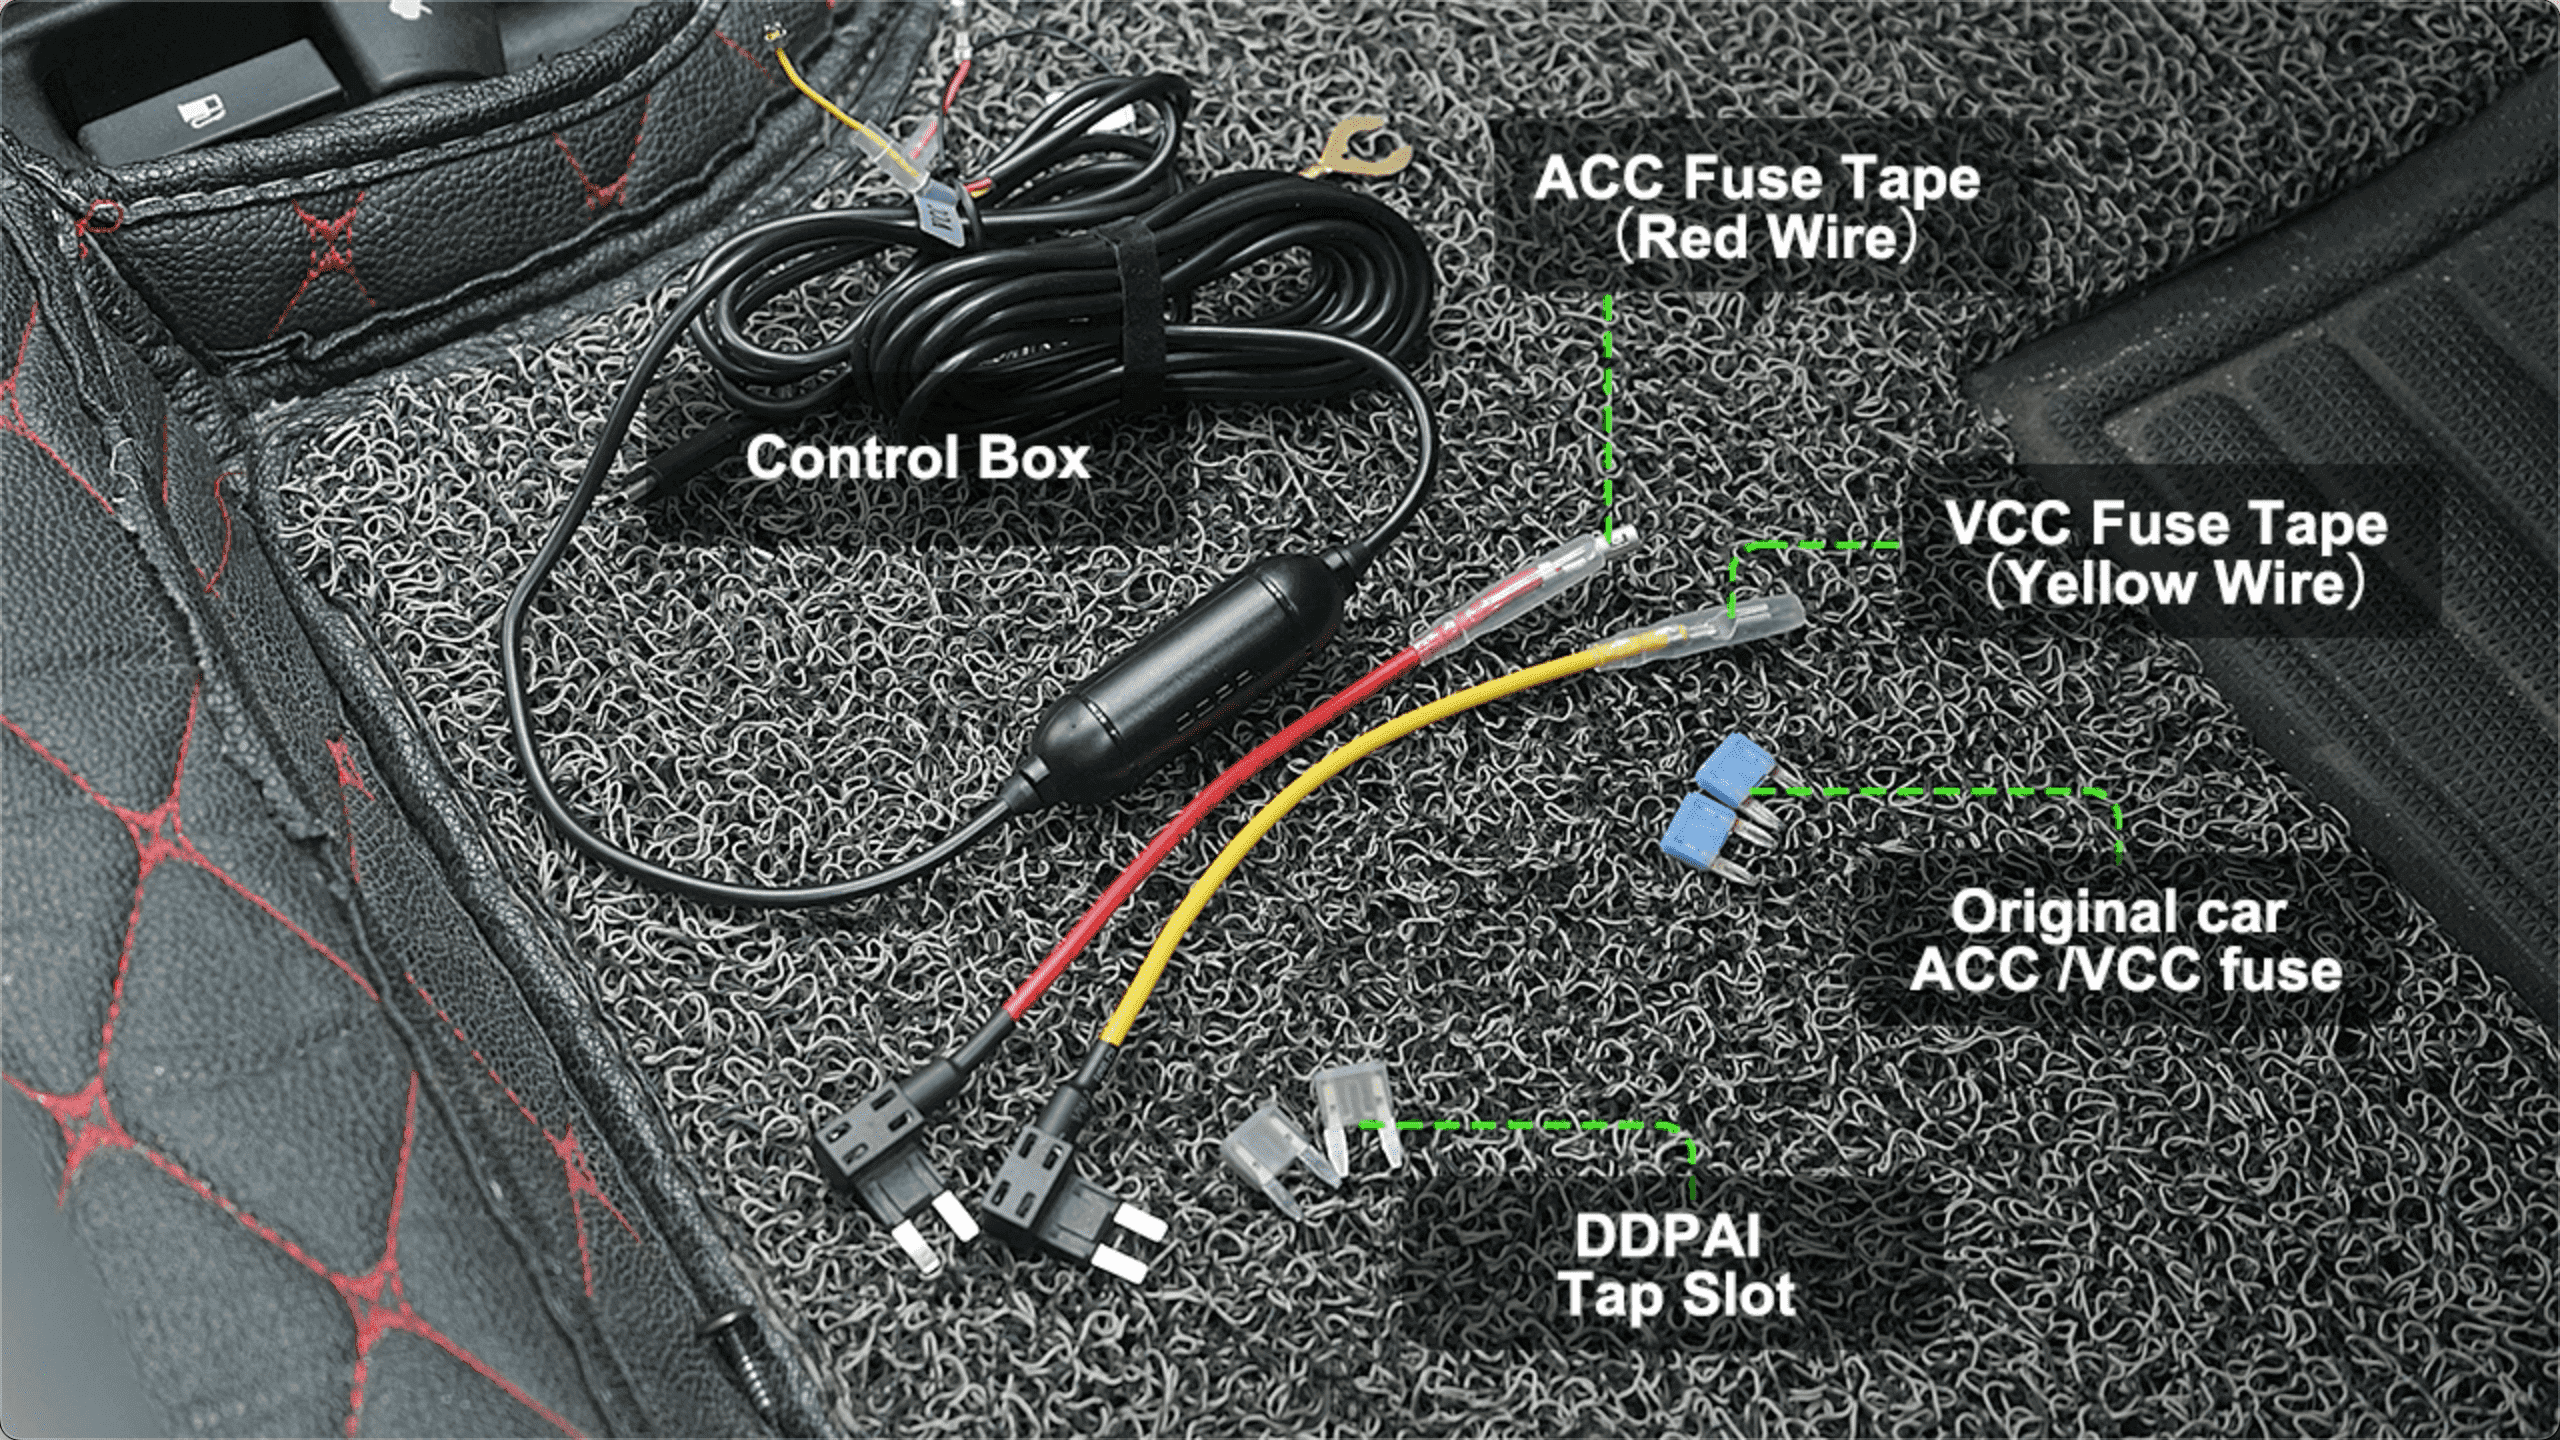
Connecting the Hardwire Kit
Connect the red and yellow wires of the hardwire kit to the corresponding ACC and VCC fuse taps. Use transparent sleeves to secure the connections firmly.
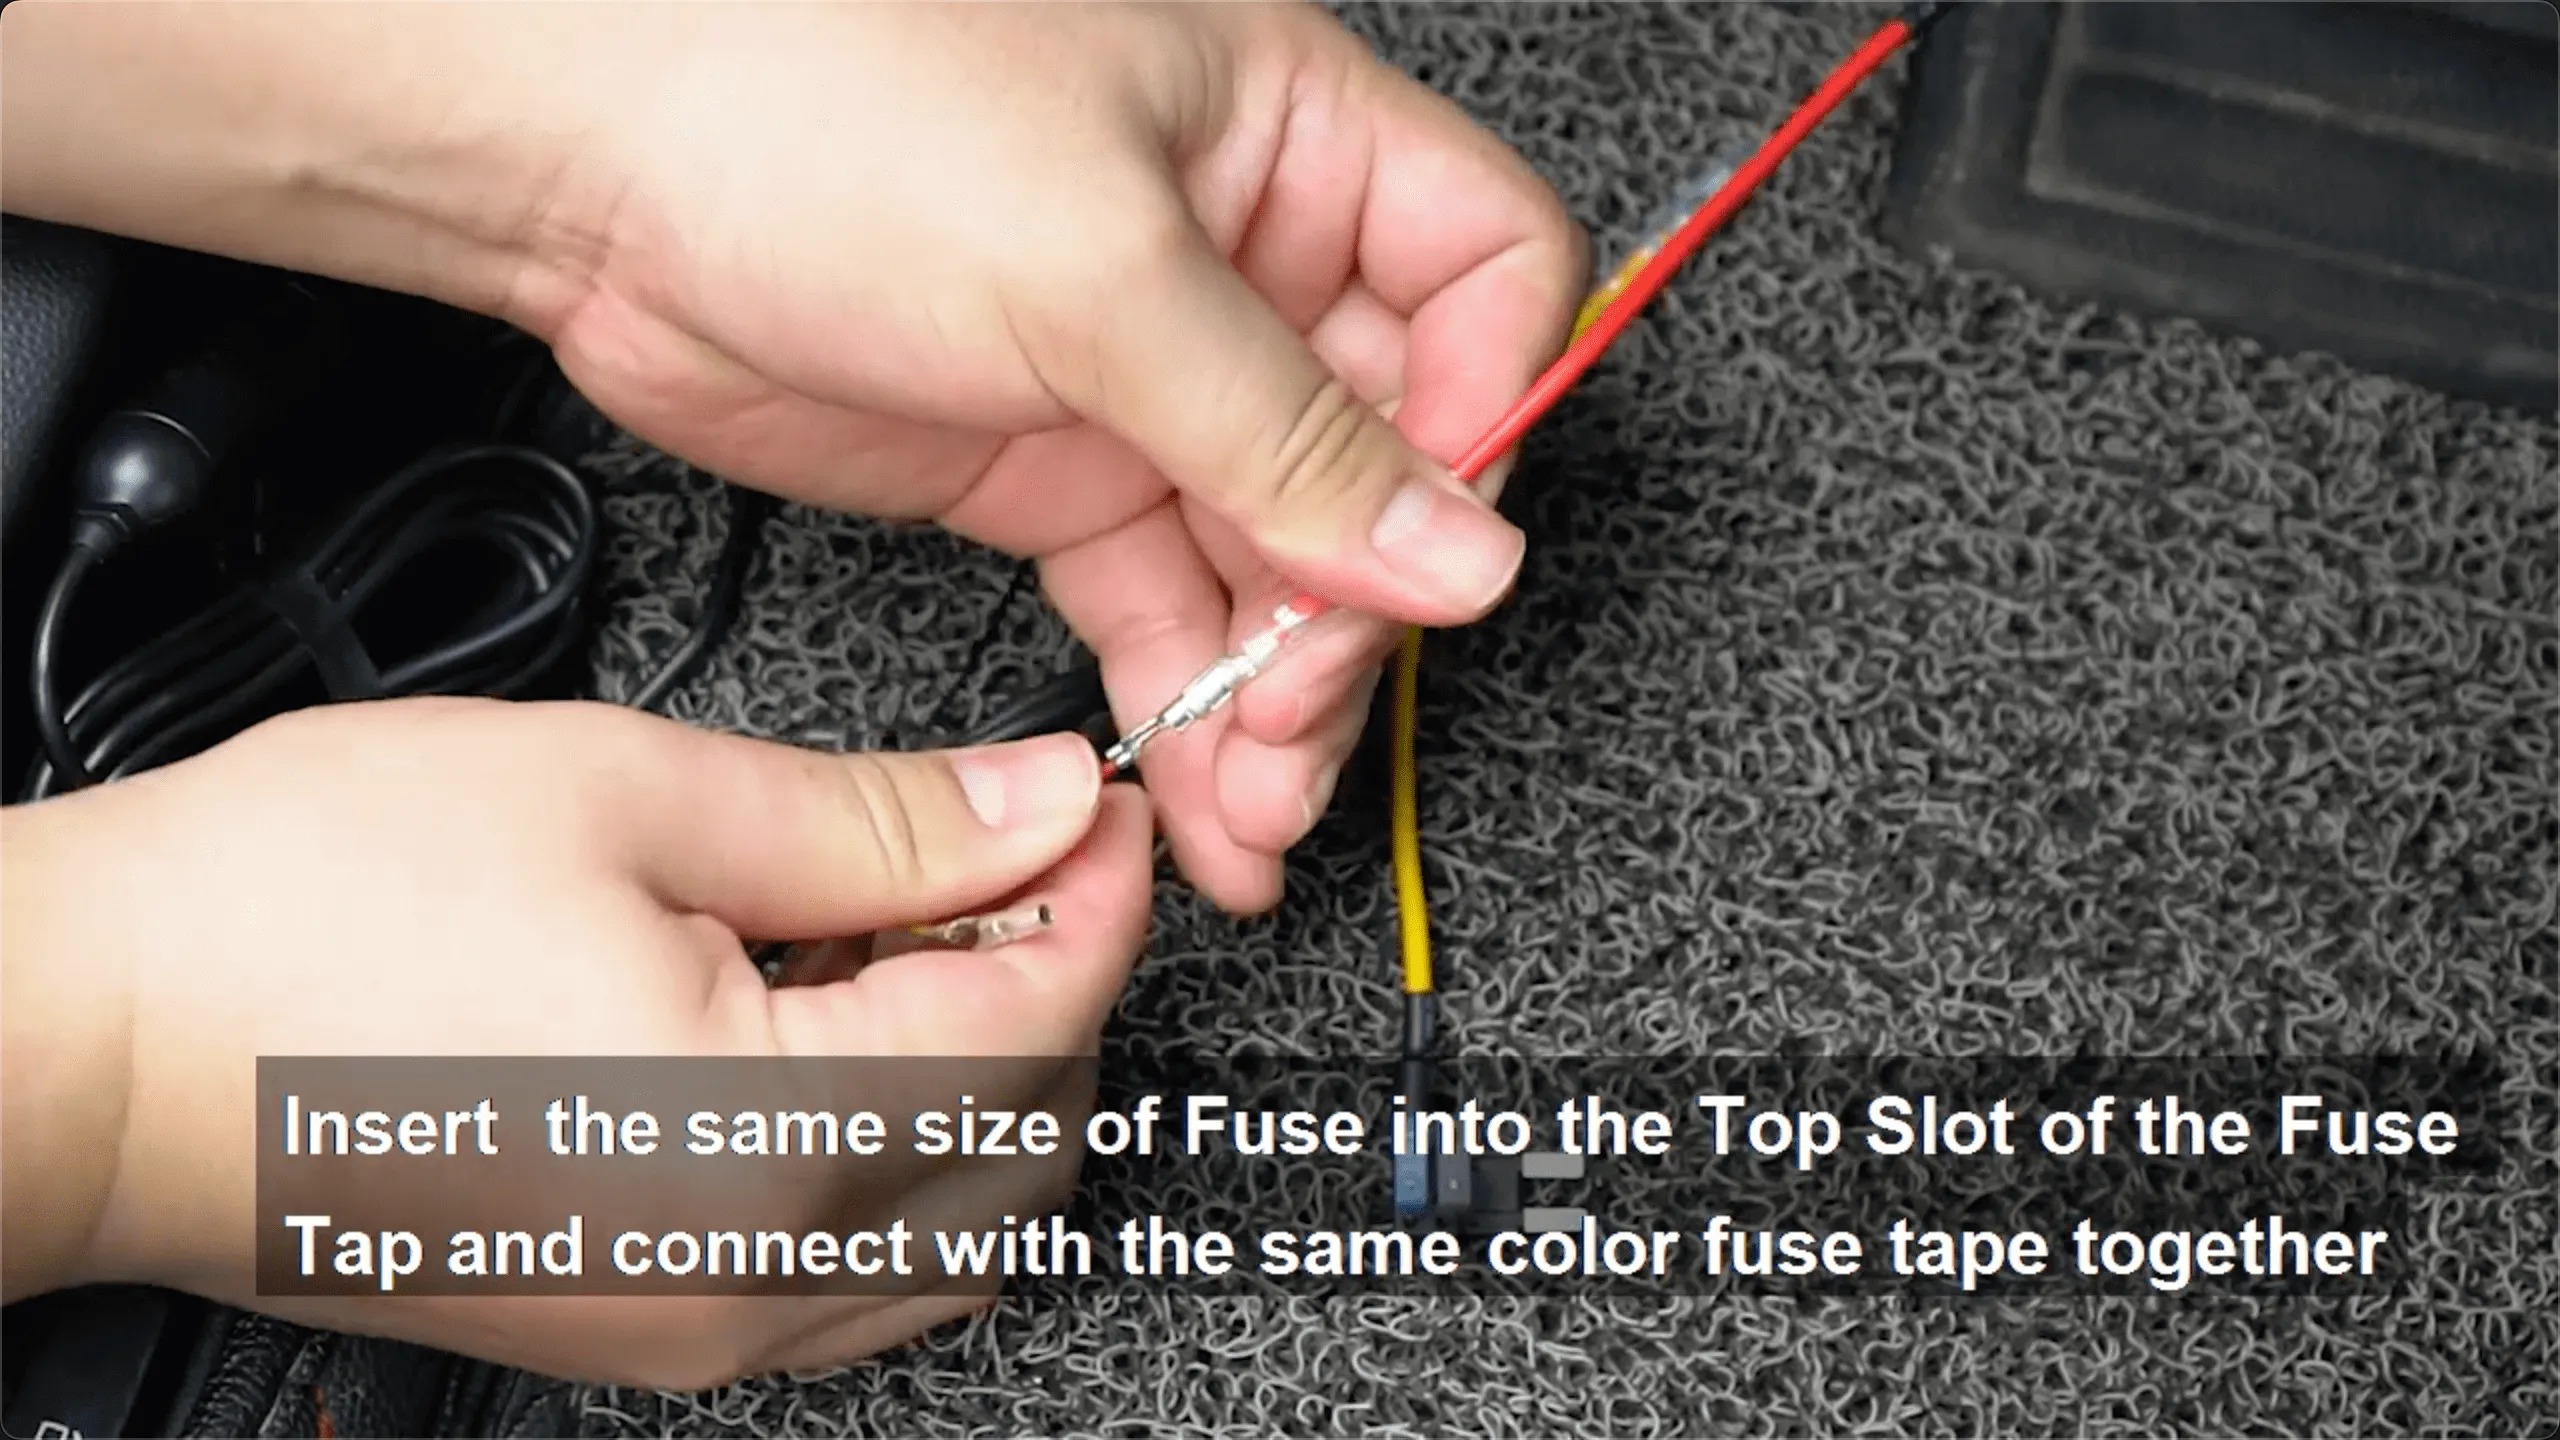
Check that the wires are tightly connected to avoid any loose connections.
Grounding and Testing
Connecting the Ground Wire
Attach the hardwire kit’s black ground wire to an unpainted metal point on the car body, such as a screw or bolt under the side trim.
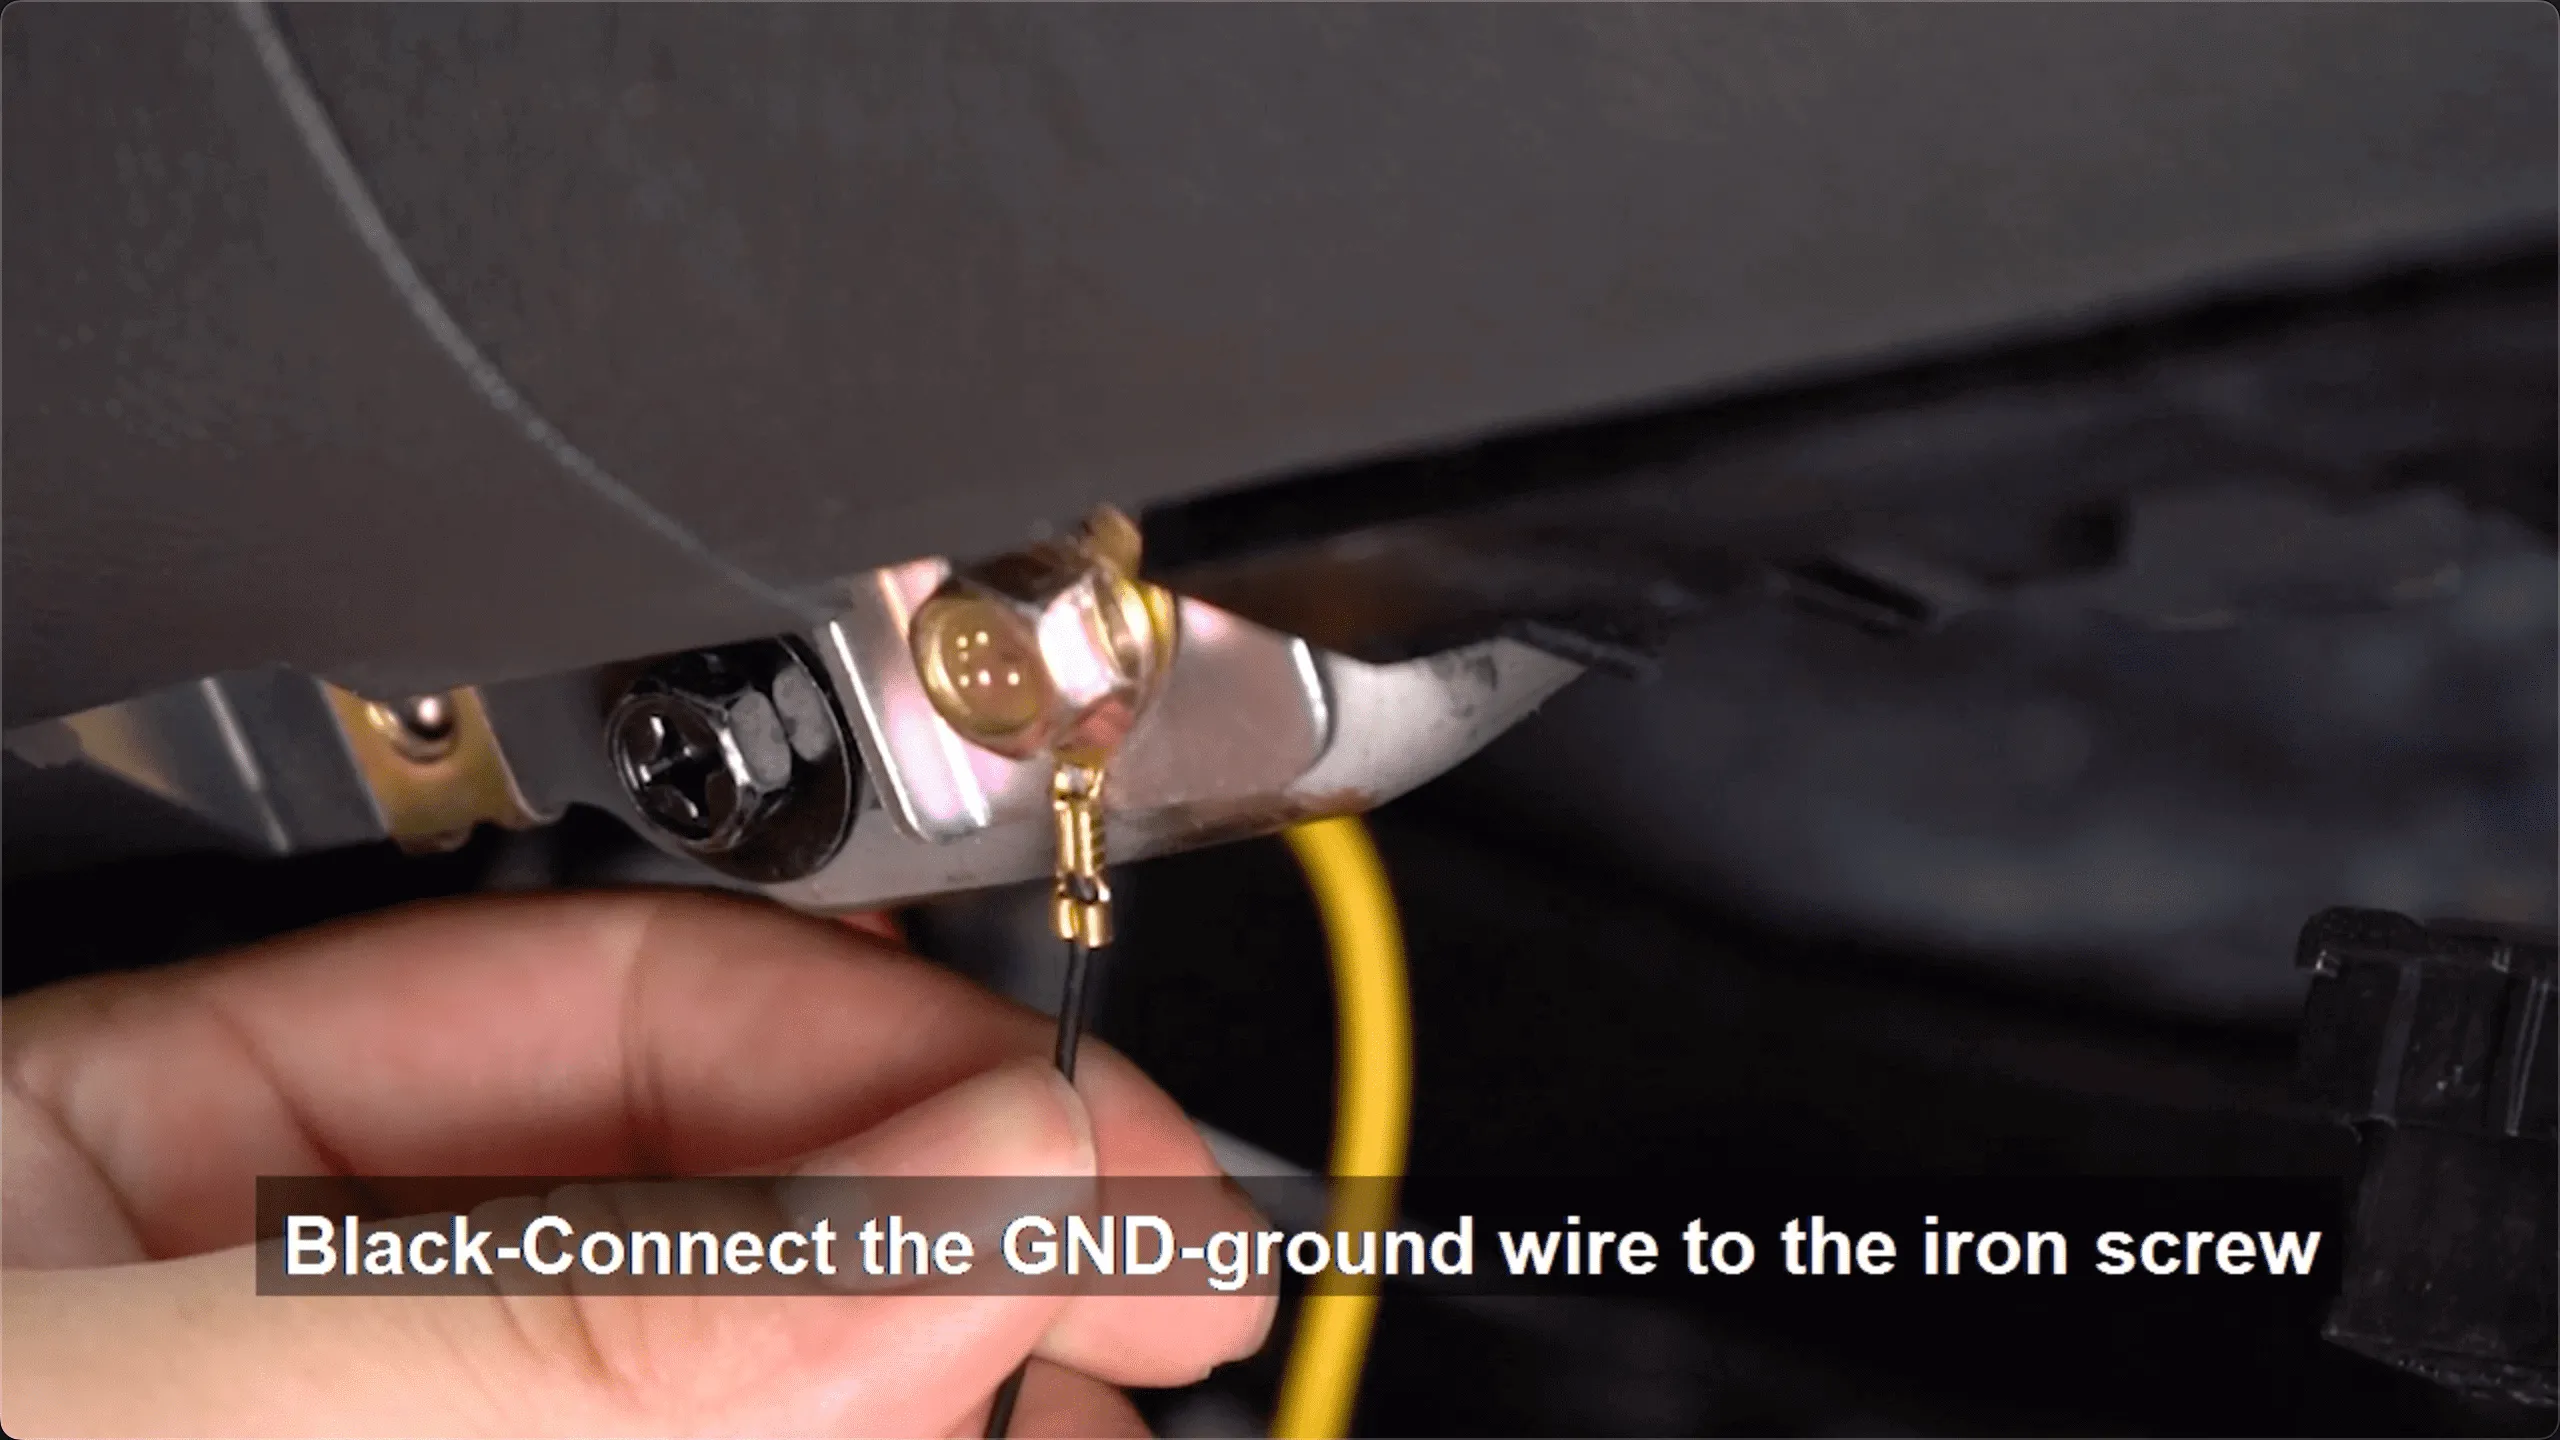
Ensure the ground point is clean and free of oil and rust to guarantee a good connection.
Testing the Installation
Reconnect the car battery and start the car to check if the dash cam powers on and functions correctly.
Ensure the dash cam switches to parking monitoring mode when the car is off and records normally when the car is on.

If the Camera Doesn’t Light Up, Please Check the Following:
- Make sure the car starts normally.
- Make sure that the socket of the line and the machine is plugged tightly.
- Make sure the sockets and wiring of ACC and VCC are tightly inserted.
- Check whether ACC and VCC are reversed.
By following these steps, you can successfully install a hardwired dash cam, ensuring it operates continuously and provides parking monitoring capabilities. This installation not only enhances your driving experience but also adds an extra layer of security to your vehicle.
Happy driving and stay safe on the road!
FAQ
What is an “Accessory Power” (ACC) fuse?
An ACC fuse provides power only when the vehicle is turned on. It is commonly used for devices like dash cams to ensure they only operate when the car is in use.
How do I find a good grounding point?
A good grounding point is usually an unpainted metal part of the car’s body, such as a screw or bolt. Ensure the point is clean and free of oil and rust for a secure connection.
What if I don’t have a circuit tester?
If you don’t have a circuit tester, you can refer to your car user manual’s fuse diagram to locate the ACC and VCC fuses. If you still have trouble, consider consulting a professional or contacting customer support for assistance.