Skip to content
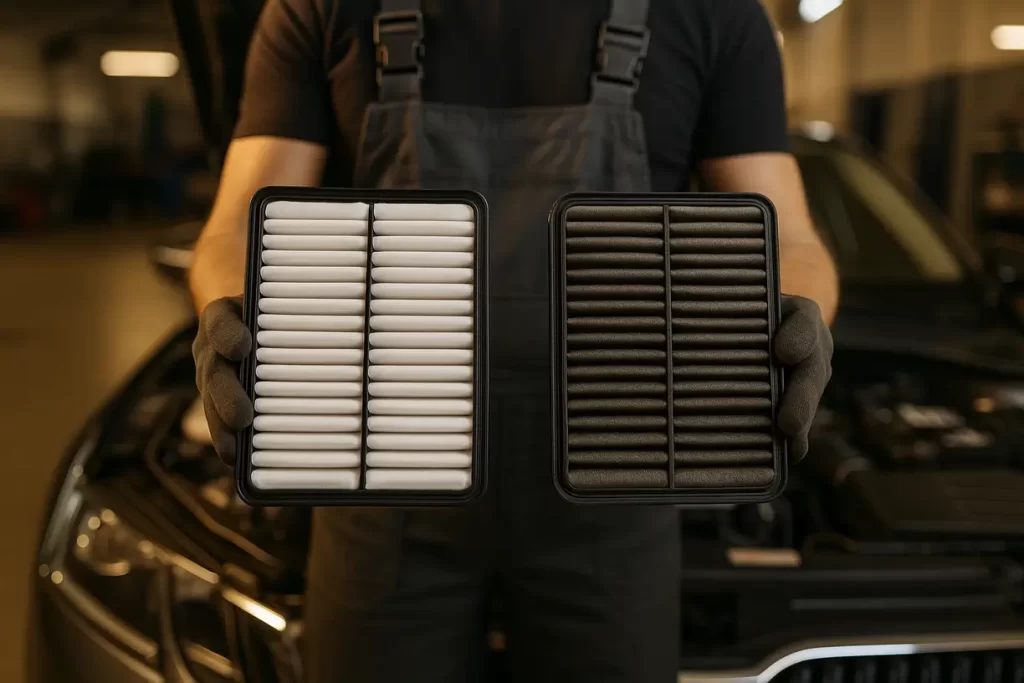
 Installing a dash cam isn’t as difficult as it may appear. And our team includes certified automotive electronics technicians with 10+ years of experience. In this updated guide, we demonstrate how to install dash cams front and rear using simple instructions.
We also cover how to hardwire a dash cam for a clean and reliable power connection.
This comprehensive dash cam installation guide covers everything you need to know, from securing and hiding wiring to connecting the hardwire kit.
Let’s get started!
If you’re unsure how to choose an SD card, you can read our Choose the Right SD Card for Your Dash Cam.
Easy Steps To Install Dash Cam
Step 1: You Should Choose The Right Dash Cam Placement
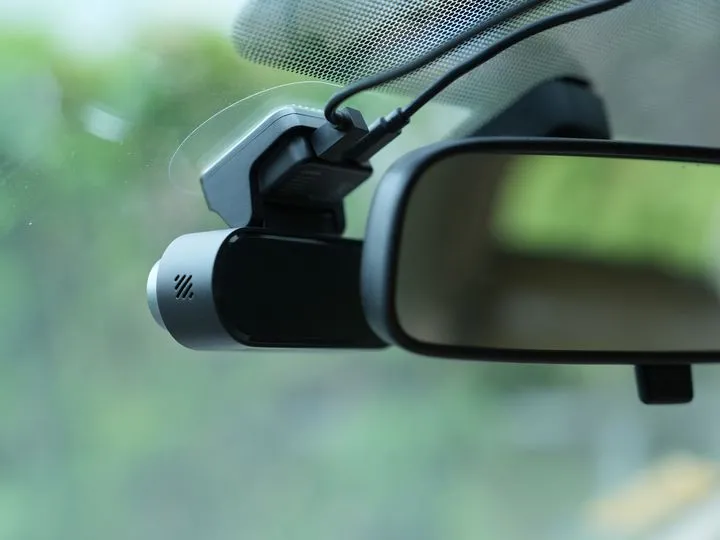
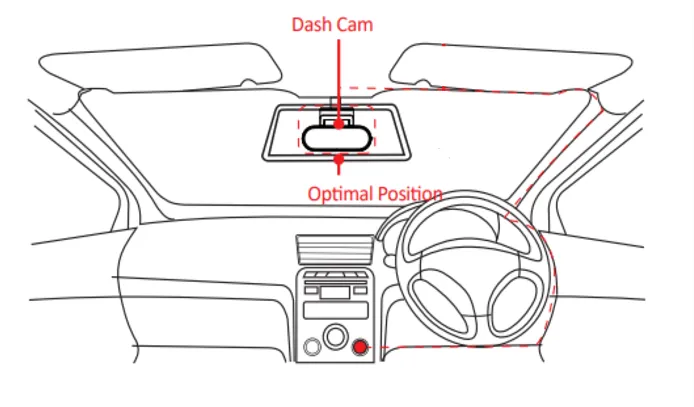
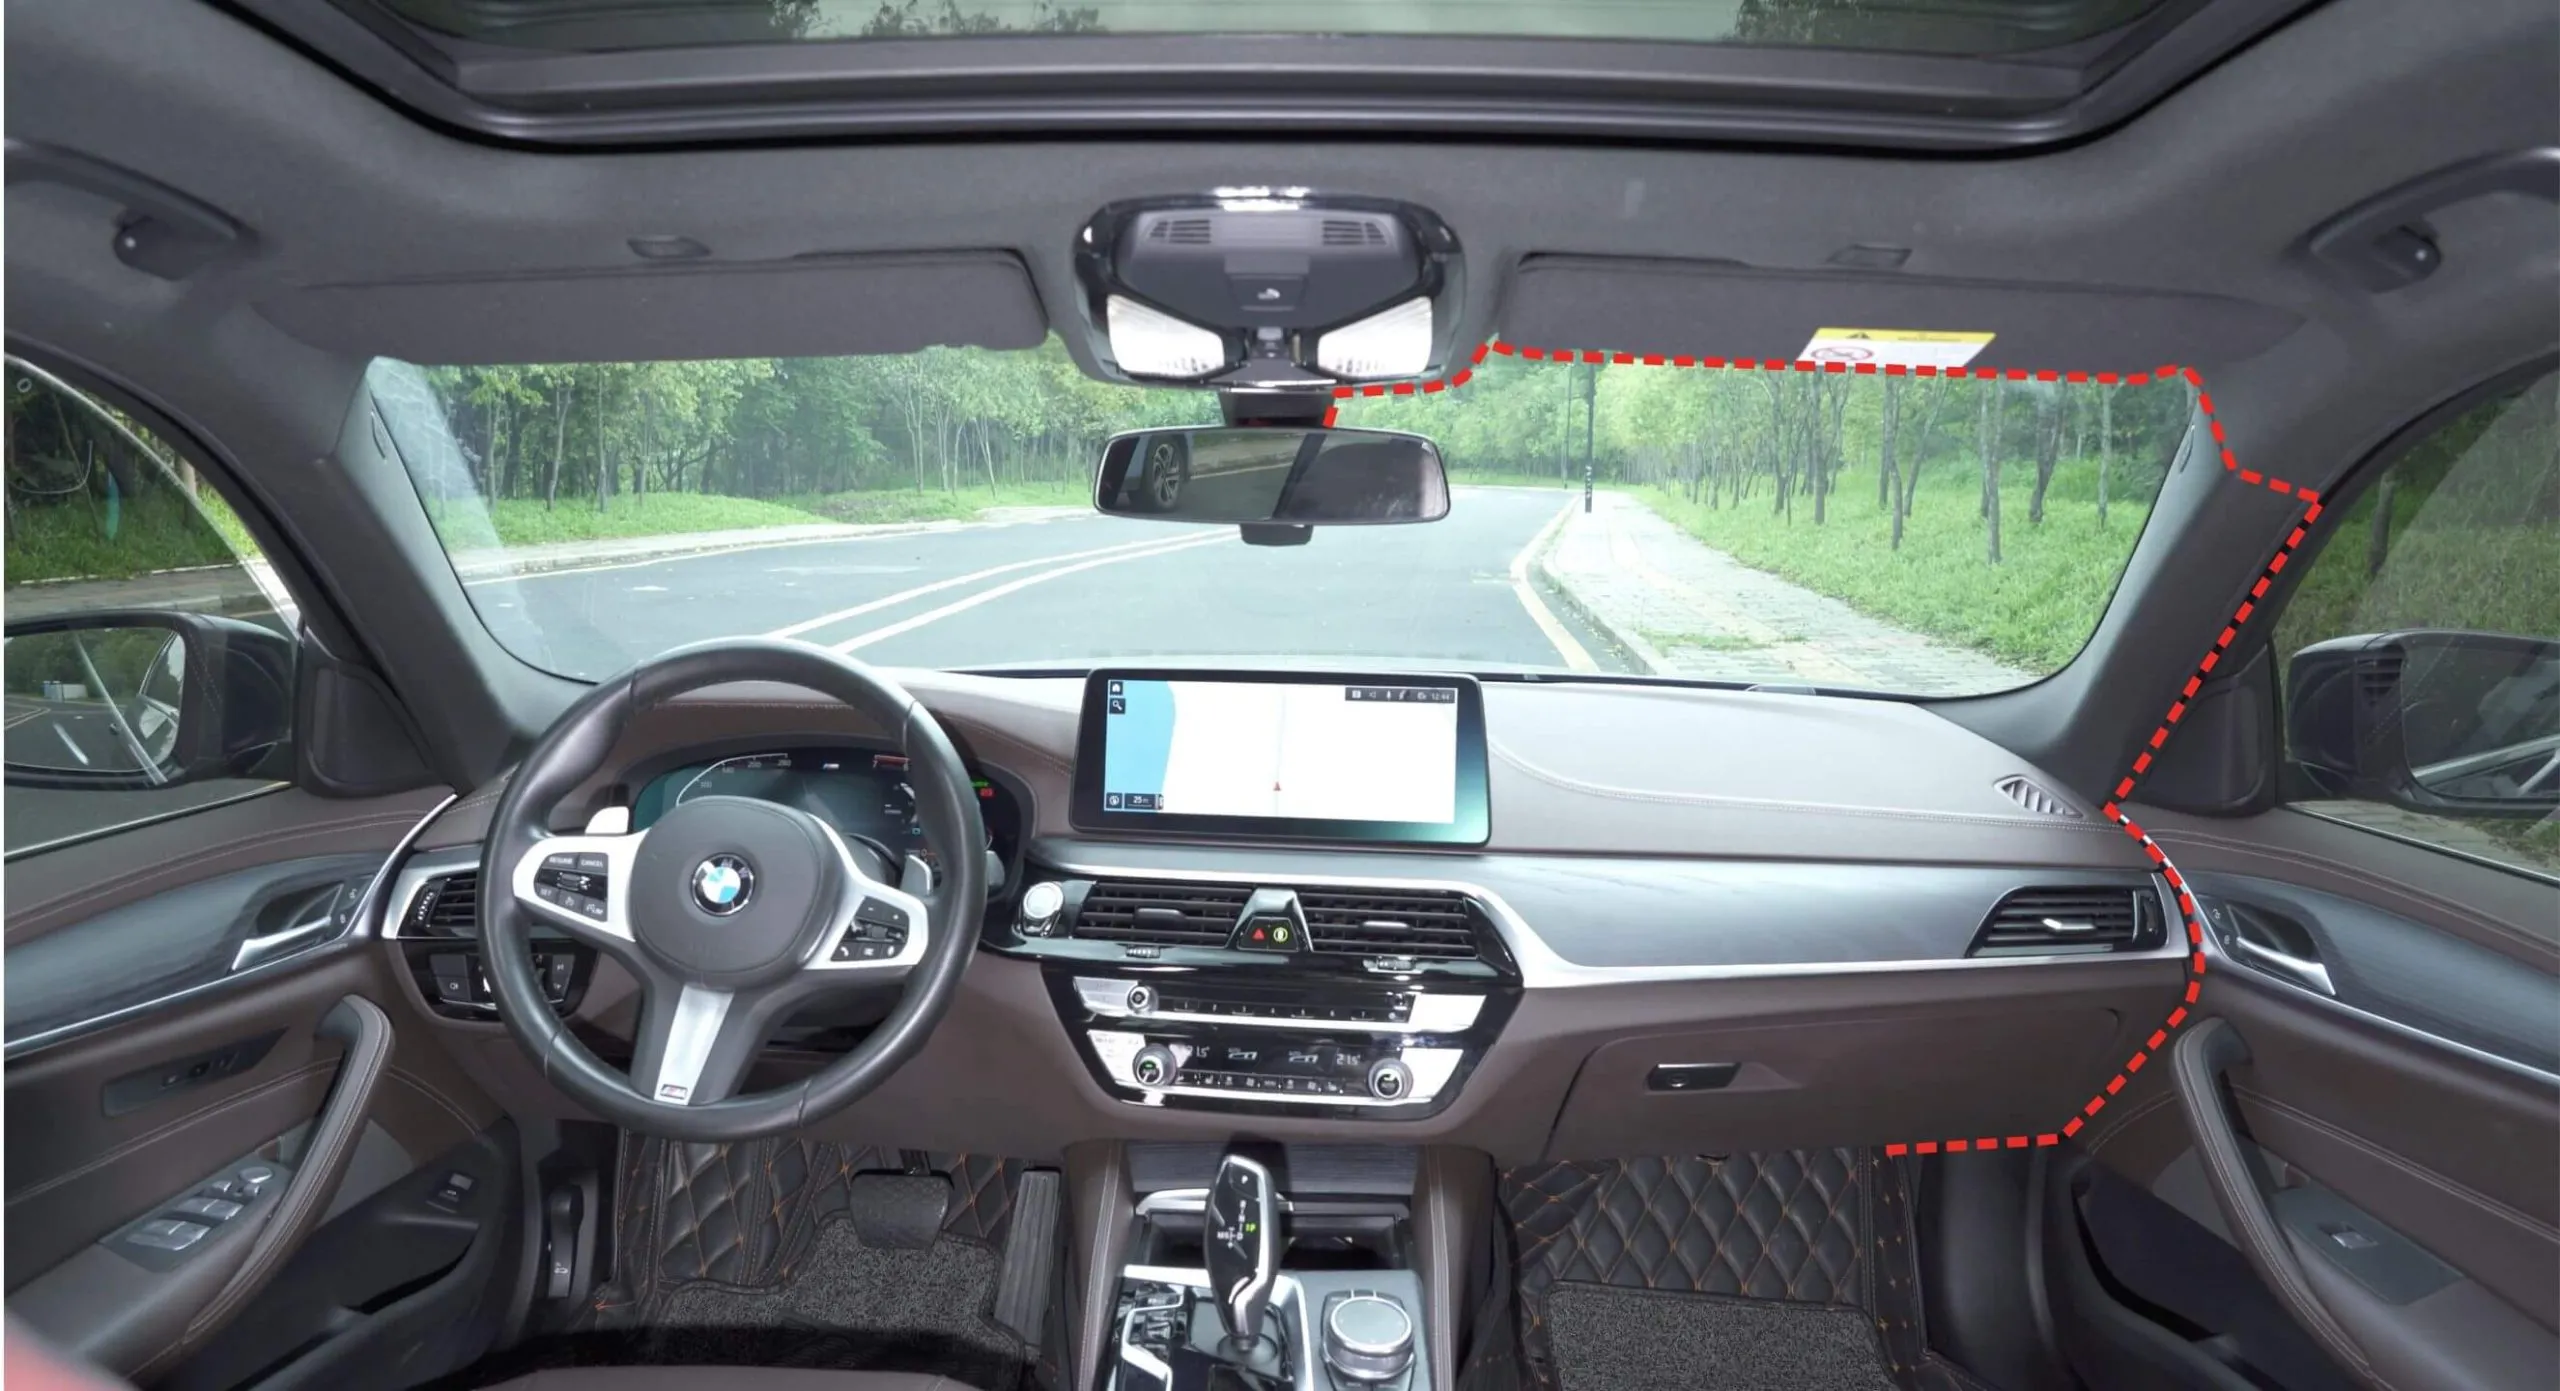
If you want to mount your dash cam on your front windshield, the best spot is usually just behind or near your rearview mirror, in the middle so you can see the road ahead clearly. This spot lets you effectively cover both lanes without getting in the way of your line of sight.
Usually, the best place to mount a rear dash cam is on your rear windshield, high enough to cover the area behind your car. You can mount it either directly on the glass or on the back deck below the window, depending on the type of car you have. Make sure it doesn’t get in the way of your safety features or rearview mirror.
You’ll get the best coverage and safest visibility if you put the front camera near your rearview mirror and the rear camera on the rear windshield or deck. Additionally, verify the regulations in your area to ensure that the placement of your dash cam is legal.
Separate laws govern where you can put your dash cam. Dashboard cameras can only be mounted on certain parts of the windshield or the dashboard in many U.S. states so long as they don’t get in the way of the driver’s view. Some states, for example, don’t let you mount it on the driver’s side windshield or specify a maximum size for the device. To avoid fines or legal problems, always check the rules in your area.
Here are the regulations regarding dashcams in the United States and Europe. You can learn more.
In order to protect the high-voltage battery system in electric vehicles, hardwiring the dash cam might need special kits. Installing multiple cameras on commercial trucks is common, and they need mounts that are strong and won’t move around. To make sure of full coverage and following fleet management rules, placement may be different.
Step2: Connect the Power Cable
Plug the power cable into the dash cam and insert the other end into the car’s power socket (usually the cigarette lighter socket).
Route the cable along the edge of the windshield, tucking it neatly to avoid any interference while driving. Use cable clips or adhesive tape to secure the power cable along the edges of the windshield and dashboard.
This will keep the cable out of the way and maintain a neat appearance inside the car.
Please continue reading; we will explain how to hardwire the dash cam and hide the wires.
Step3: Test the Dash Cam
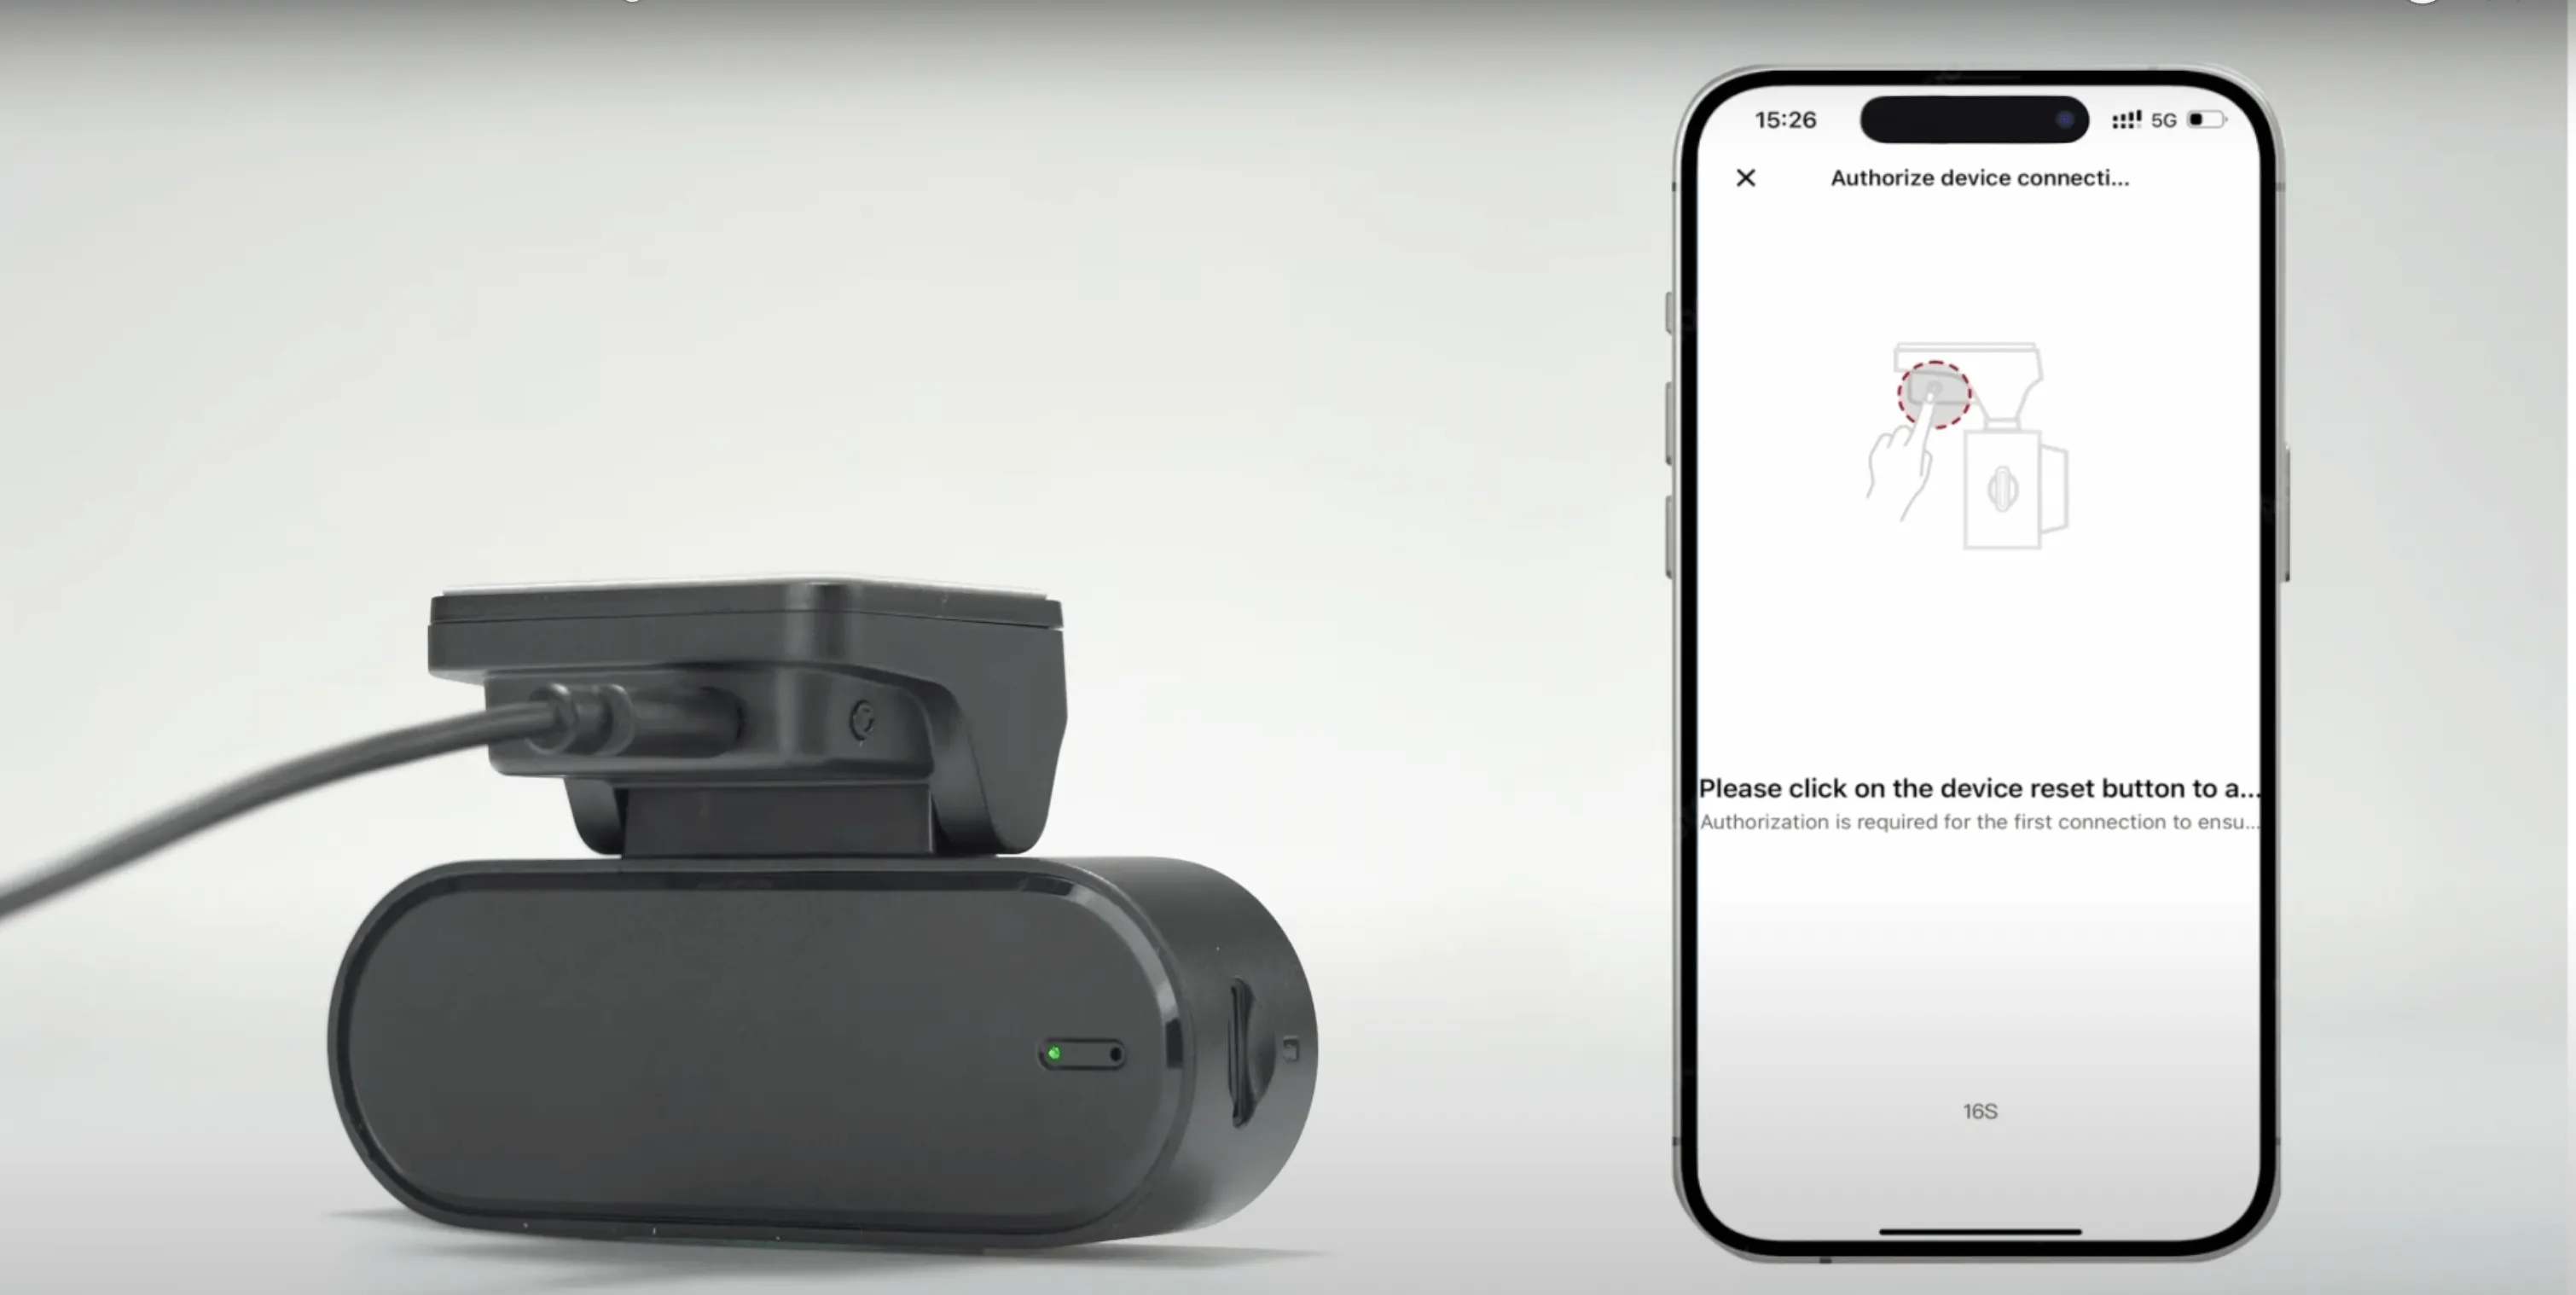
Start your car and check if the dash cam powers on and starts recording. Most dash cams will start automatically when powered and indicate this with a record light or voice alert.
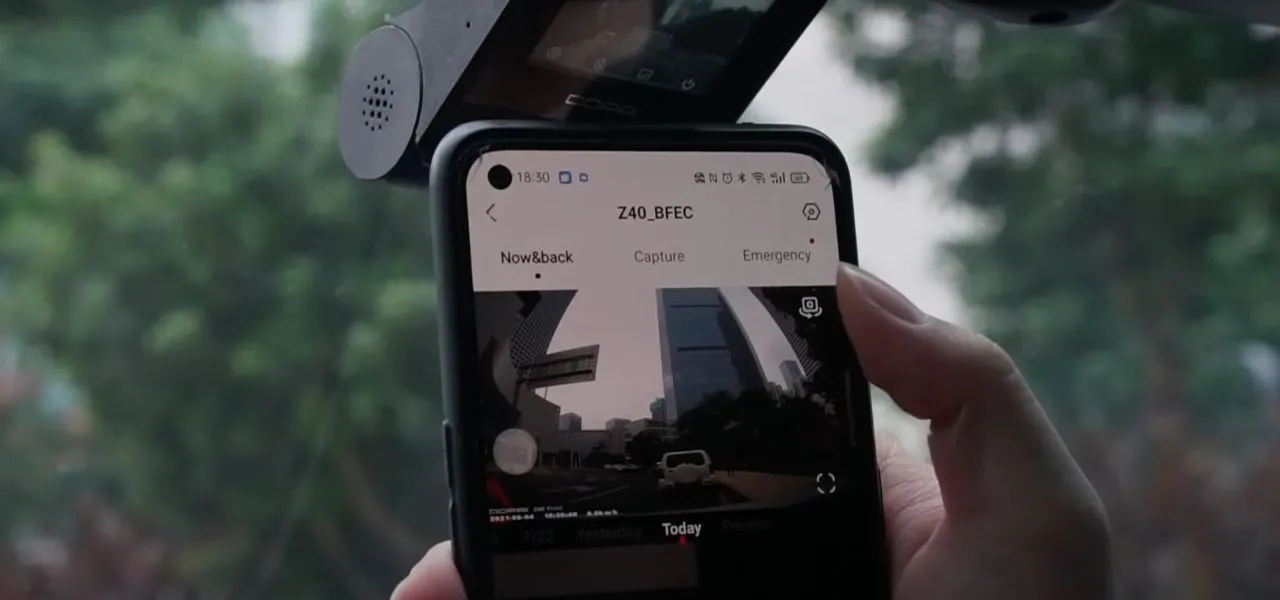
You can also use the app to connect to the dash cam via Bluetooth for additional settings and adjustments.
Step4: Adjust the Camera Angle
Adjust the dash cam so that it captures the road ahead clearly. Use the app’s real-time video feed to ensure the camera is aligned properly.

That’s it!
By following these steps, you’ve successfully installed your dash cam and are ready to record your journeys.
How To Hardwire A Dash Cam?
Hardwiring your dash cam requires some knowledge of automotive electronics. Improper connections or errors can potentially affect other electronic systems in your vehicle. If you lack experience, it’s recommended to have a professional handle the installation for you.
Step 1: Run the Wiring and Hide the Dash Cam wire
Front Camera Power Cable Routing
- Begin with the dash cam and tuck the power cable between the windshield and the headliner (the inside of the roof).
- Do not damage the headliner when you gently lift it with a plastic trim removal tool.
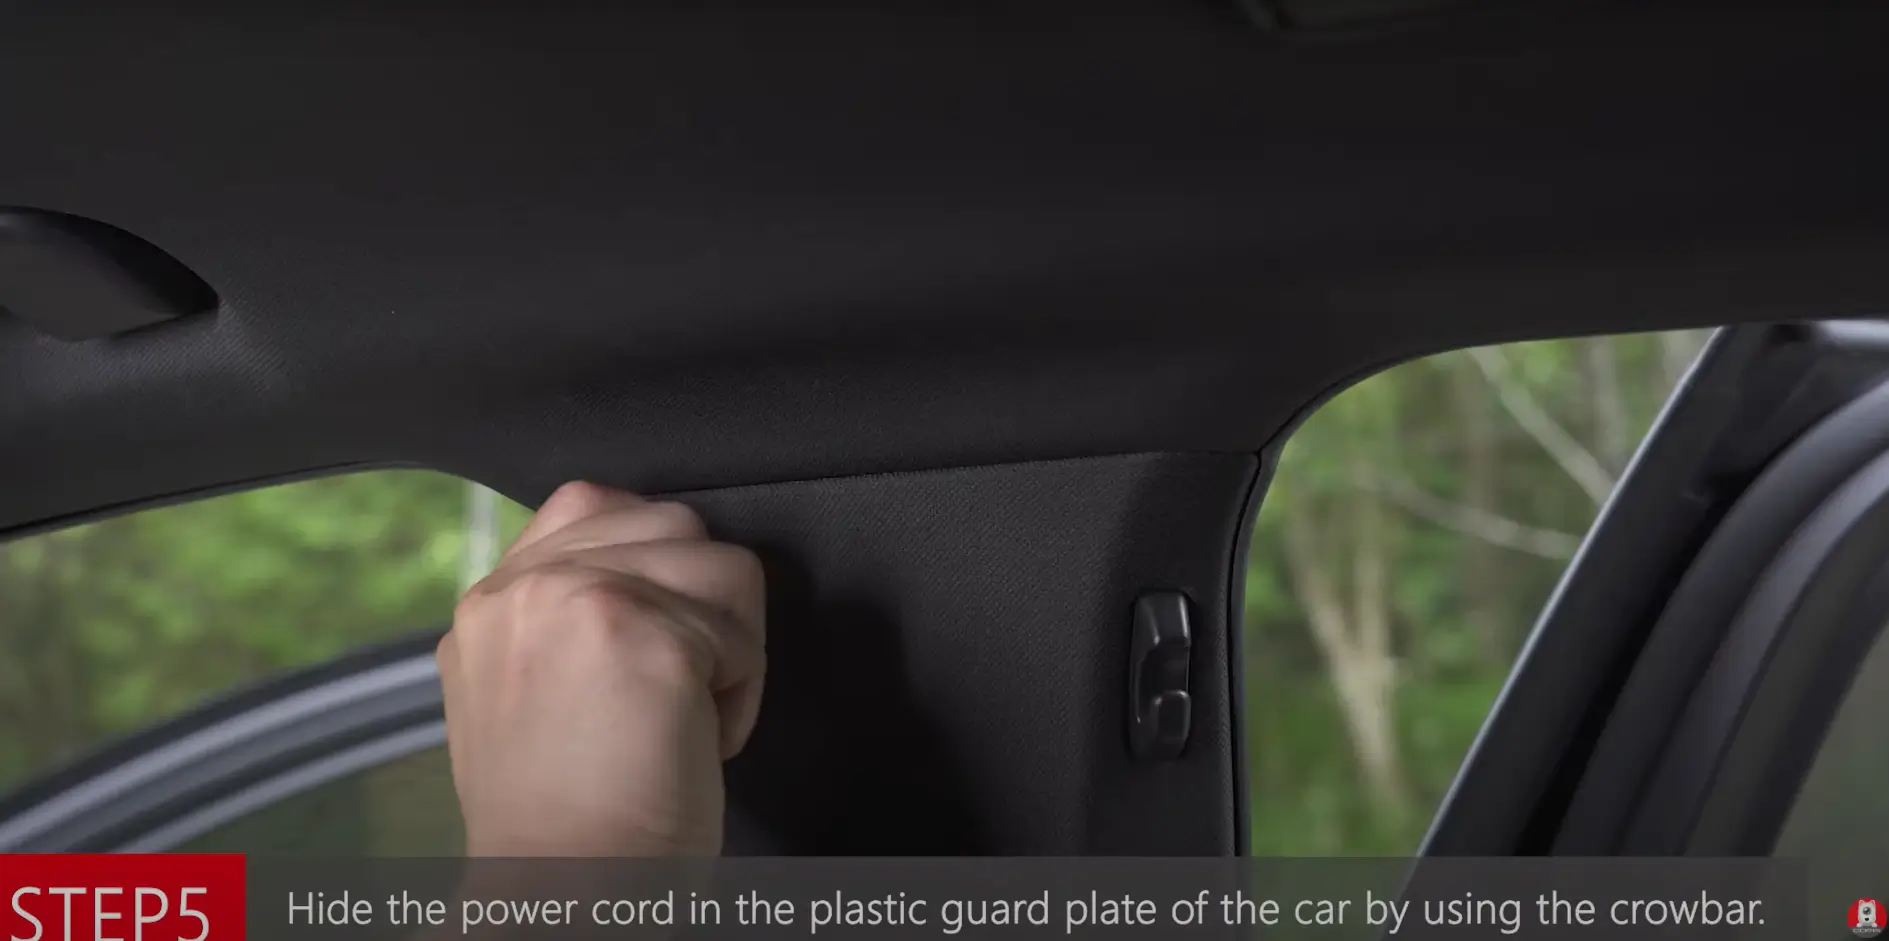
- Carefully remove the A-pillar trim on the passenger side as you run the cable down it. Be careful not to damage the airbags.
- Keep going under the dashboard until you reach the fuse box.
- Use zip ties or adhesive clips to keep the cable from moving or rattling.
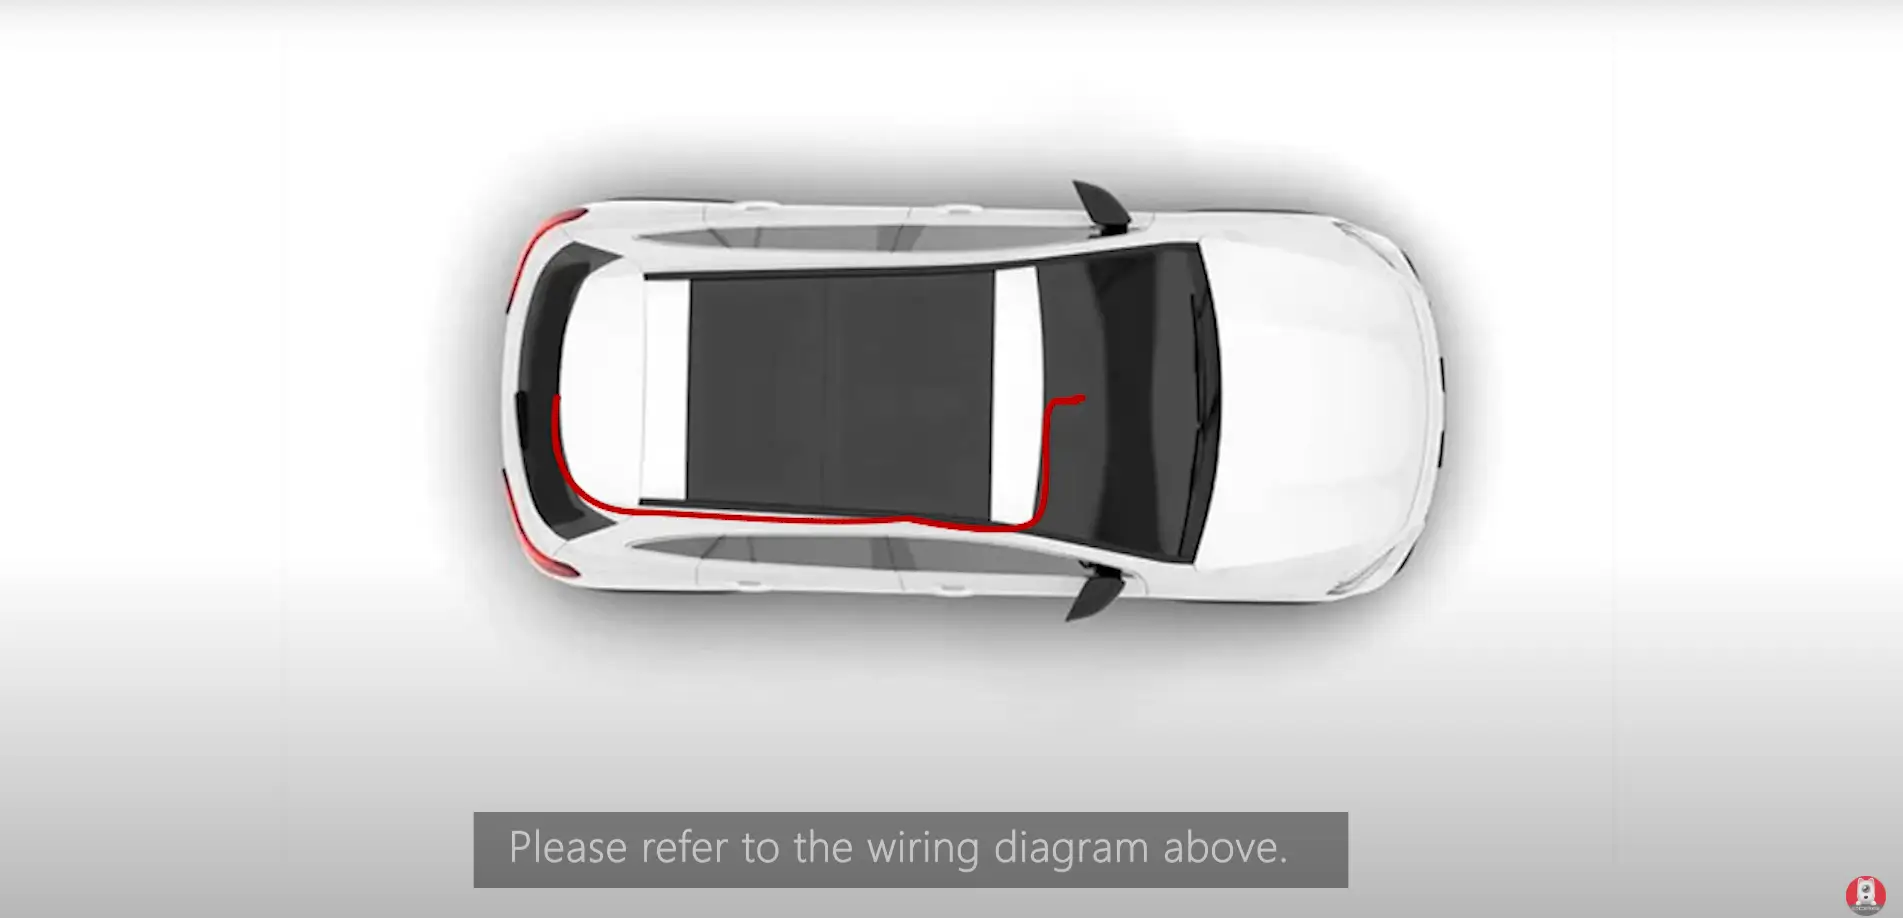
Rear Camera Cable Routing
- Follow the cable from the rear camera along the roof edge to the B-pillar on the passenger side of the back.
- Carefully take off the trim panels you need to in order to hide the cable behind the pillars and door sills.
- Put the cable through rubber conduits or holes in the wall if they are available, like those above the back door frame.
- To get to the front dash cam unit, keep running the cable forward under the carpet or door seals.
- You need to connect the cable for the rear camera to the front dashcam’s rear camera input port.
- Clips and zip ties can be used to hold down extra cable and keep it from getting in the way of moving parts.

Here is a detailed YouTube video on how to install a dash cam.
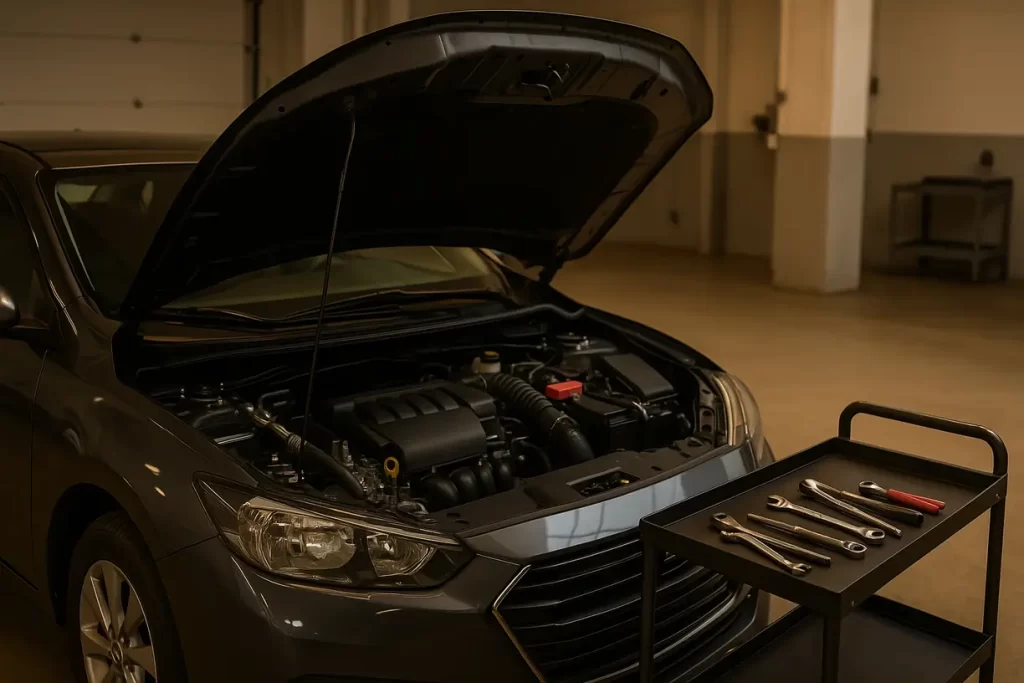
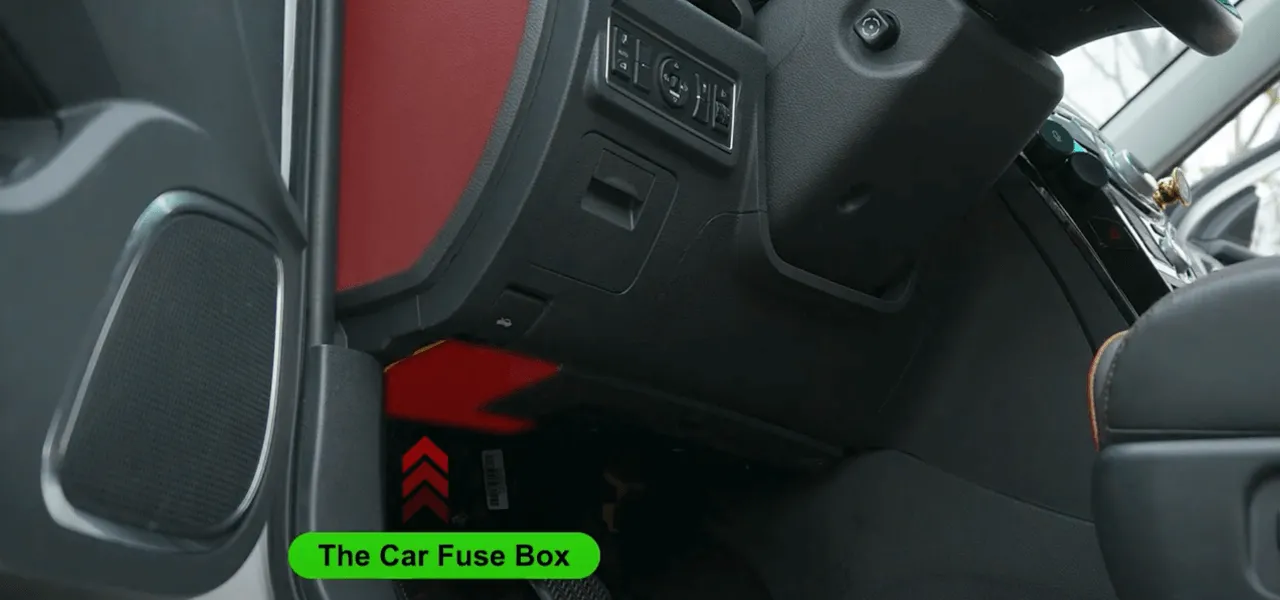
Step2: Locate the Fuse Box
Most cars have fuse boxes under the dashboard or in the engine compartment.
If you can’t find the exact location, refer to your car’s user manual or consult a dealership for accurate information, as the fuse box location may vary between different car models.
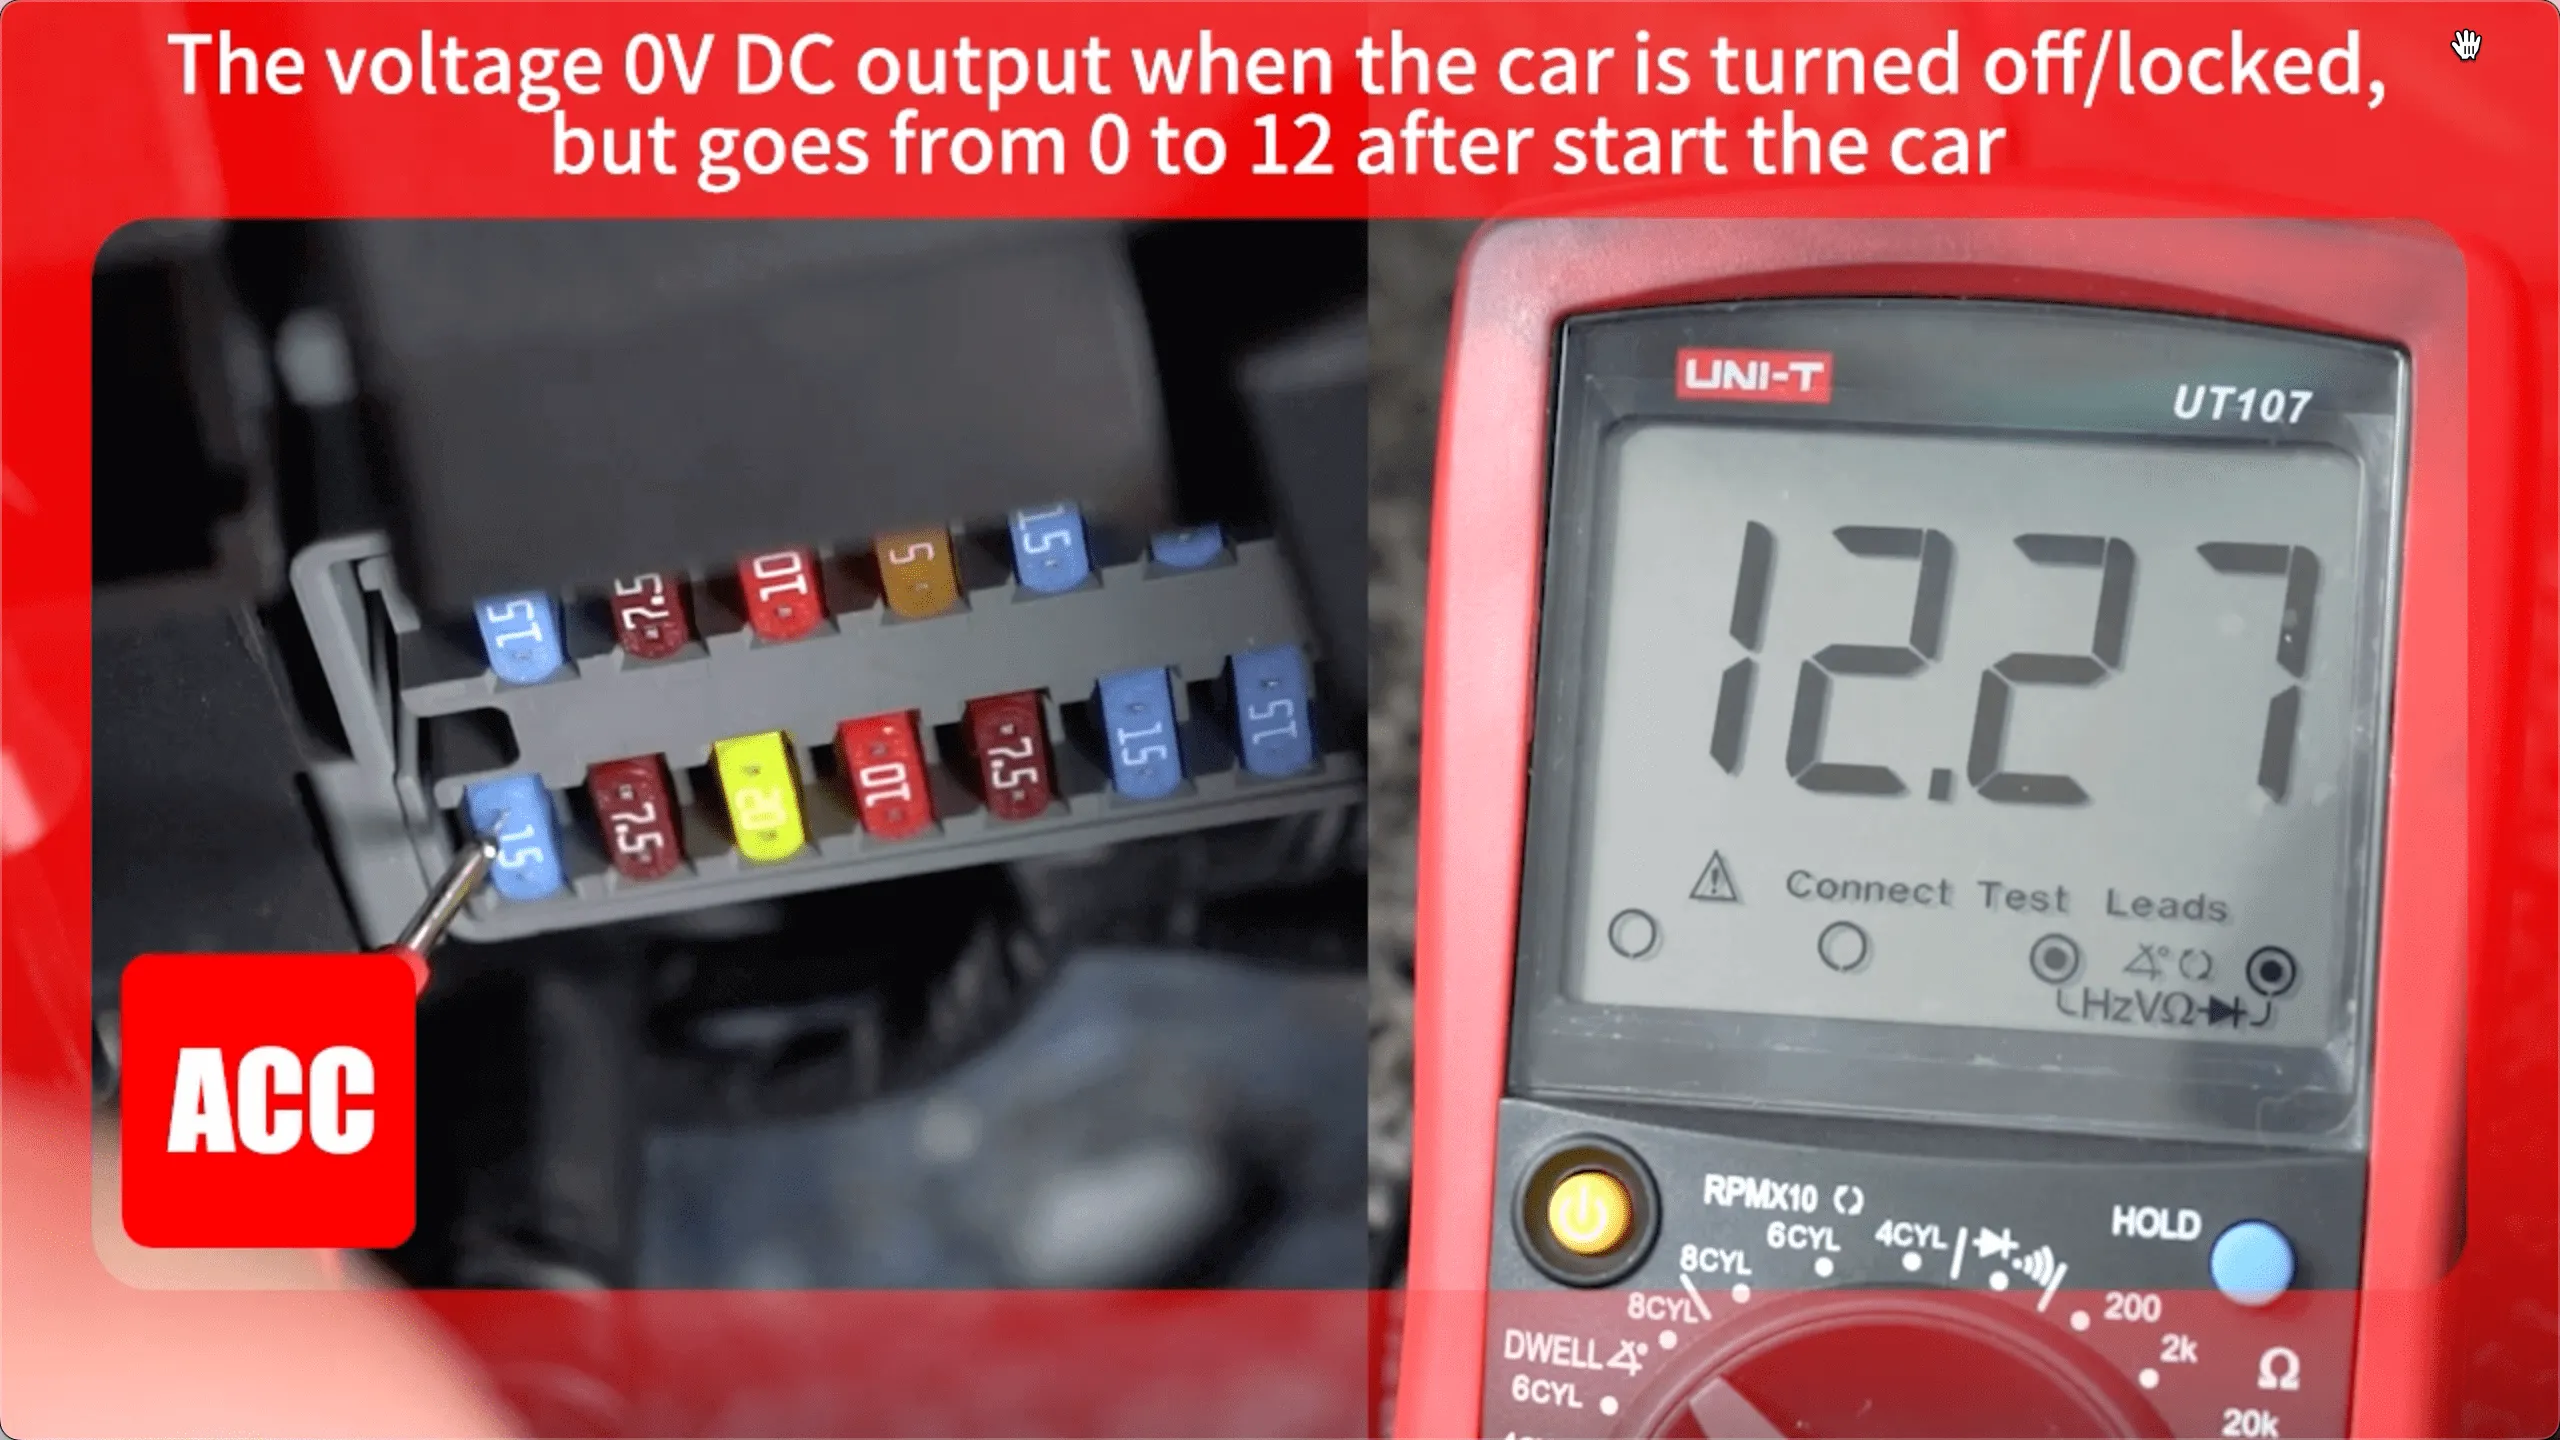
Step3: Identify ACC and Constant Power Fuses
First, turn your car key to the ACC or ON position. Using a circuit tester, check both ends of each fuse. The ACC fuse will show voltage when the car is on, as shown in the image below:
Next, remove the car key completely. Use the circuit tester again to check both ends of each fuse. The constant power (VCC) fuse will always show voltage, regardless of whether the car is on or off, as illustrated here:
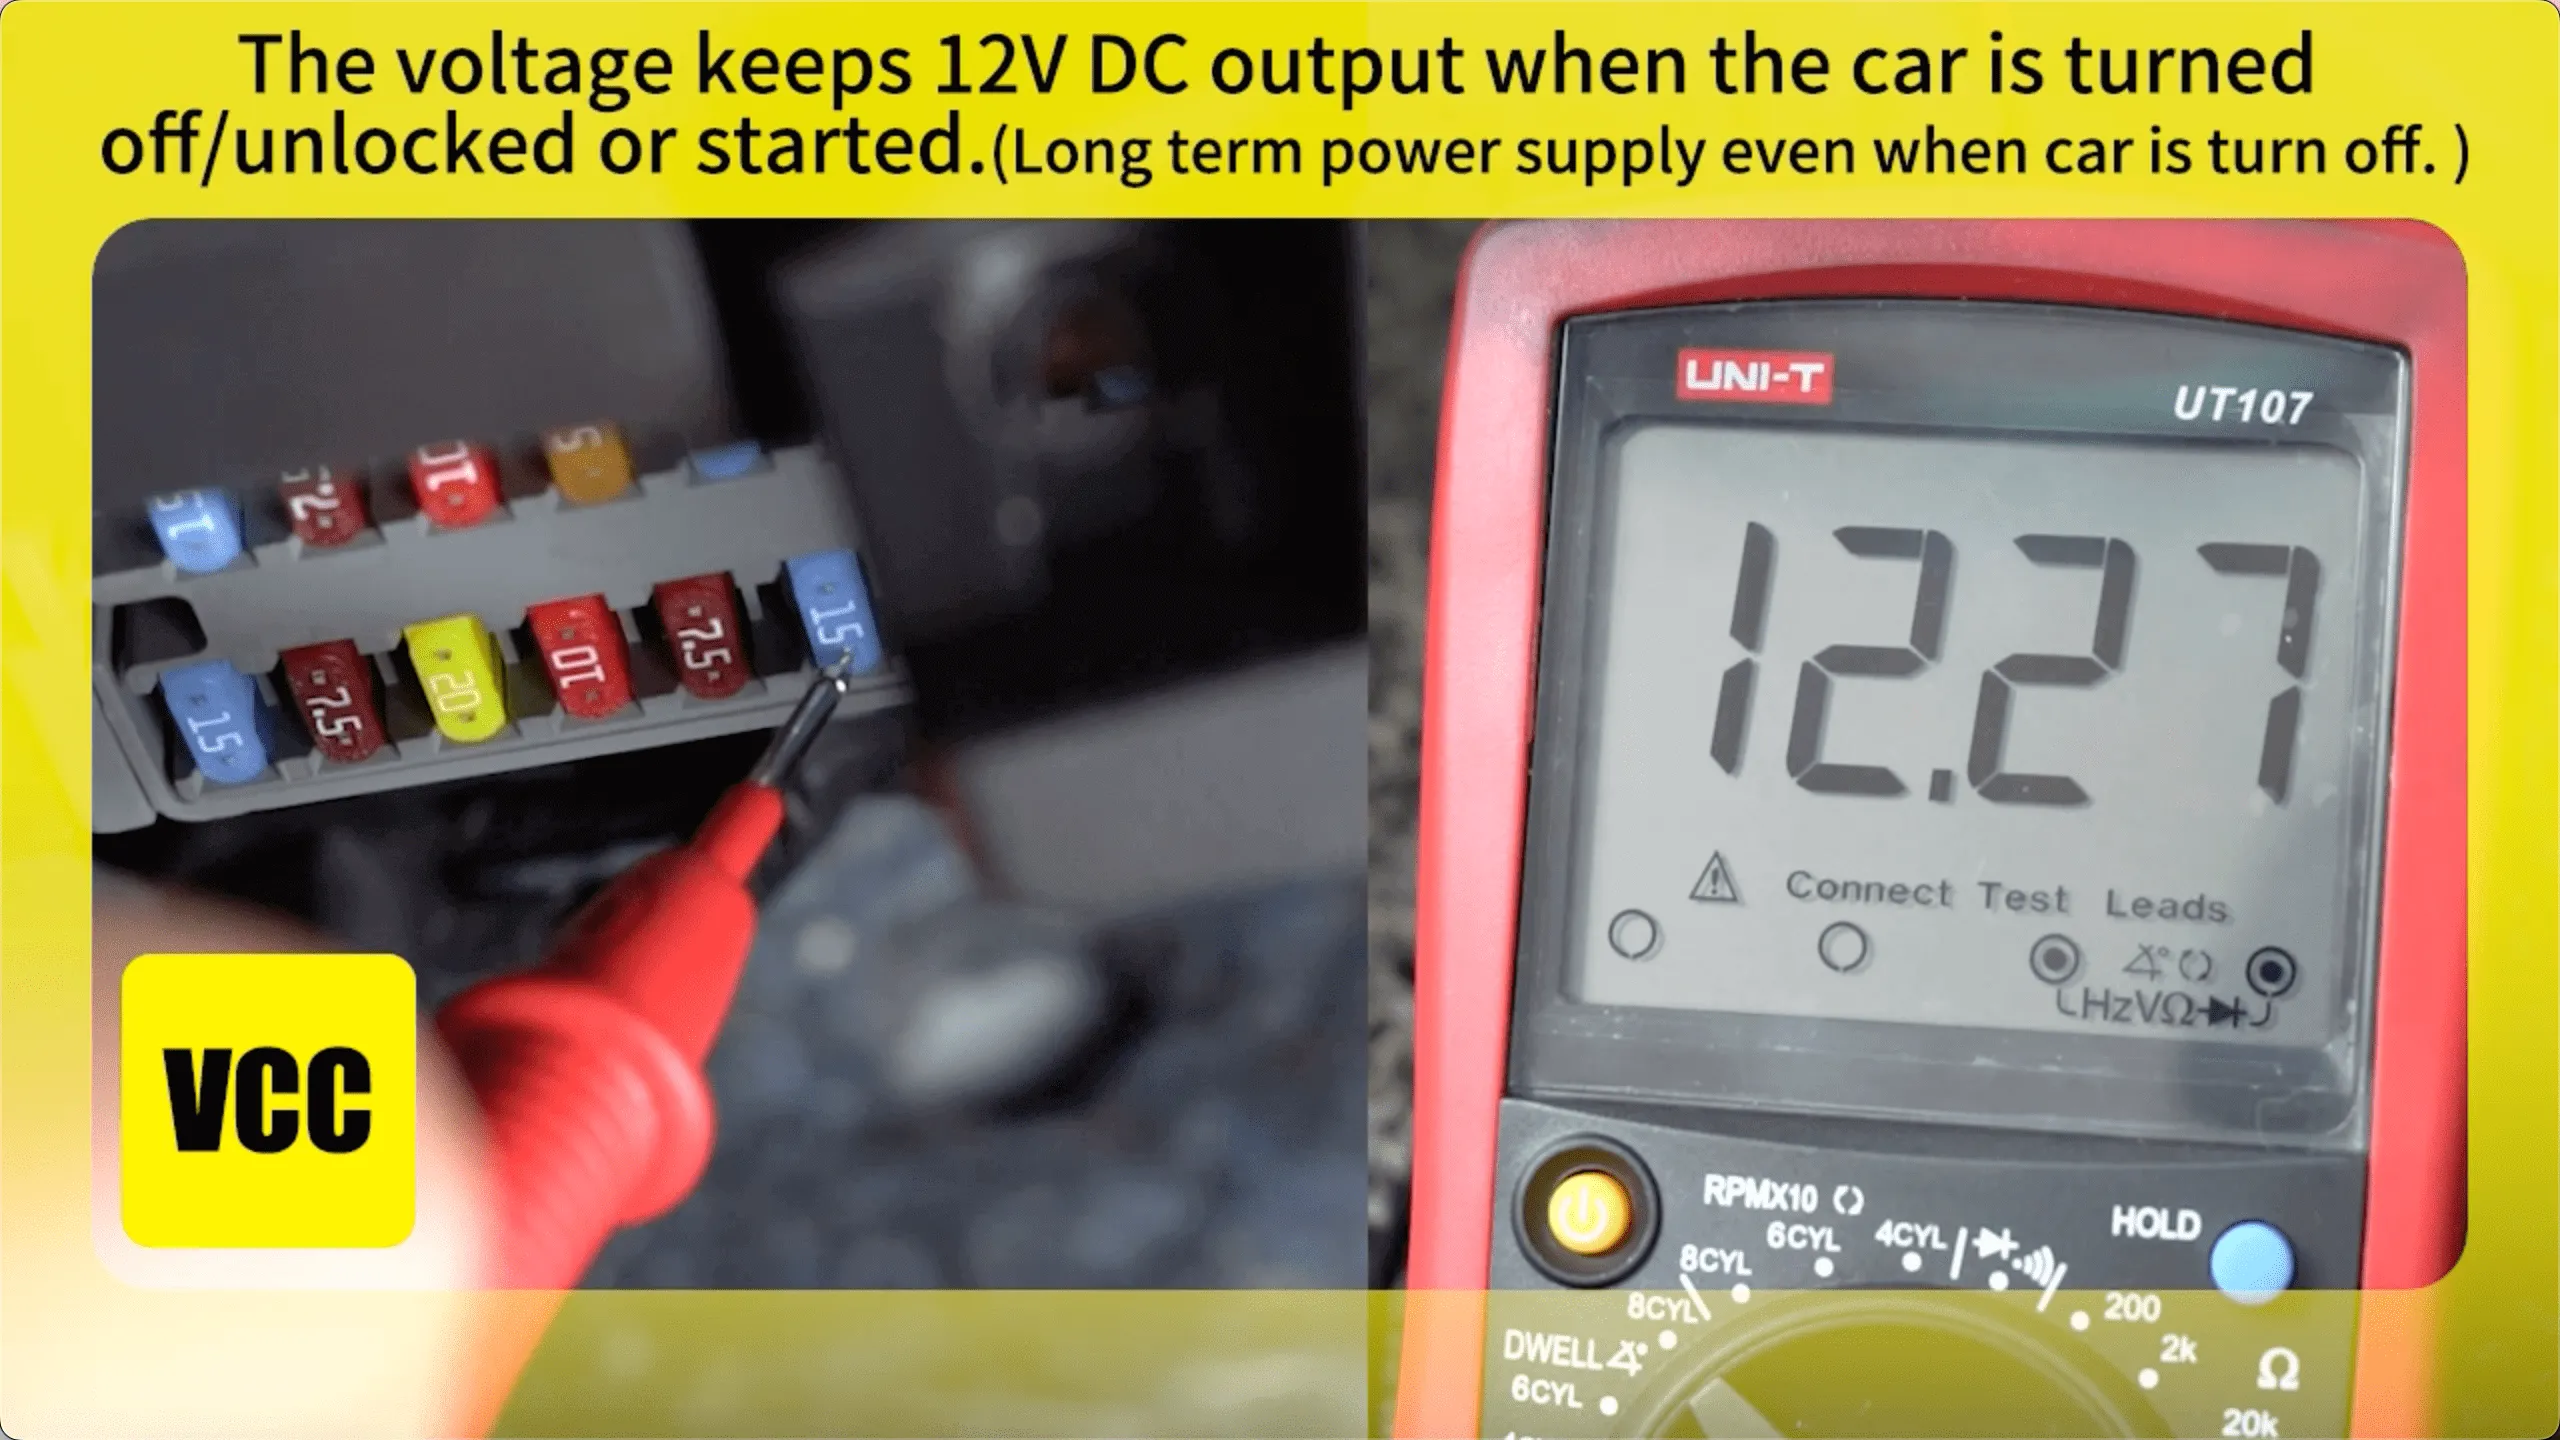
More on ACC and VCC Power Sources: ACC (Accessory power) is only active when the ignition is turned on in your car. Connecting your dash cam to ACC will make sure it only powers on while you’re driving, which will keep the battery from dying. VCC (constant power) gives the car power even when it’s not running. This lets features like parking mode keep working, but if you don’t use it right, it could drain your battery. The right power source balances the functionality of the dash cam with the safety of the batteries.
Safety Warning on Cable Routing: When routing cables, don’t run wires through areas where airbags will deploy or near pedals to keep them from interfering with important safety systems. Carefully tuck the cables along the trim edges and secure them so they don’t get damaged or in the way. This will make sure that both your dash cam and vehicle safety systems work properly.
Alternative Methods Without a Circuit Tester
If you don’t have a circuit tester, don’t worry. Here’s what you can do:
Check your vehicle’s user manual. It usually includes a diagram of the fuse box layout, showing the location and function of each fuse. You can use this to find the ACC and constant power (VCC) fuses.
Step4. Connect the Hardwire Kit
First, use a fuse puller or pliers to remove the identified ACC and VCC fuses from your vehicle’s fuse box.
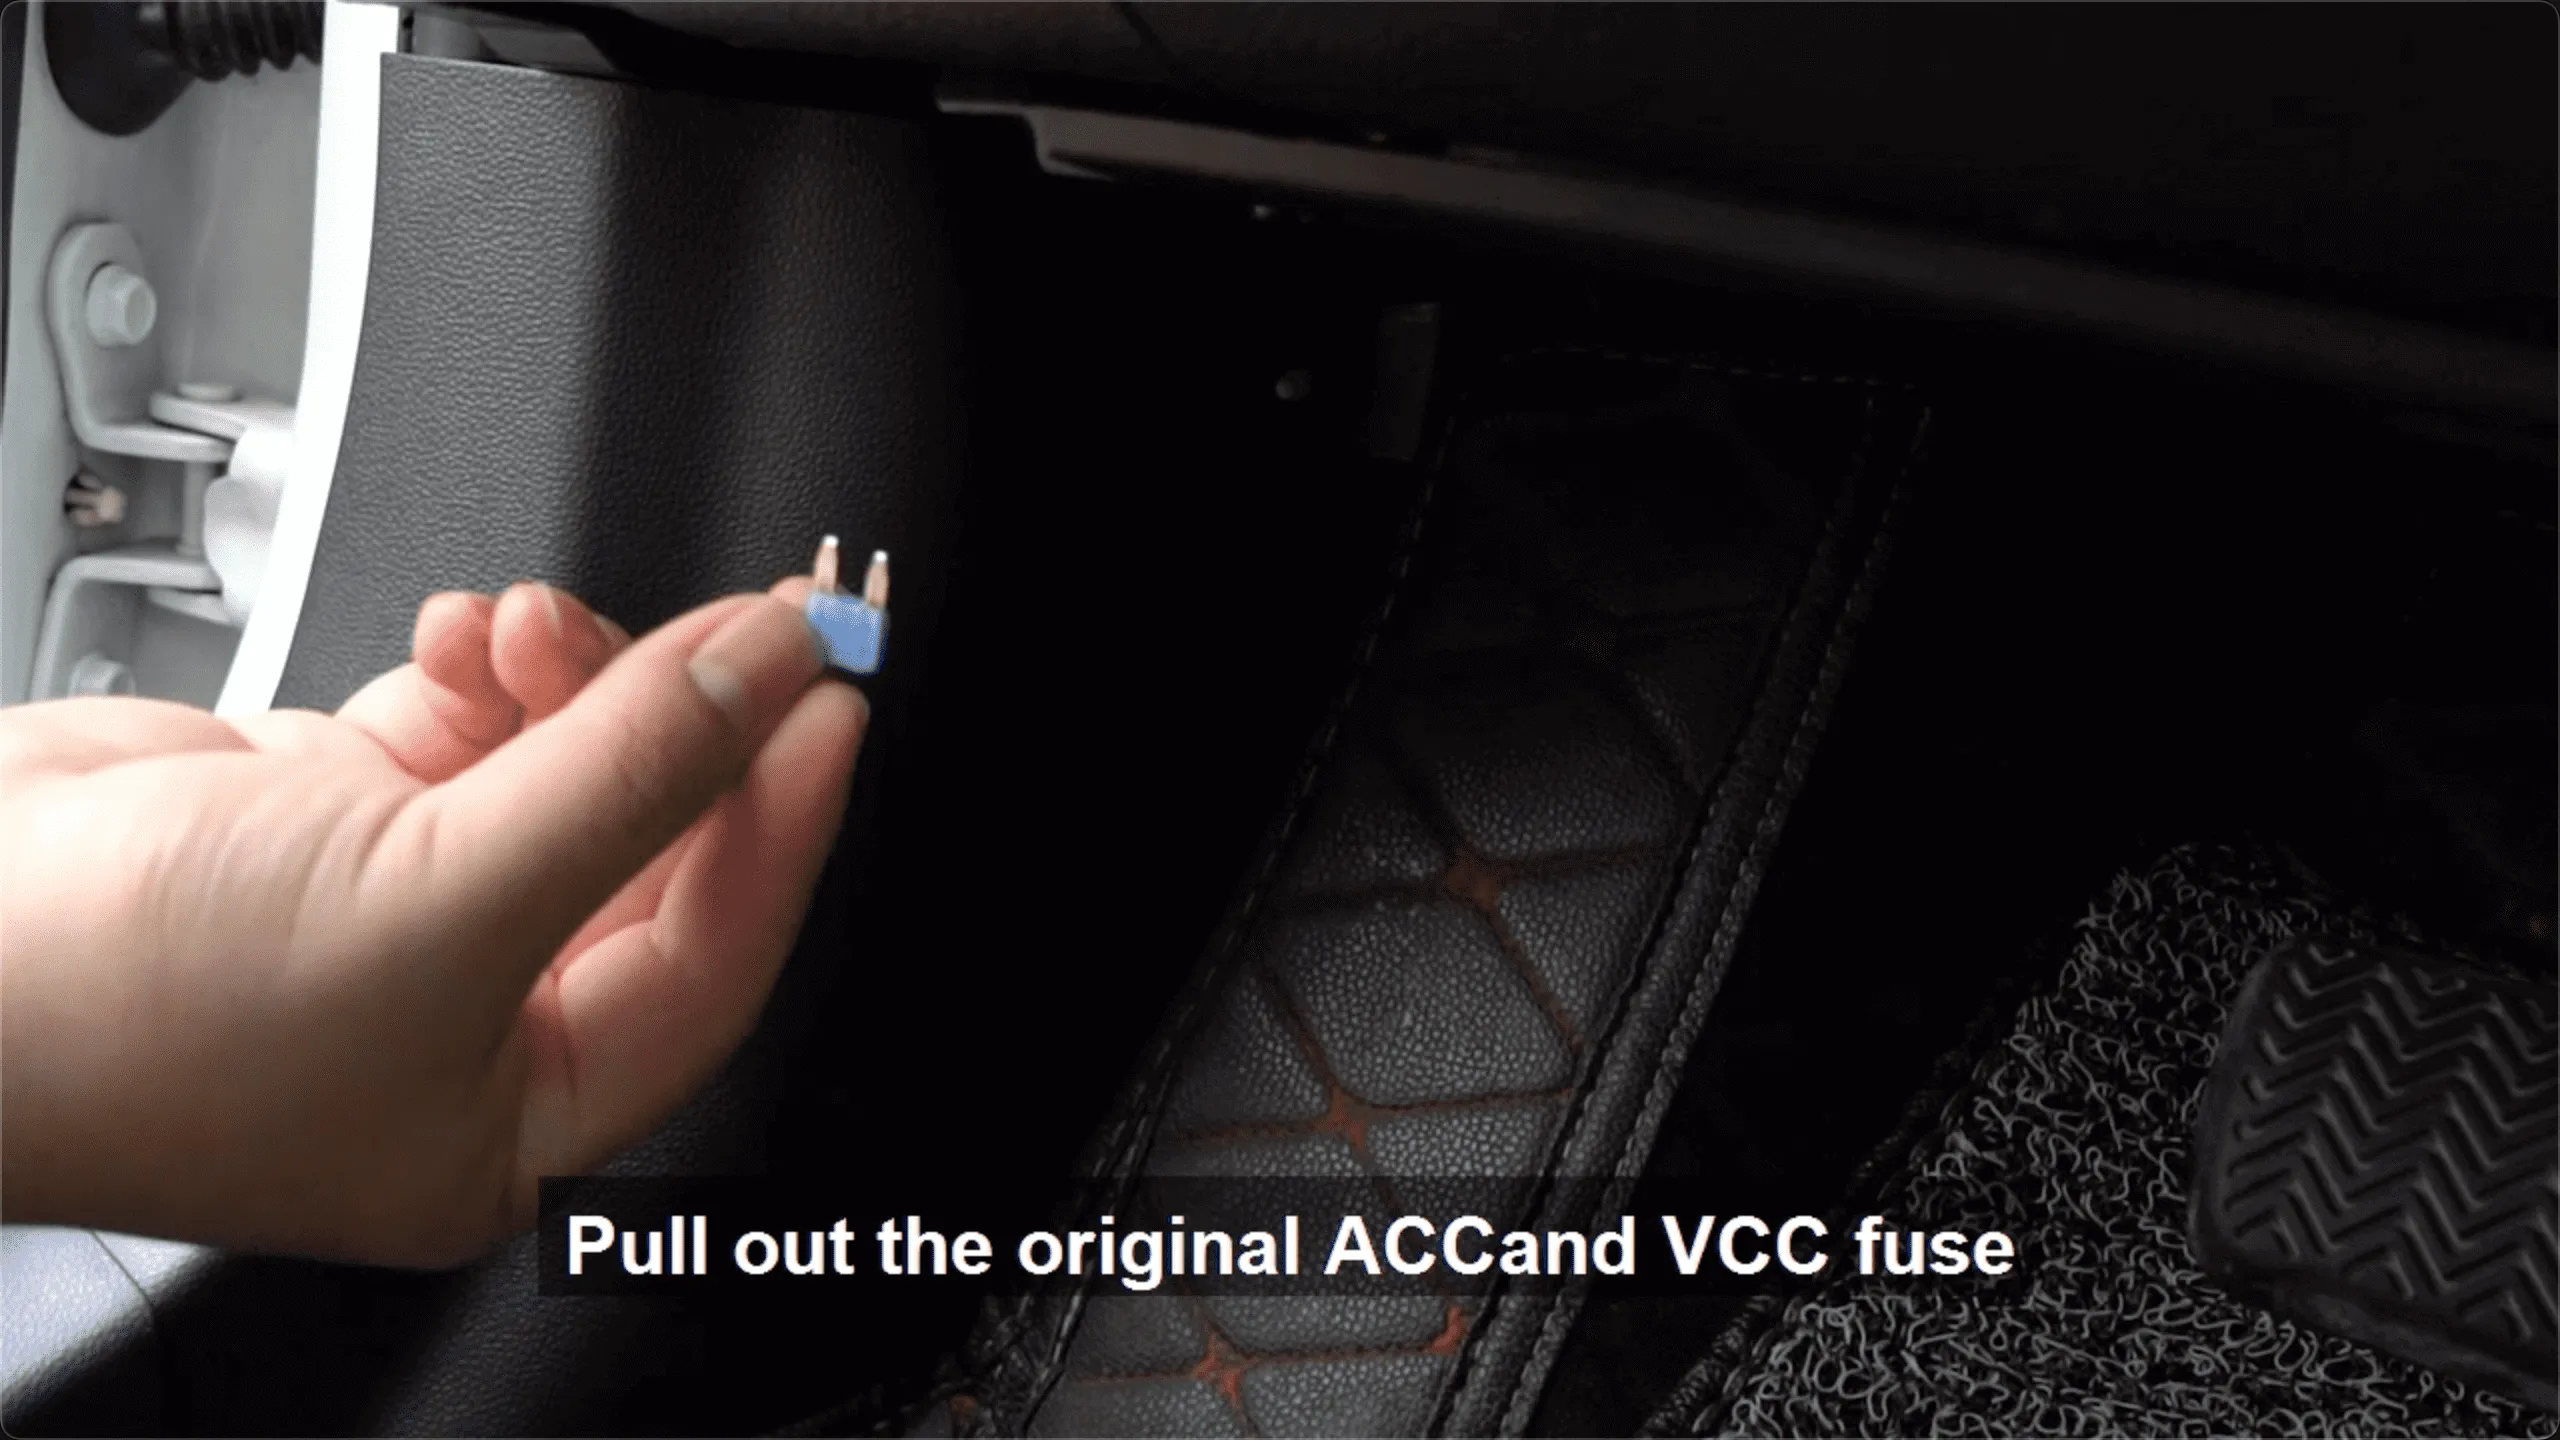
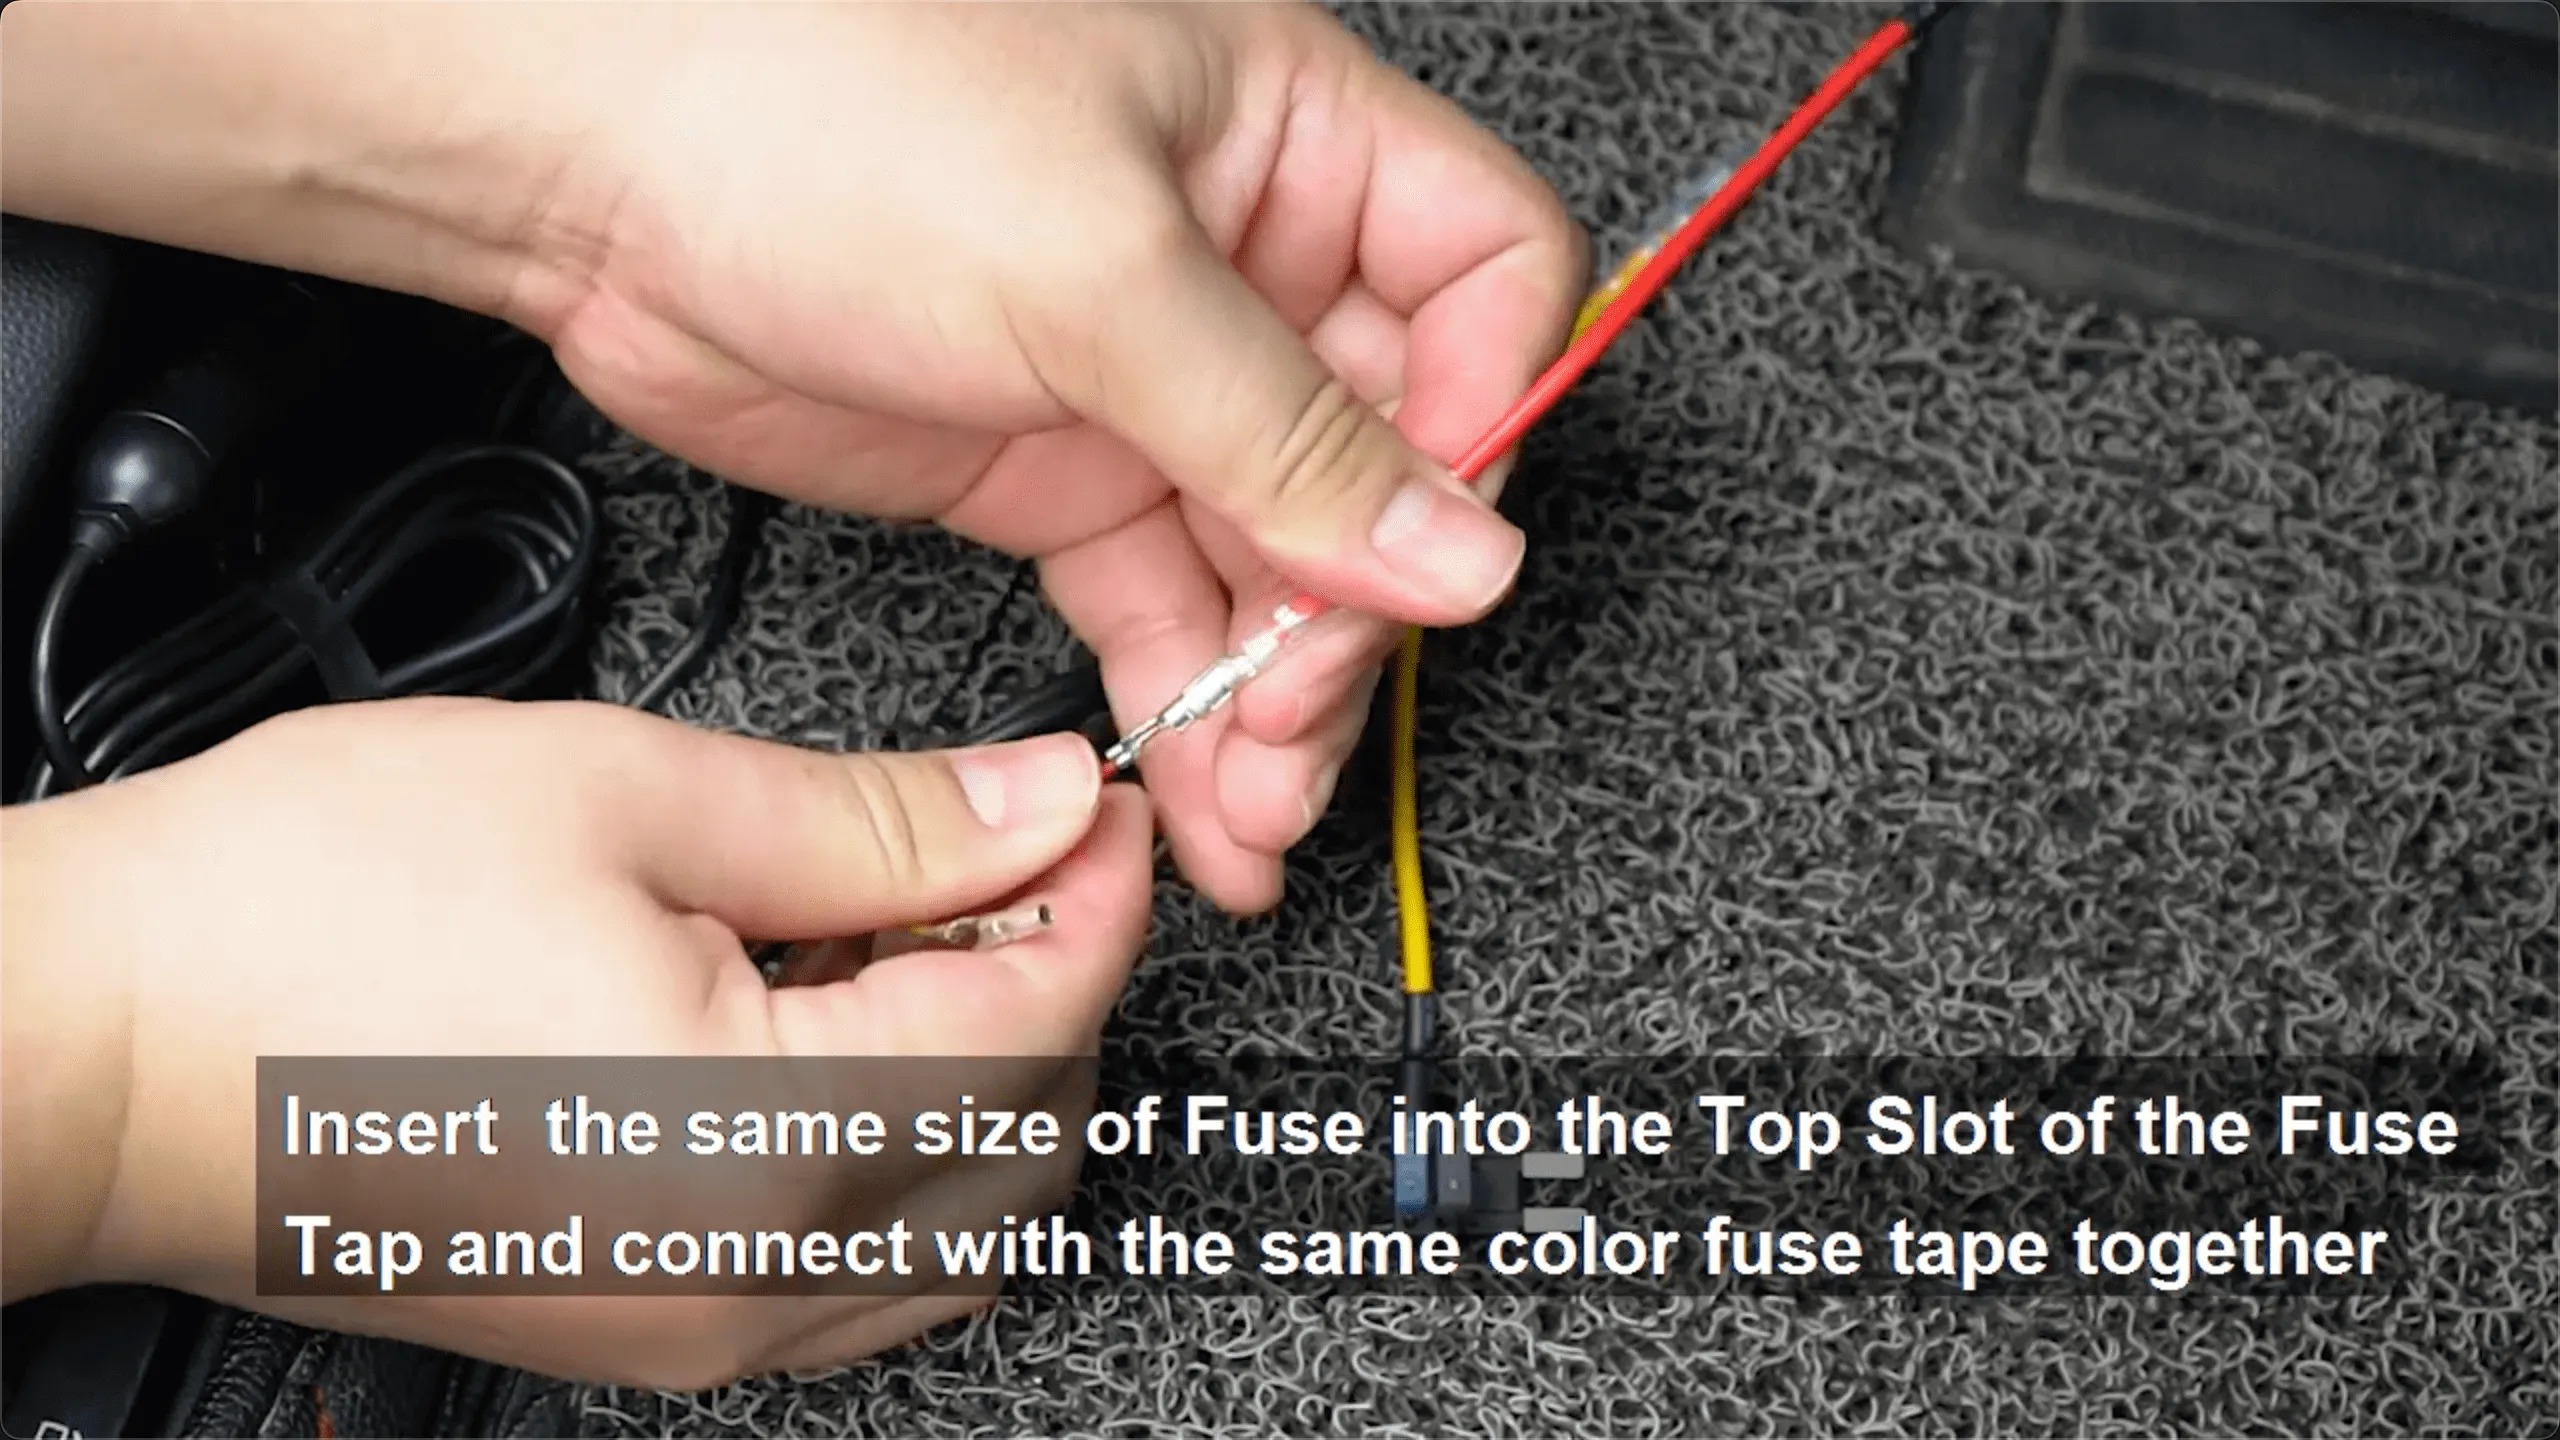
Next, take the same size ACC/VCC fuse and insert it into the fuse tap slot near the metal sheet end first. Place the original car ACC/VCC fuse into the other side away from the metal sheet.
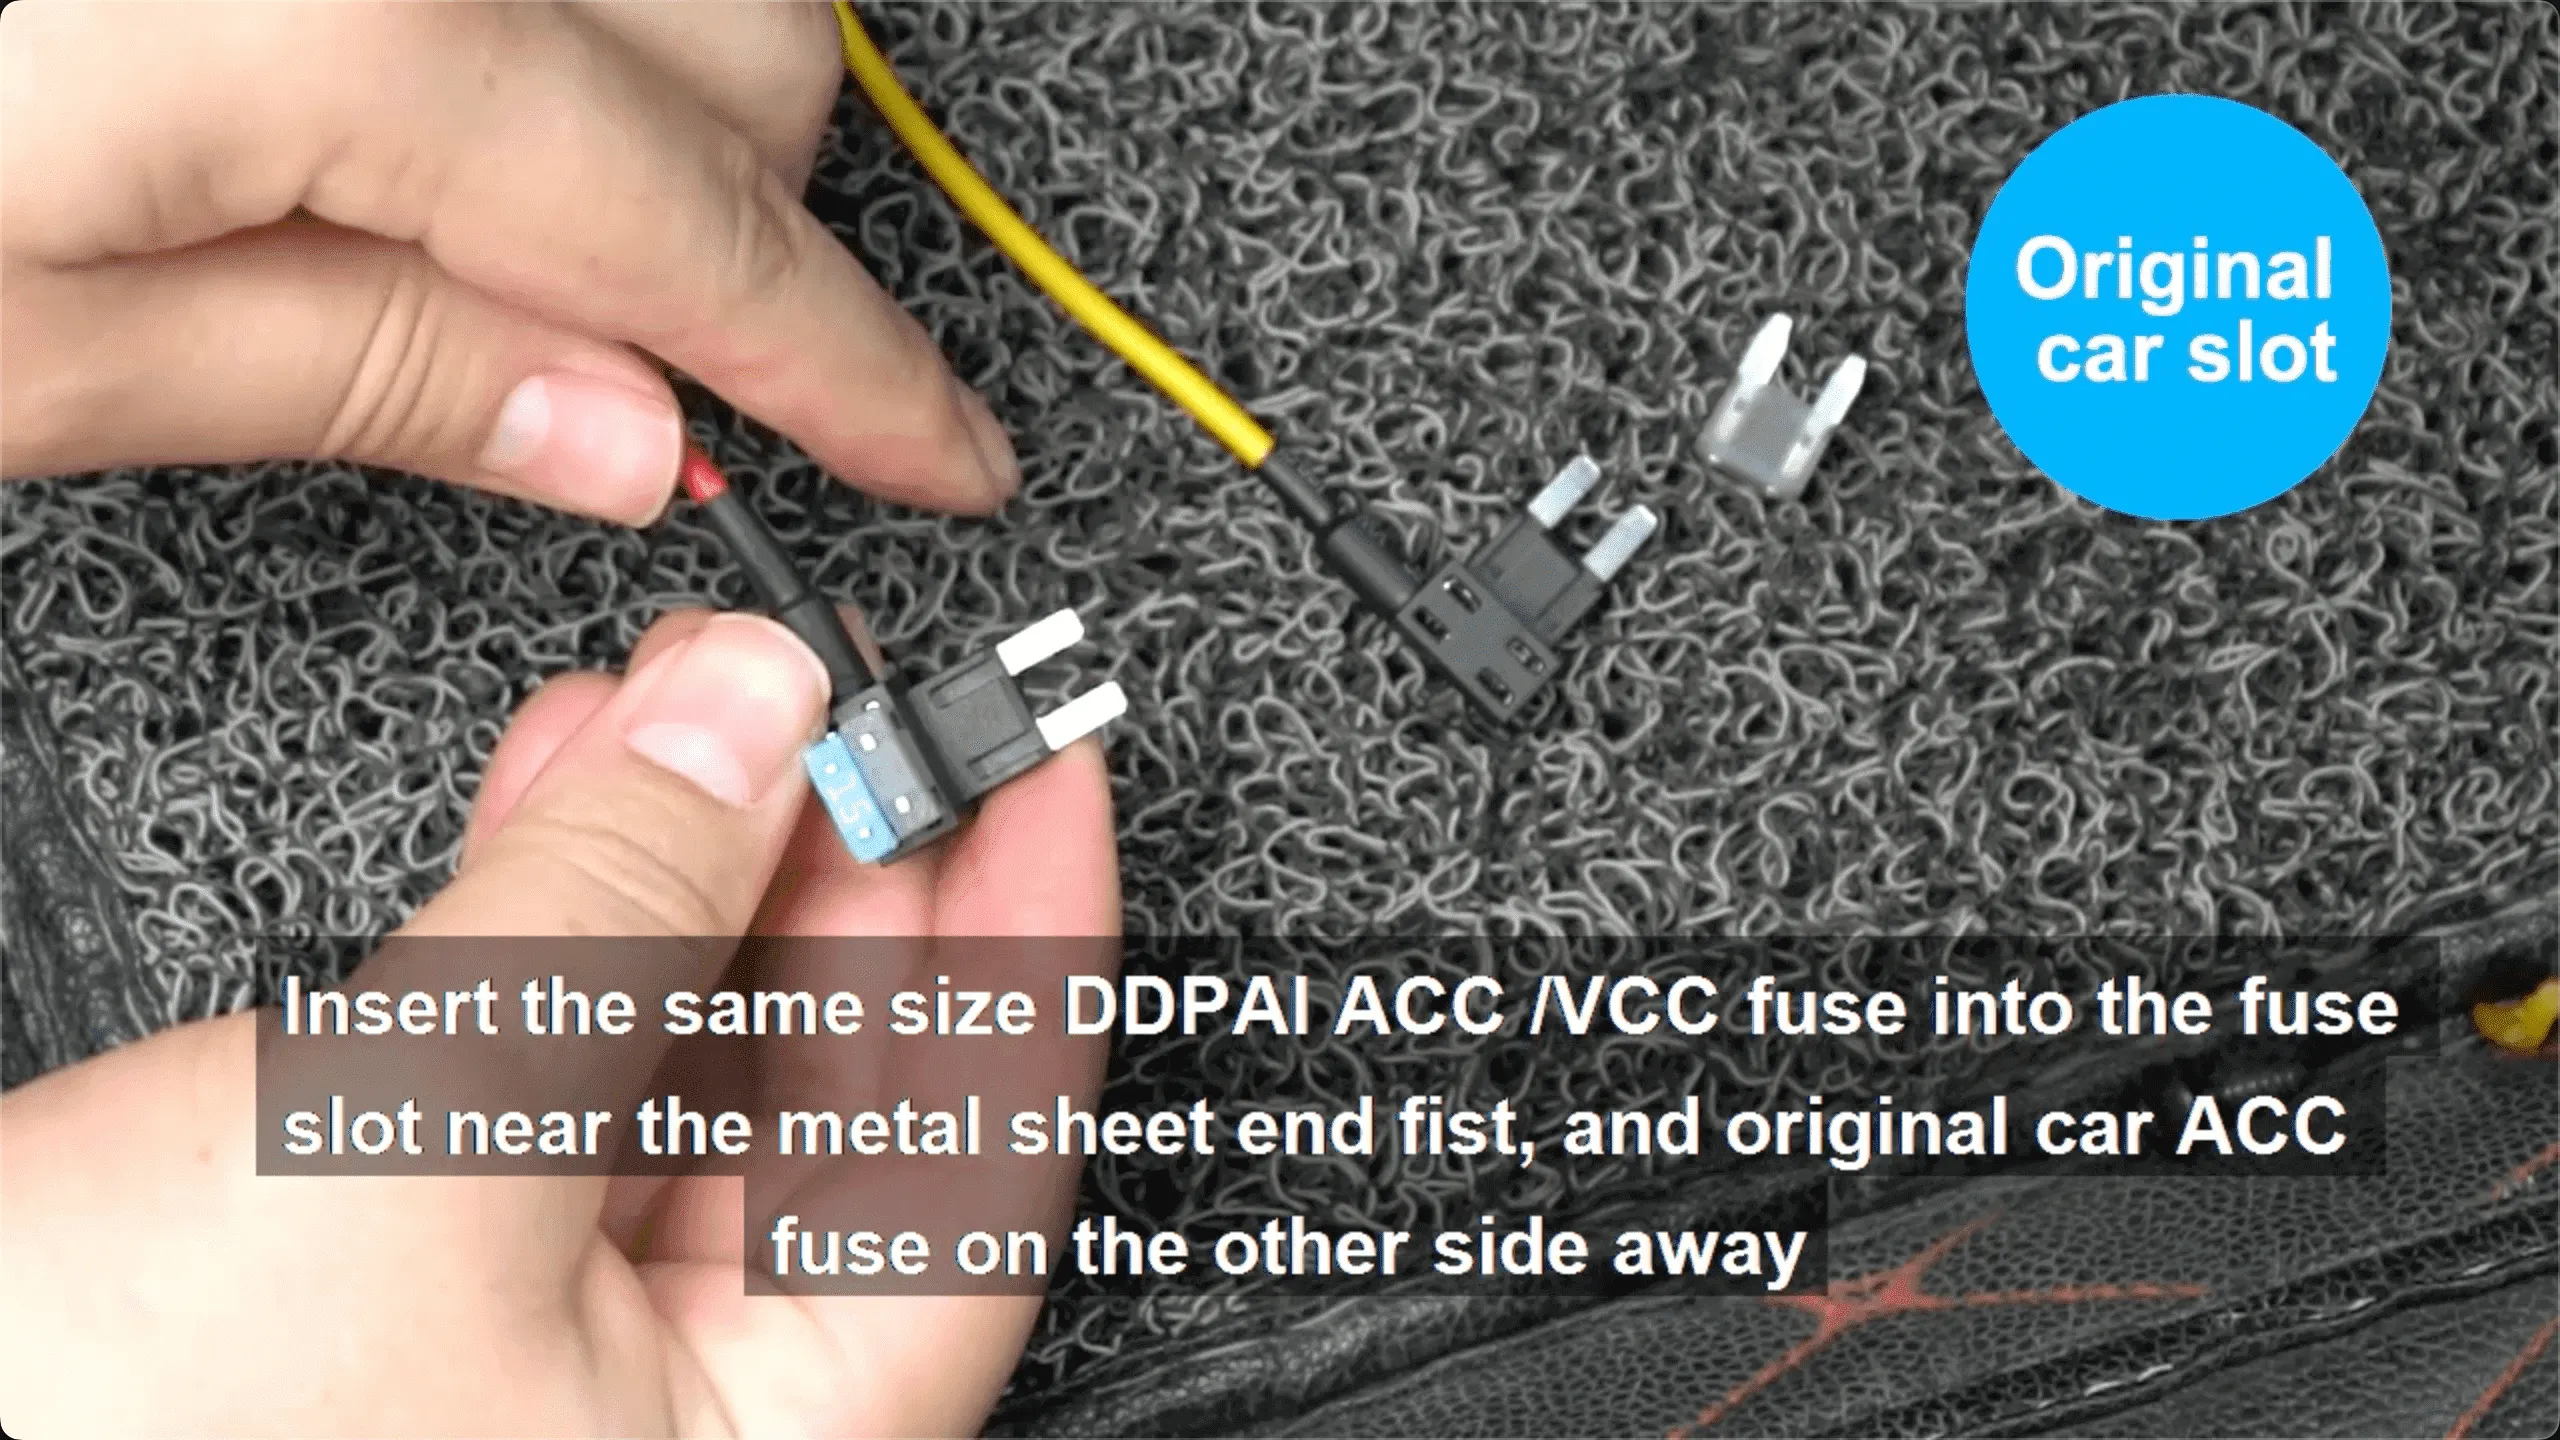
Now, connect the red wire to the ACC fuse tap and the yellow wire to the VCC fuse tap.
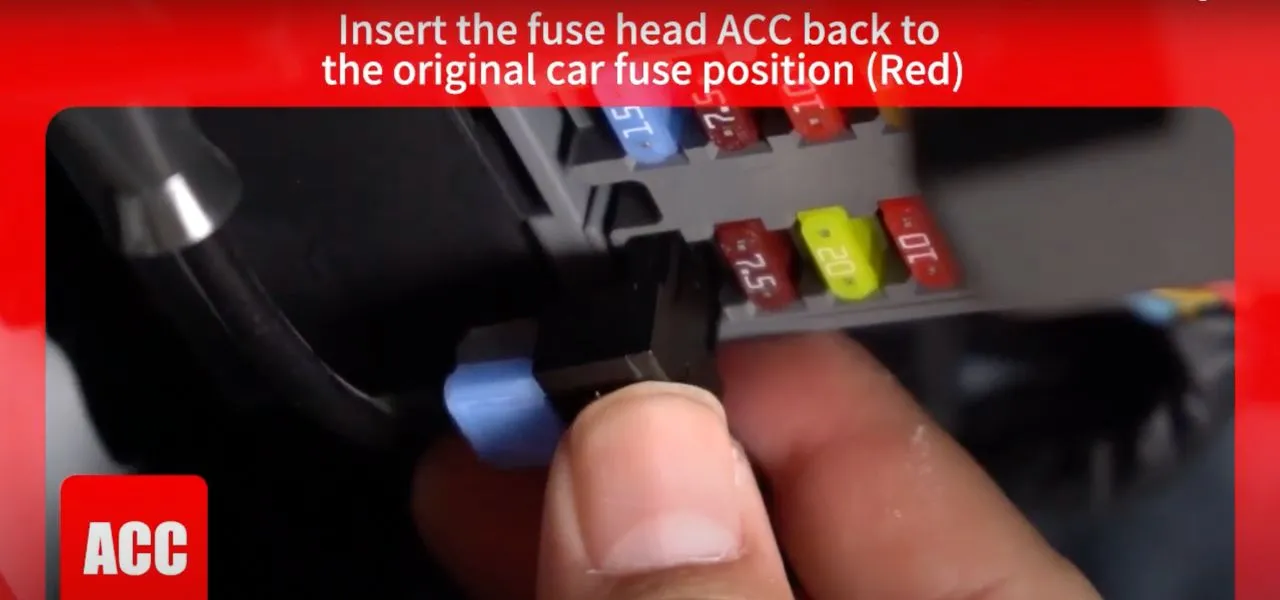
Insert the fuse tap into the corresponding fuse slots in the fuse box, ensuring each fuse tap is securely in place.
It is safe to connect your dash cam to your car’s fuse box with fuse taps, which are also known as add-a-circuits. There are different sizes and shapes to fit different fuse boxes, such as mini, low-profile, micro2, and full-size. When picking fuses for your dash cam circuit, choose one with a rating of 2A to 5A for the dash cam side to protect the device. The original fuse you tap into should have a higher rating (10A to 30A) for the circuit that is already there. This makes sure there is enough power without putting electrical damage at risk.

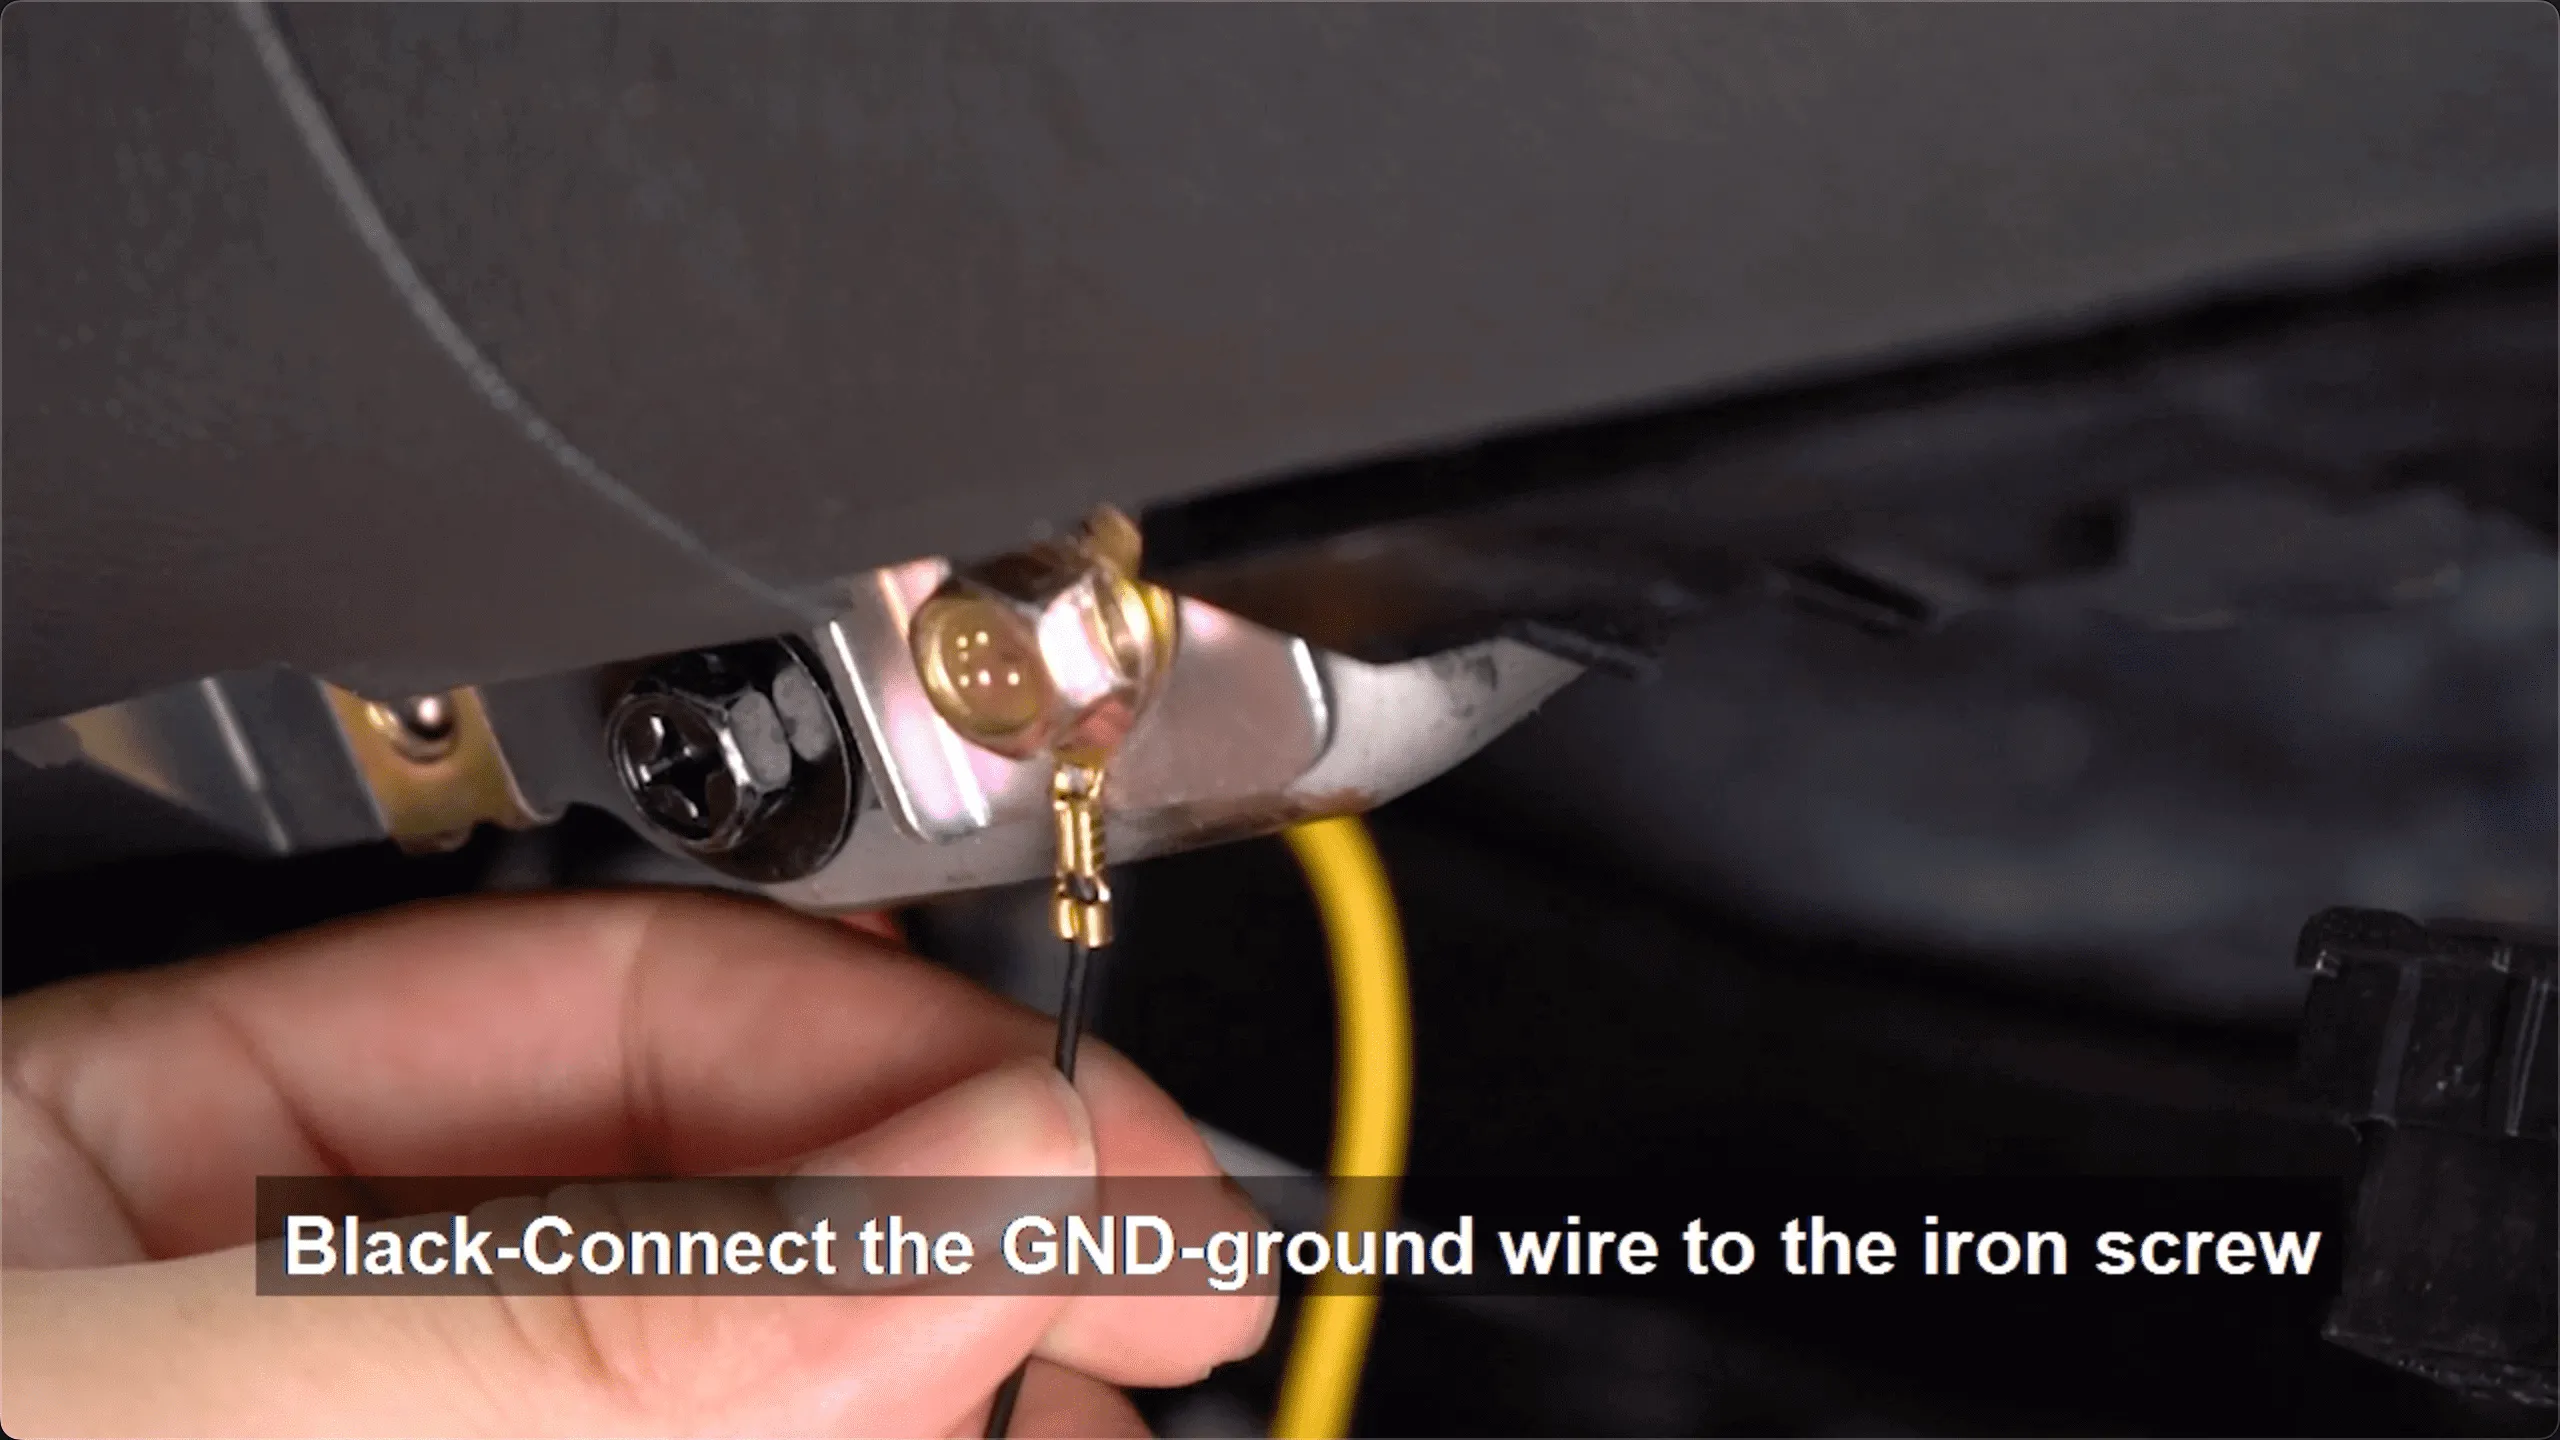
Step5: Ground Wire Connection
Connect the black ground wire from the hardwire kit to a metal part of your car’s body. This can be done by locating a bolt or screw attached to a metal surface, ensuring it is securely fastened to avoid any electrical issues.
- Always connect the black ground wire to a clean, unpainted metal surface on the chassis or body.
- Use a bolt or screw to secure the wire firmly in place.
- Avoid painted, rusty, or plastic surfaces as they can cause unstable connections or electrical noise.
- Regularly check the ground connection to prevent corrosion or loosening over time.
Finally, connect the hardwire kit’s power cable to the dash cam.
Step6: Test the Hardwired Installation
Start your car and check if the dash cam powers on and starts recording. Most dash cams will indicate they are powered on with a light or voice alert. Use the app to verify the connection and settings.
- If the dash cam won’t turn on, make sure the fuse taps are installed correctly and that the wires are securely crimped. Also, ensure the fuses are facing the right way.
- If the parking mode doesn’t work, verify that the ACC wire is connected to an accessory fuse that only powers on when the ignition key is turned on.
- If the dash cam turns on but then turns off unexpectedly, check that the parking mode setting is enabled in the dash cam’s menu.
- If problems persist, try switching to a different fuse slot or consult the hardwire kit’s support materials.
If you follow these steps, you should be able to install your dash cam in a clean, professional way. Remember that if you have any problems or aren’t sure about any step, you should always talk to a professional to keep your car’s electrical system from getting damaged. You can feel safer and more at ease on the road if your dash cam is properly set up and powered on. Have a safe trip!
FAQ
What should I do if my dashcam won't start?
Check the power connection to ensure the power cable and plug are securely connected. Verify the battery charge and recharge or replace it if necessary. Try resetting the device.
What should I do if the video is unclear or noisy?
What should I do if my dashcam is unstable or falls off?
Check the installation position to ensure it is stable. Use a high-quality mount to ensure strong adhesion or fixation. Regularly inspect the installation to ensure it remains securely fixed.
What should I do if the parking monitor doesn't work (for hardwired installations)?
Check the hardwire connections to ensure the ACC and constant power connections are correct. Inspect the fuses to ensure they are not damaged. Enable the parking monitor function in the settings to make sure it is activated.