Skip to content
 ![]() The app will be continuously optimized. Actual interface may vary from the manual. Please keep it updated for optimal experience. Thank you.
The app will be continuously optimized. Actual interface may vary from the manual. Please keep it updated for optimal experience. Thank you.
Name: 4G-cloud Box, 4G-cloud Box-NA
Model: DDPAI B13, DDPAI B15
Input: 5V/2A
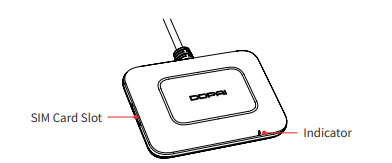
Equipped with a 4G-cloud box, the dash cam supports 4G interconnection. After inserting the SIM card into the 4G-cloud box, the dash cam can support 4G functions such as remote viewing of vehicles, vehicle entry and exit notifications, cloud storage of important photos and videos, and collision warnings.
![]() If the SIM card is removed or inserted while the 4G Cloud Box is running, a restart is required for proper operation.
If the SIM card is removed or inserted while the 4G Cloud Box is running, a restart is required for proper operation.
1) Install SIM card
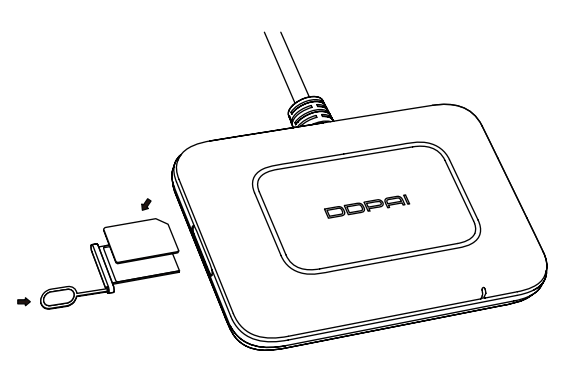
Use the included SIM ejector tool to remove the card tray, install the SIM card, and insert it back into the 4G-cloud box.
![]() For optimal 4G performance, we recommend using the included SIM card, which offers plug-and-play convenience with no additional setup, along with easy data services. If you use another SIM card, you may need to configure the APN in the app. Please refer to “11. APN Configuration” to learn more.
For optimal 4G performance, we recommend using the included SIM card, which offers plug-and-play convenience with no additional setup, along with easy data services. If you use another SIM card, you may need to configure the APN in the app. Please refer to “11. APN Configuration” to learn more.
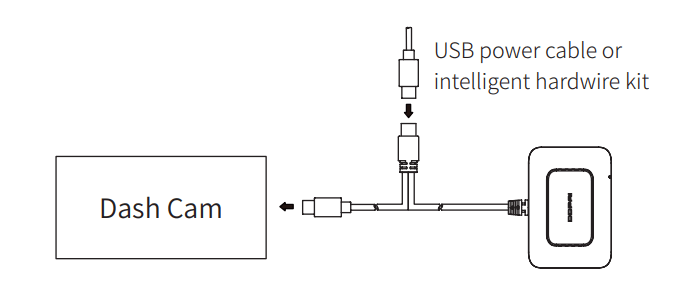
2) Connect the 4G-box to the dash cam
① Connect the USB-C receptacle of the 4G-cloud box to the USB power cable or intelligent hardwire kit.
② Connect the USB-C plug of the 4G-cloud box to the dash cam.
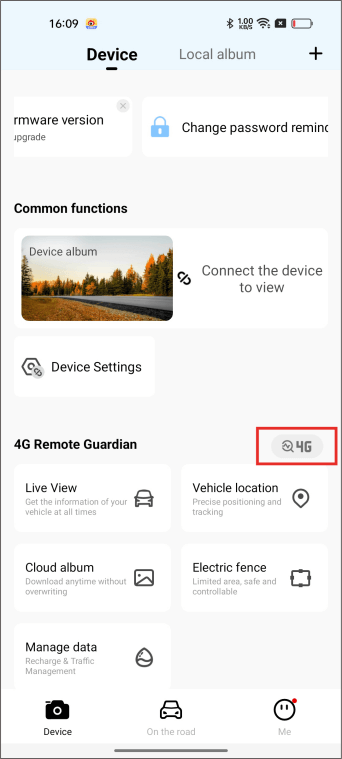
Before using the 4G function for the first time, we recommend running the built-in 4G self-test to ensure it is working properly. Simply go to the “Device” interface and tap to start the diagnostic process.
![]() Before using the 4G function, please refer to the following steps to authorize the dash cam to the current app account, otherwise it will affect the use of the 4G function.
Before using the 4G function, please refer to the following steps to authorize the dash cam to the current app account, otherwise it will affect the use of the 4G function.
- Ensure the 4G Cloud Box is properly connected to the dash cam.
- When powered on, the dash cam will announce “Network Connection Successful”, indicating 4G network is available.
- Register and log in to your DDPAI app account, then connect to the dash cam’s Wi-Fi via the app.
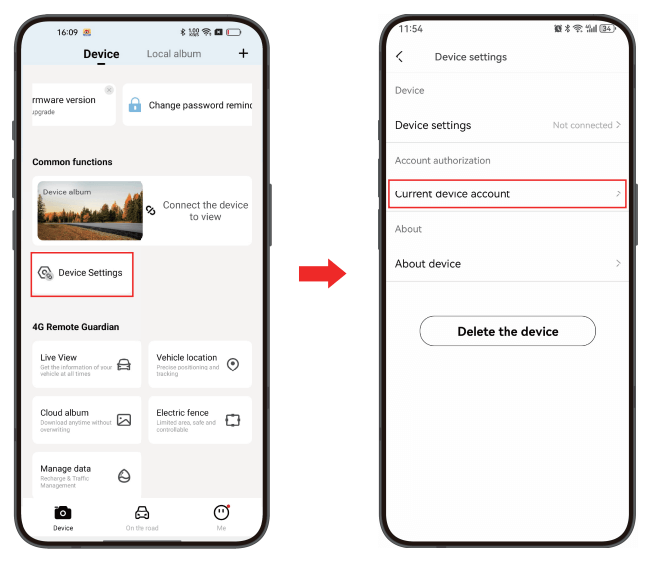
- Once connected, open the app and go to “Device Settings”> “Current Device Account”.
View Vehicles Remotely
When the dash cam is operating normally and the 4G network is available, you can view the vehicle location or perform real-time monitoring remotely through the app, without having to bring your phone close to the dash cam and connect to the dash cam’s Wi-Fi for real-time preview.
1. Tap”Vehicle Location” to remotely check the vehicle’s location.
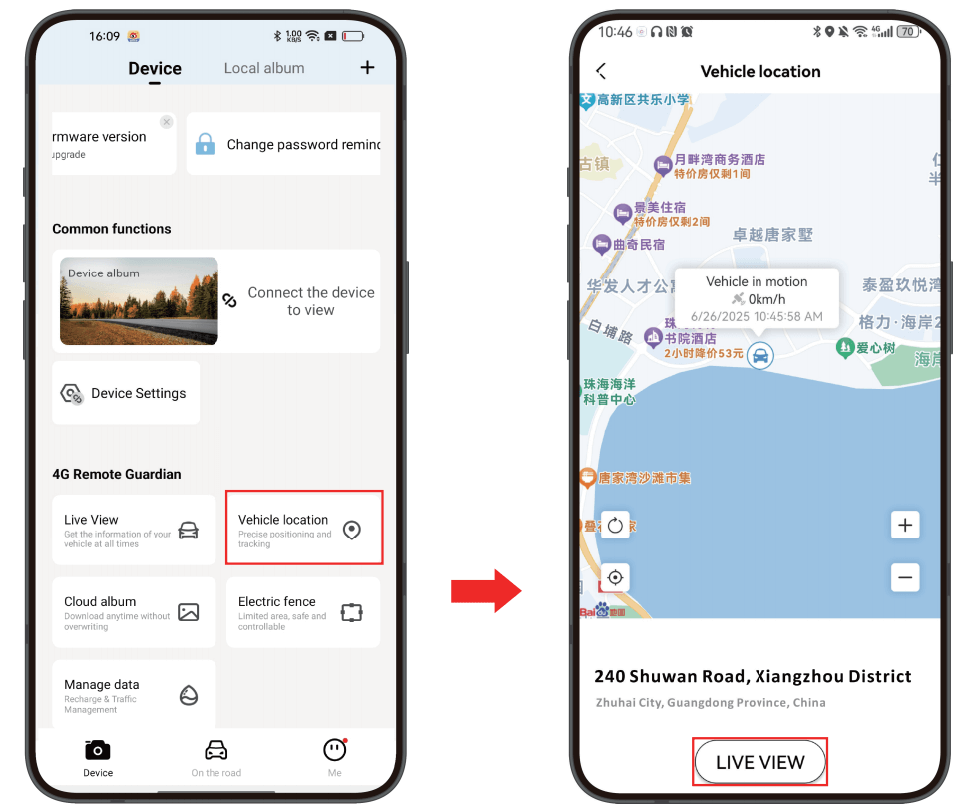
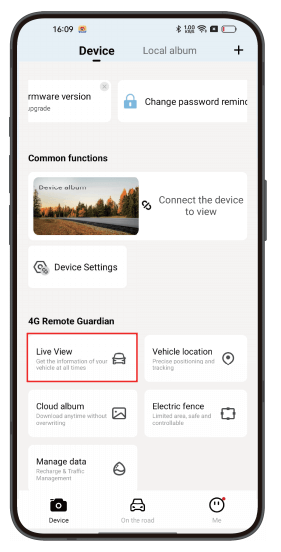
2. Tap ”Live View”to realize remote real-time monitoring.

Remotely Wake up the Dash Cam
If you choose to use the intelligent hardwire kit to draw power, you can also remotely check the vehicle status even if the car is stalled. When the parking monitoring mode of the dash cam is set to “Sleep”, if the 4G network is normal, the app will show that the current device status is “Sleep”. At this time, tap “Live view” and the device will be awakened. After waking up, you can view the vehicle remotely.
![]() When the app exits remote viewing, the dash cam will re-enter sleep mode after a few minutes.
When the app exits remote viewing, the dash cam will re-enter sleep mode after a few minutes.
Collision Warning Notification
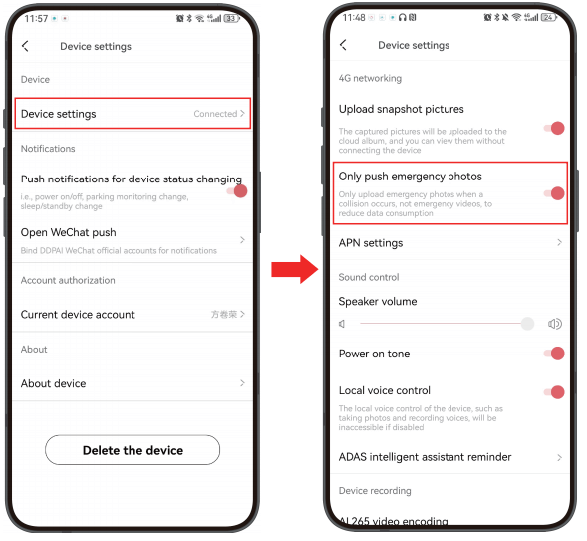
When the dash cam is operating normally and the 4G network is available, if a vehicle collides, you will receive a collision warning notification on your phone. To reduce data consumption, you can tap “Device Settings” and enable “Only push emergency photos”.
Notes:
- When a vehicle collides, emergency photos and videos will be pushed to the phone together (default settings). Pushing emergency videos to the phone will consume the data flow of the device. You can choose to enable “Only push emergency photos”and only emergency photos will be pushed to your phone when the vehicle collides.
- Please ensurethat the collision sensitivity is turned on, otherwise the dash cam will not generate emergency photos and videos when the vehicle collides.
Electric Fence
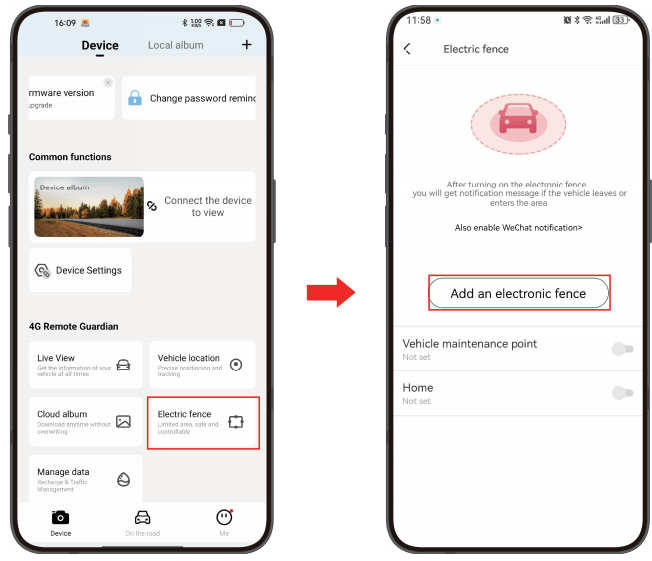
After setting the electronic fence range, if the dash cam is operating normally and the 4G network is available, you will immediately receive a notification through the DDPAI app on your mobile phone when a vehicle enters or leaves the range.
- Add Electric Fence
Tap “Electric Fence” > “Add an Electronic Fence”.
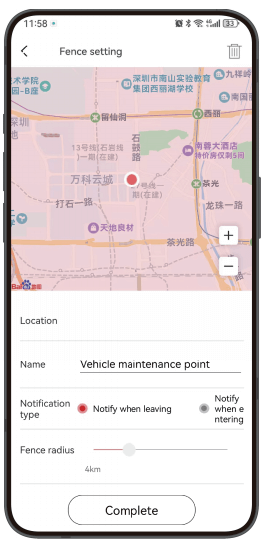
- Modify Electric Fence
Tap to enter the electronic fence that needs to be modified, modify the name, fence radius, and other parameters, then tap “Complete”.
Cloud Space
When using the dash cam with a 4G-cloud box, you can obtain 2G of cloud storage space. You can automatically upload voice-captured photos, photos and videos generated by emergency collisions to the cloud space via 4G traffic to avoid loss.
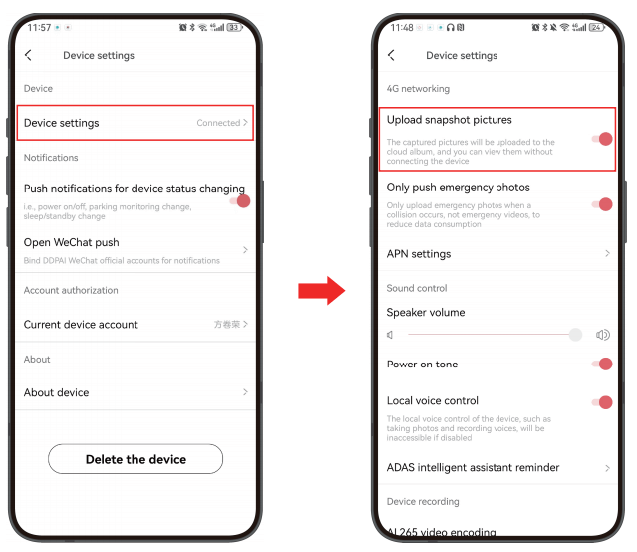
- Upload Snapshot Pictures to Cloud Space
Tap “Device Settings” and enable “Upload snapshot pictures”.
Notes:
- Uploading photos and videos to the cloud will consume the 4G traffic of the device.
- The associated voice-captured videoswill not be uploaded to the cloud.
- When the cloud storage is full, it will stop storing new photos and videos. It is recommended that you regularly download photos and videos from the cloud to your computer and then delete them to free up cloud space for storage and ensure that subsequent important files can be uploaded to the cloud.
- View Photos and Videos in Cloud Space
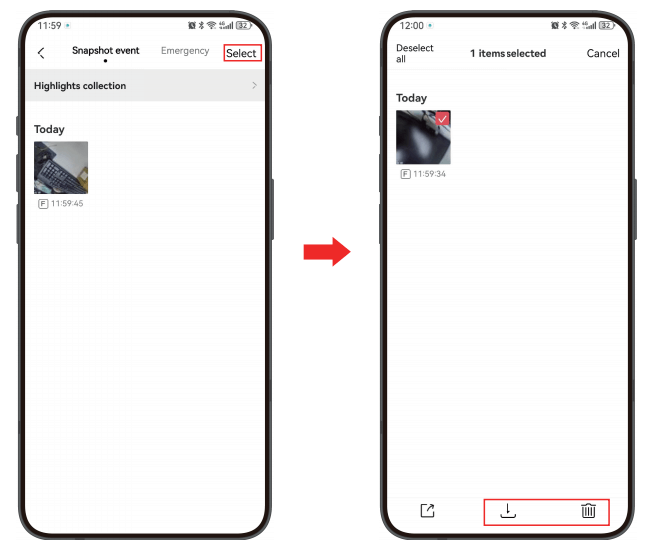
Tap “Cloud Album” and select the “Snapshot Event” page to view the voice-captured photos uploaded to the cloud space, select “Emergency” to view emergency photos and videos uploaded to the cloud space.

- Download Photos and Videos in Cloud Space
Tap and hold the file or tap the “Select” button in the upper right corner of the interface, check the photos or videos you want to download/delete, and then tap ![]() /
/![]() .
.
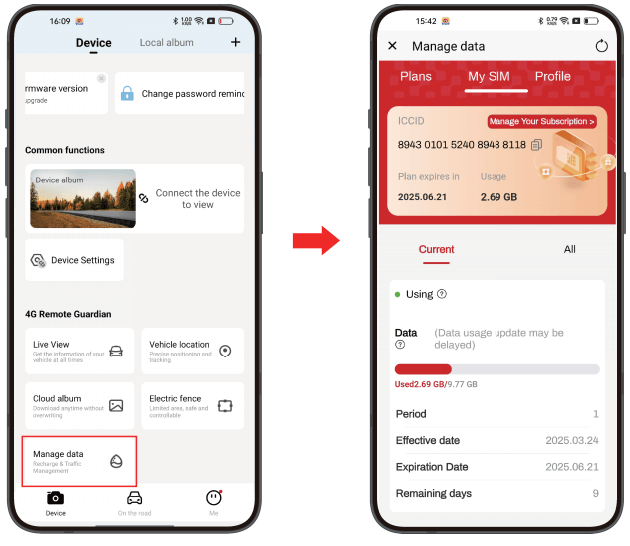
Manage Data (Requires DDPAI SIM card)
You can check the current data usage of your SlM card in the app. On the “Device” interface, tap “Manage Data”> “My SlM”.
![]() Final package pricing is as shown in the App.
Final package pricing is as shown in the App.
APN Configuration
![]() For optimal 4G performance, we recommend using the included SIM card, which offers plug-and-play convenience with no additional setup, along with easy data services. If you use another SIM card, you may need to configure the APN in the app. Please refer to the following instructions to configure.
For optimal 4G performance, we recommend using the included SIM card, which offers plug-and-play convenience with no additional setup, along with easy data services. If you use another SIM card, you may need to configure the APN in the app. Please refer to the following instructions to configure.
Step 1: Obtain APN Information
Contact your SIM card carrier to request the APN settings information, including the Name and APN.
Step 2: Connect the Dash Cam and Locate the APN Settings Menu
- Launch the DDPAI app onyour smartphone.
- Connect your DDPAIDash Cam to the “DDPAI” app on your mobile phone (via Wi-Fi local connection).
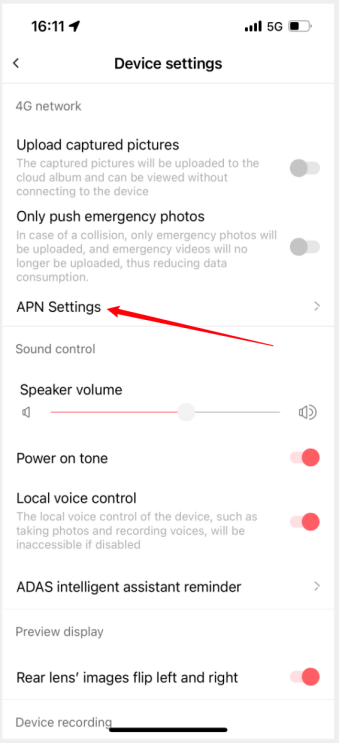
- Launchthe app, tap “Device Settings”.
- Tap “APN Settings”.
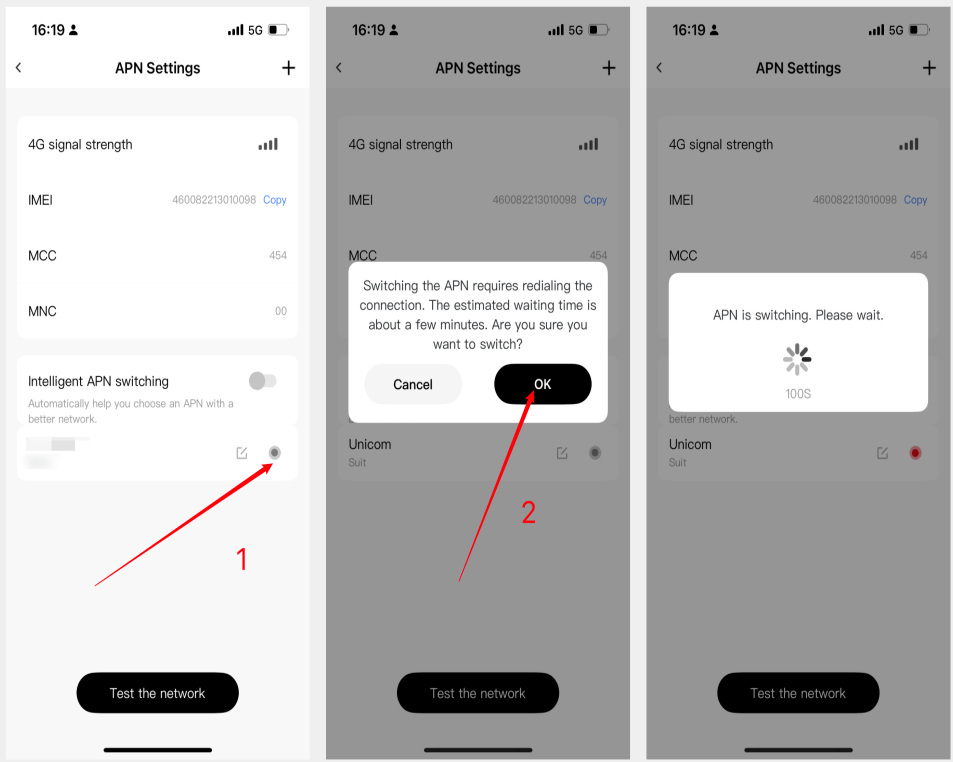
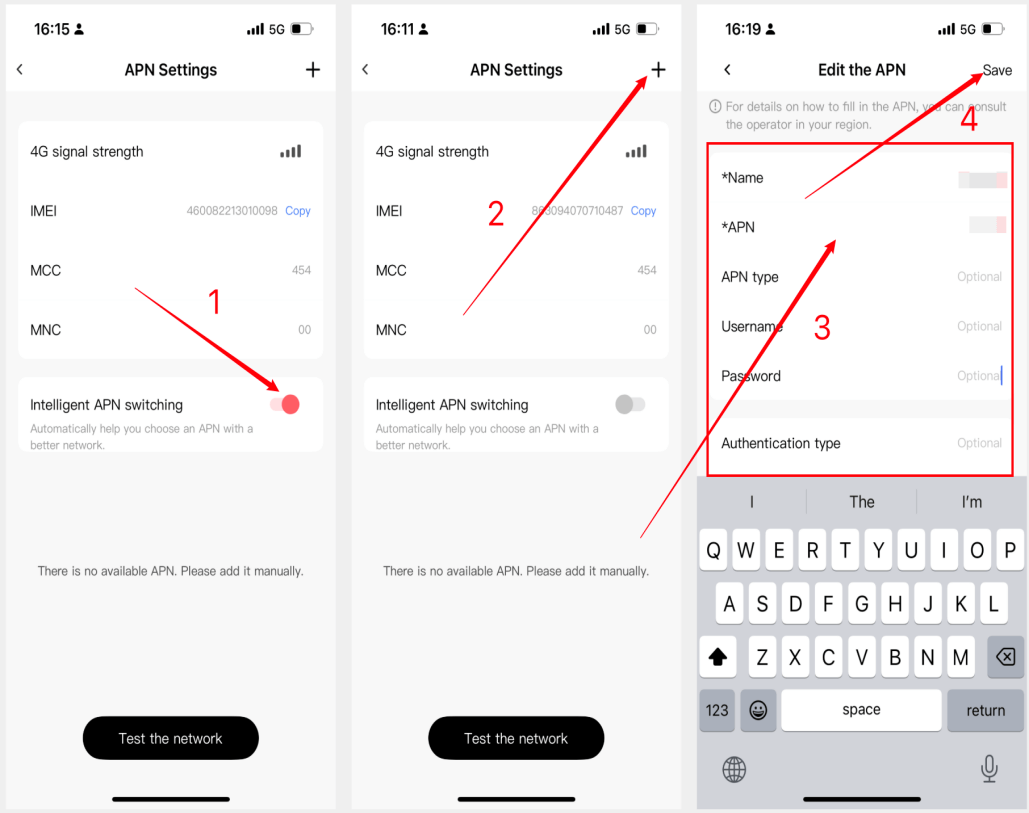
Step 3: Manually Configure the APN
- Disable Automatic APN Selection: If the “Intelligent APN Switching” feature is enabled, please disable it. This ensures your manual settings will be applied correctly.
- Add a New APN Profile: Tap the “+” icon in the upper-right corner to create a new APN entry.
- Enter APN Details: Carefully enter all required information provided by your carrier into the corresponding fields.
- Save the Configuration: Once all information has been entered correctly, tap “Save” to confirm and apply your settings.
Step 4: Enable and Test the APN
- Select APN: In the APN list, find the APN you just added and select it to enable it.
- Wait for APN Switching: Wait for the Dash Cam to complete the APN switch. This may take a few minutes.
- Restart the Dash Cam: After restarting, the Dash Cam should automatically connect to the network using the APN settings you configured.
- Test Network: You can tap”Test Network” to test whether the network is available.