Appearance
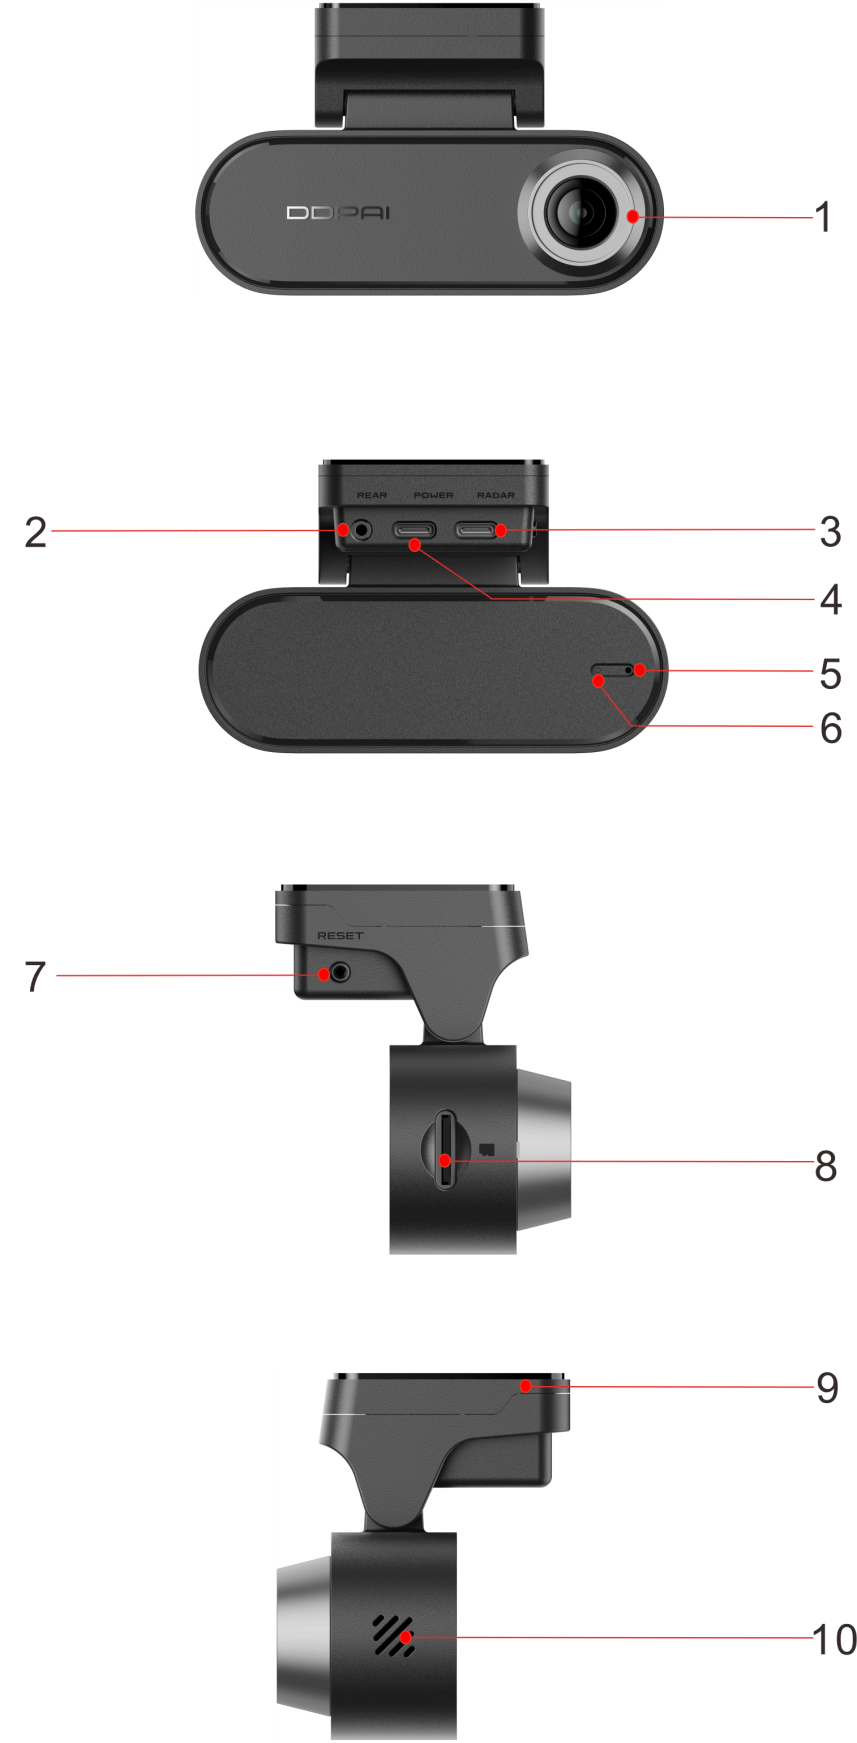
Indicator Guide
Specifications
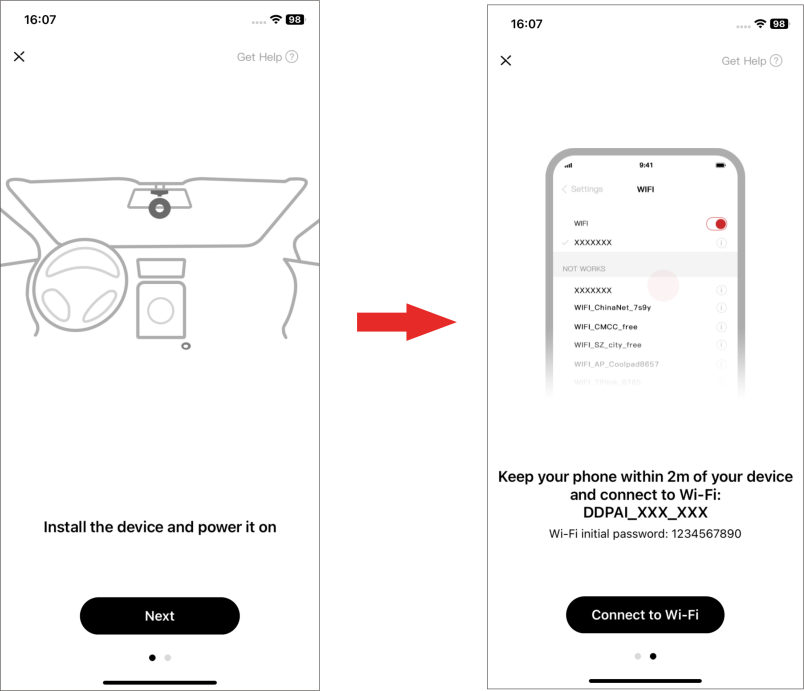
Downloading DDPAI App

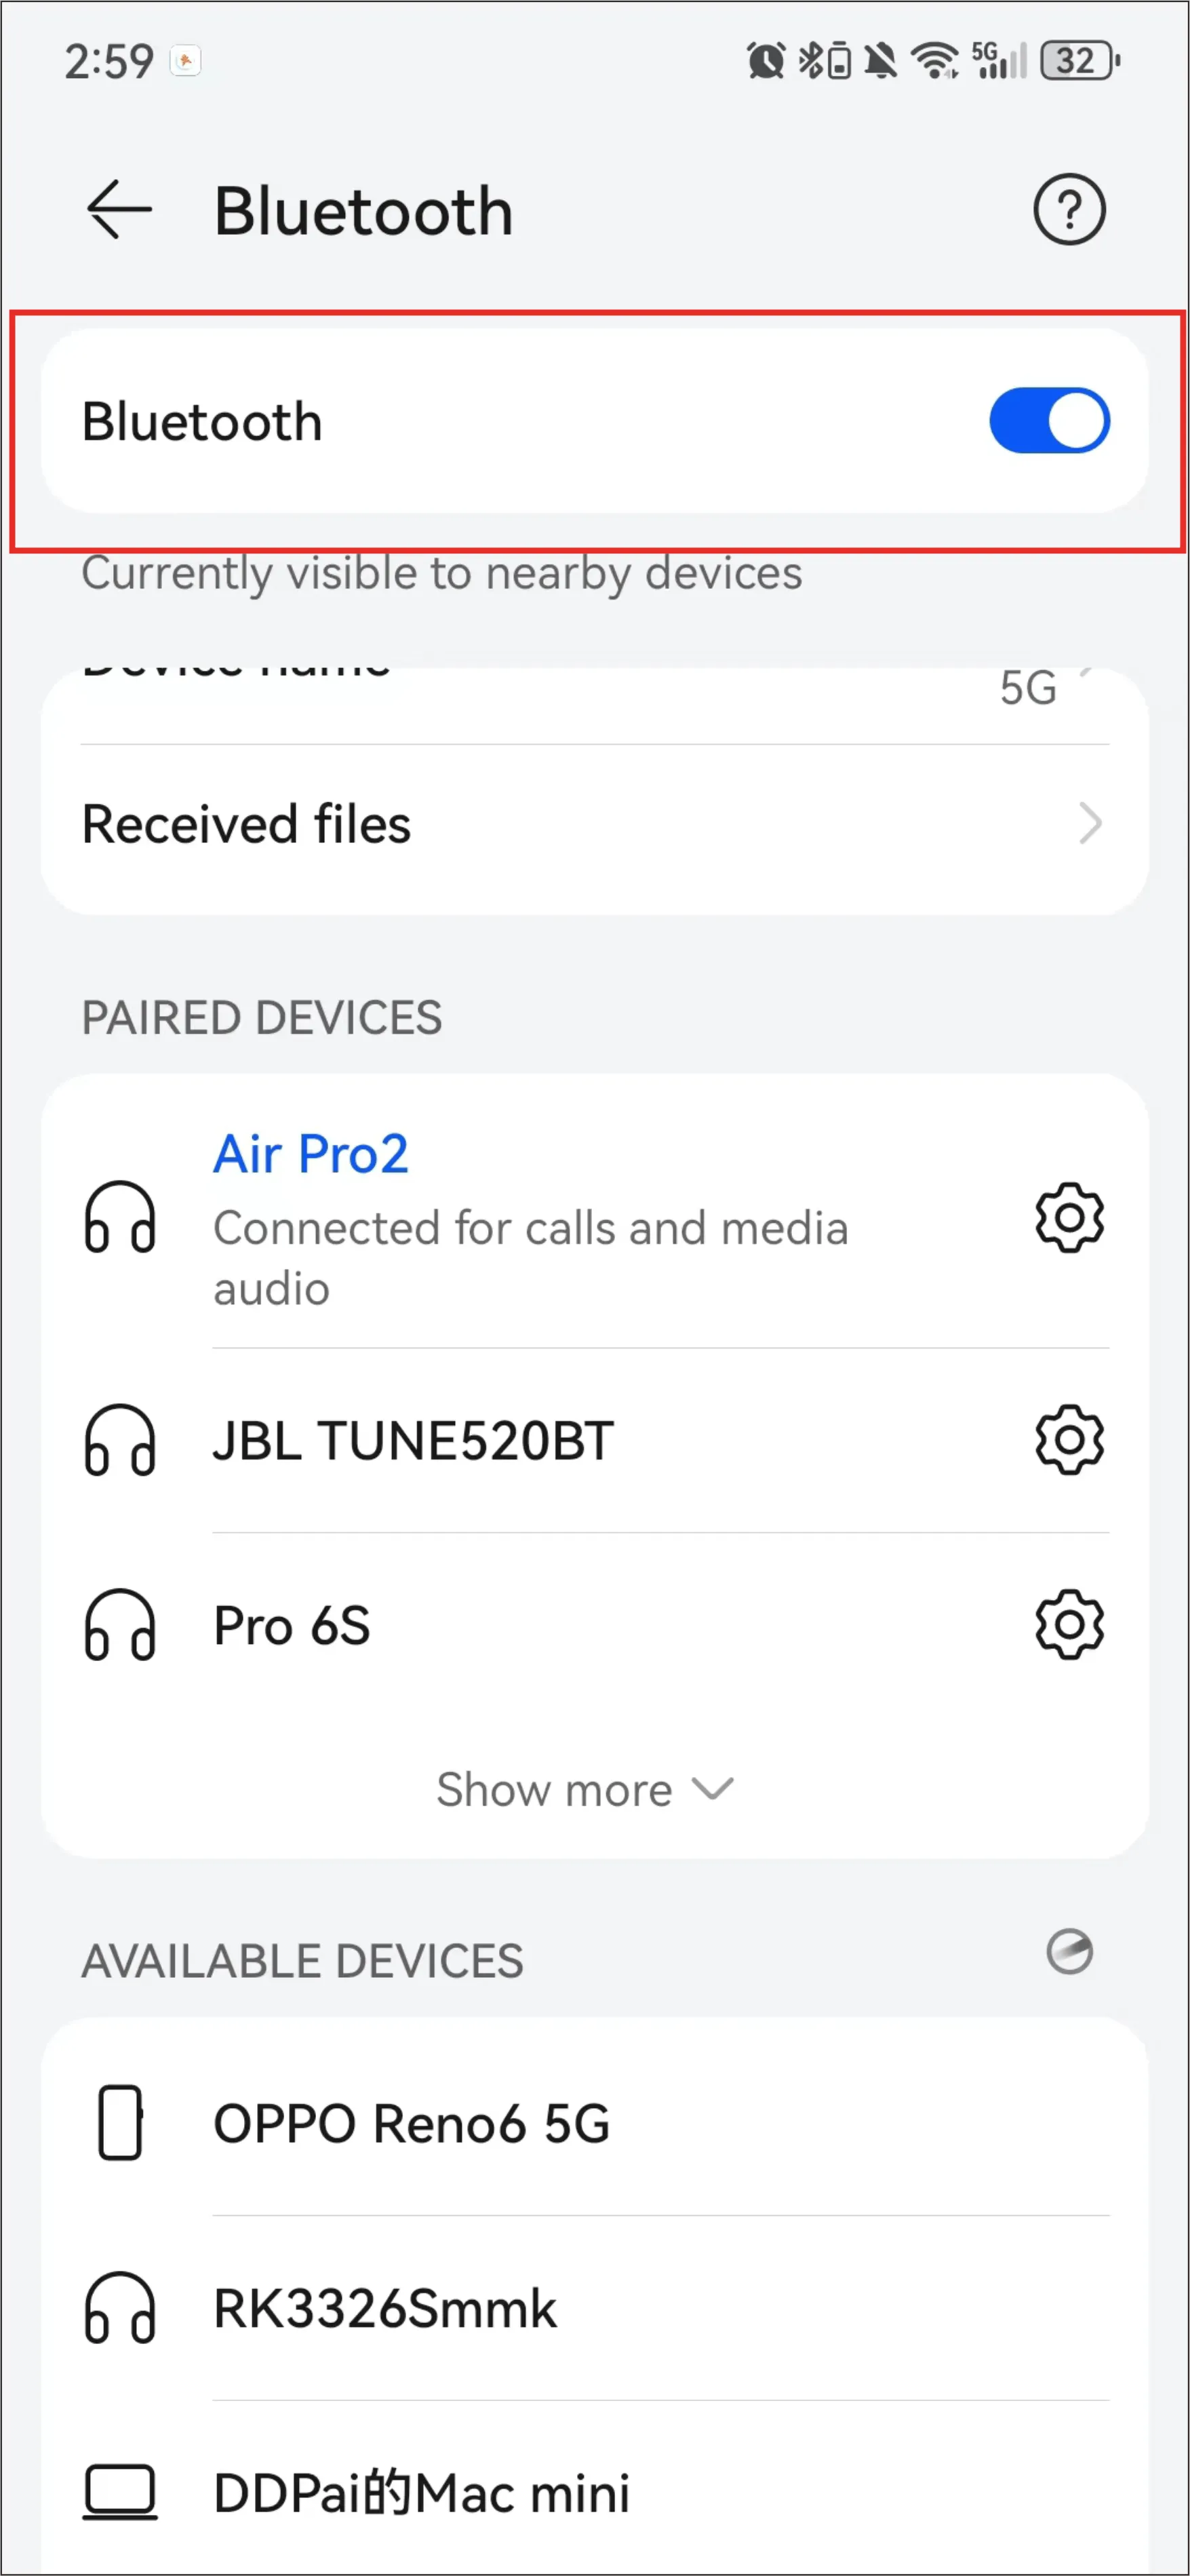
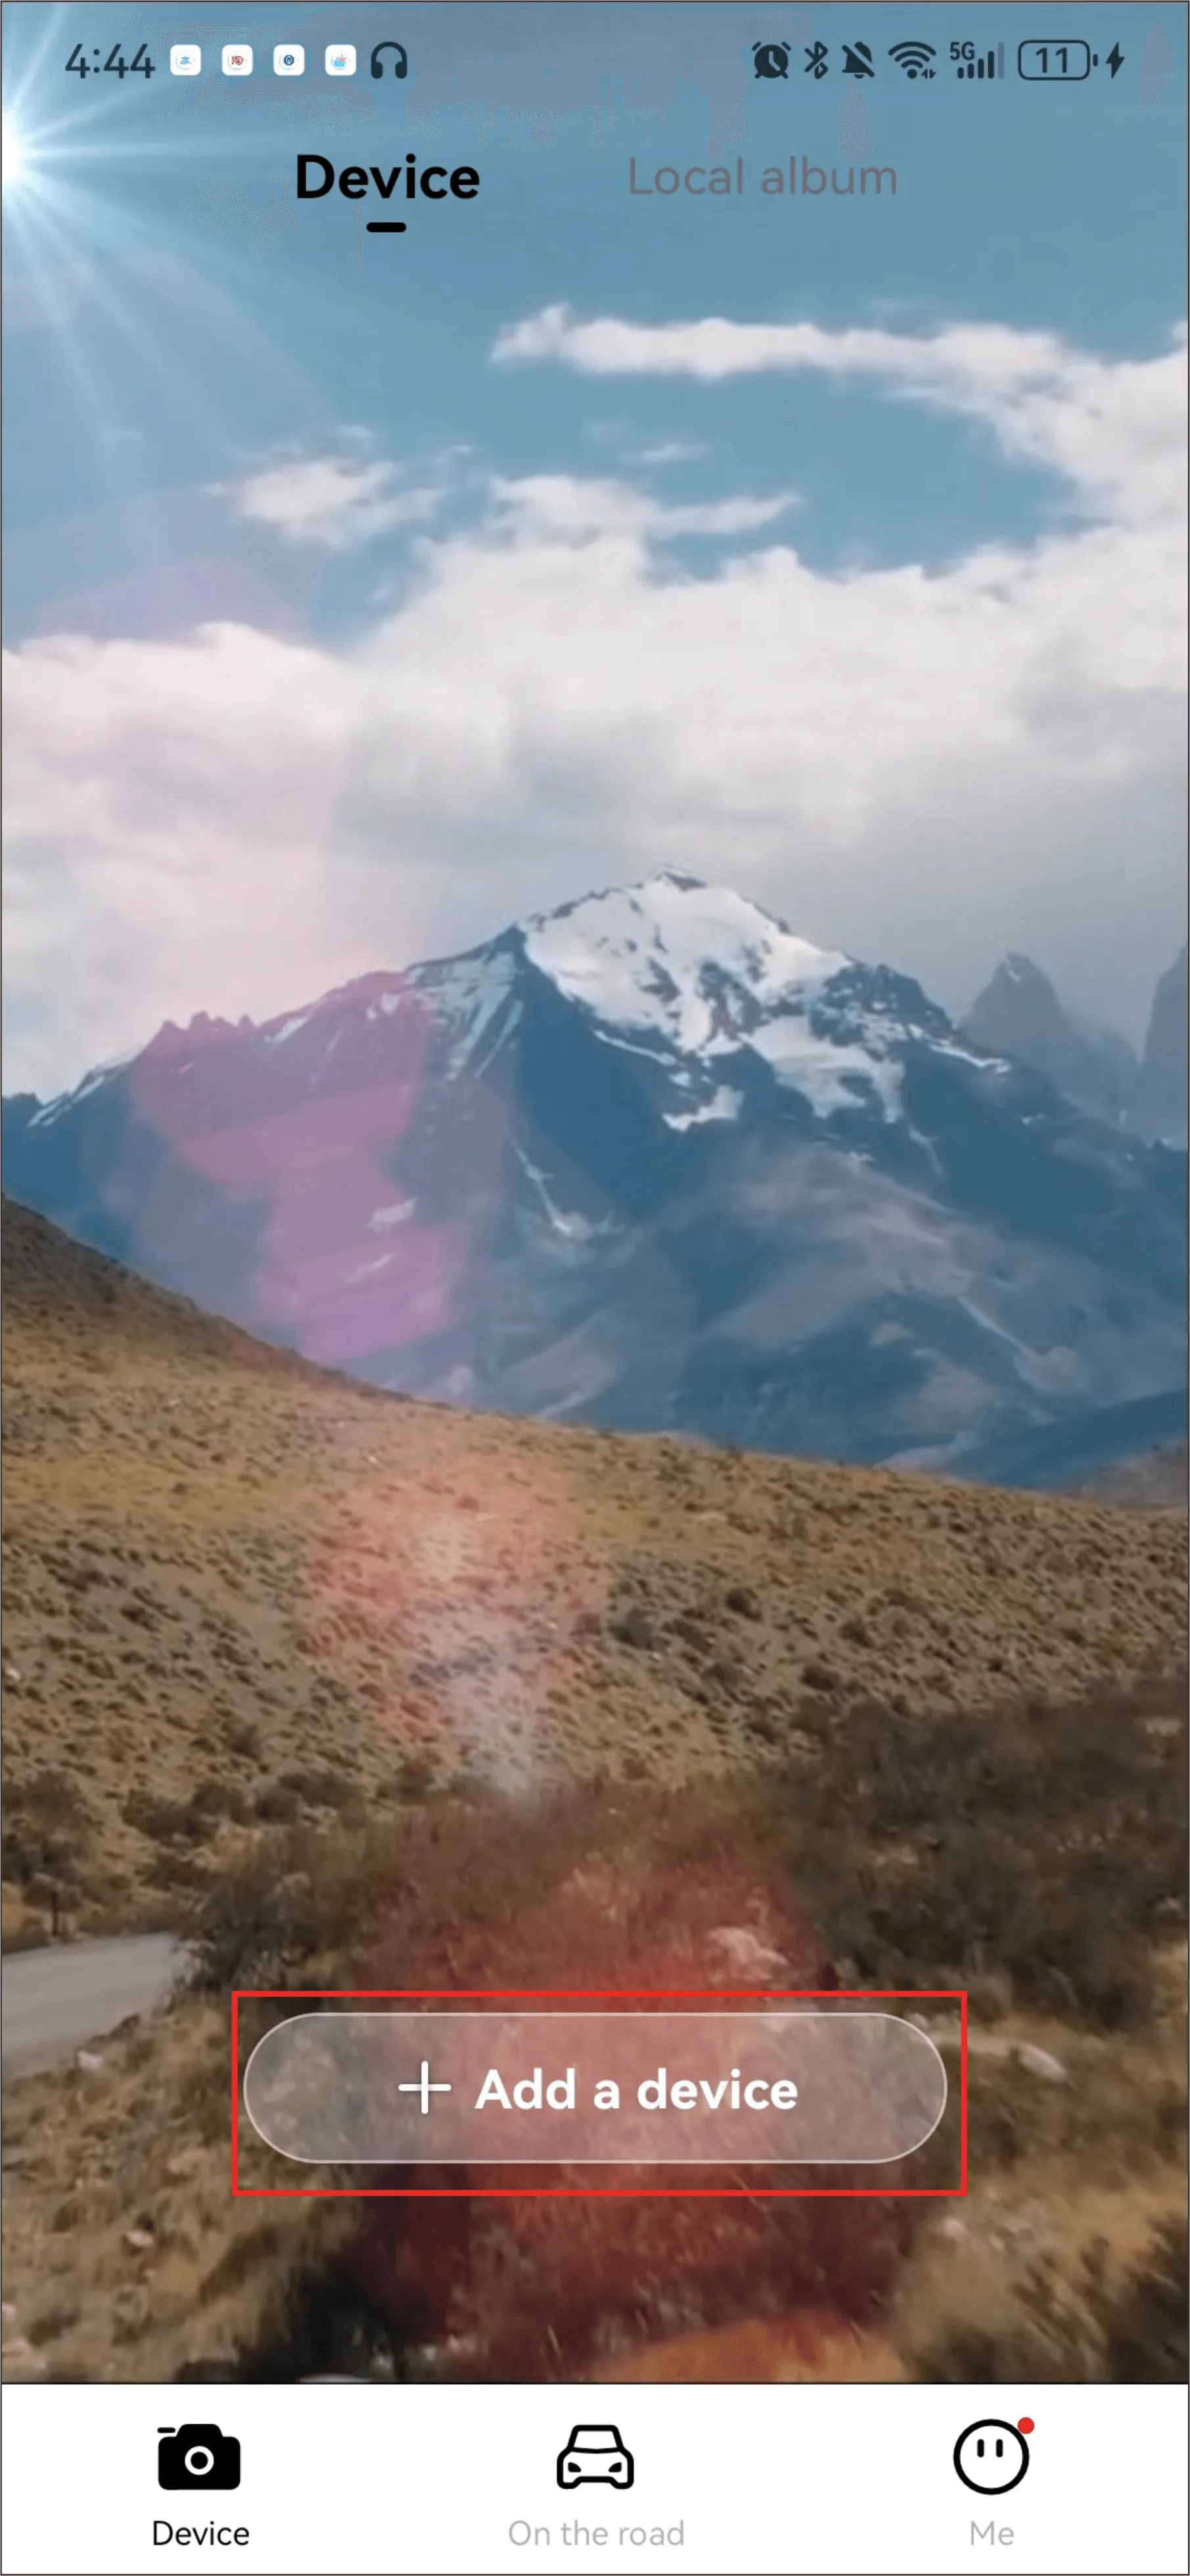
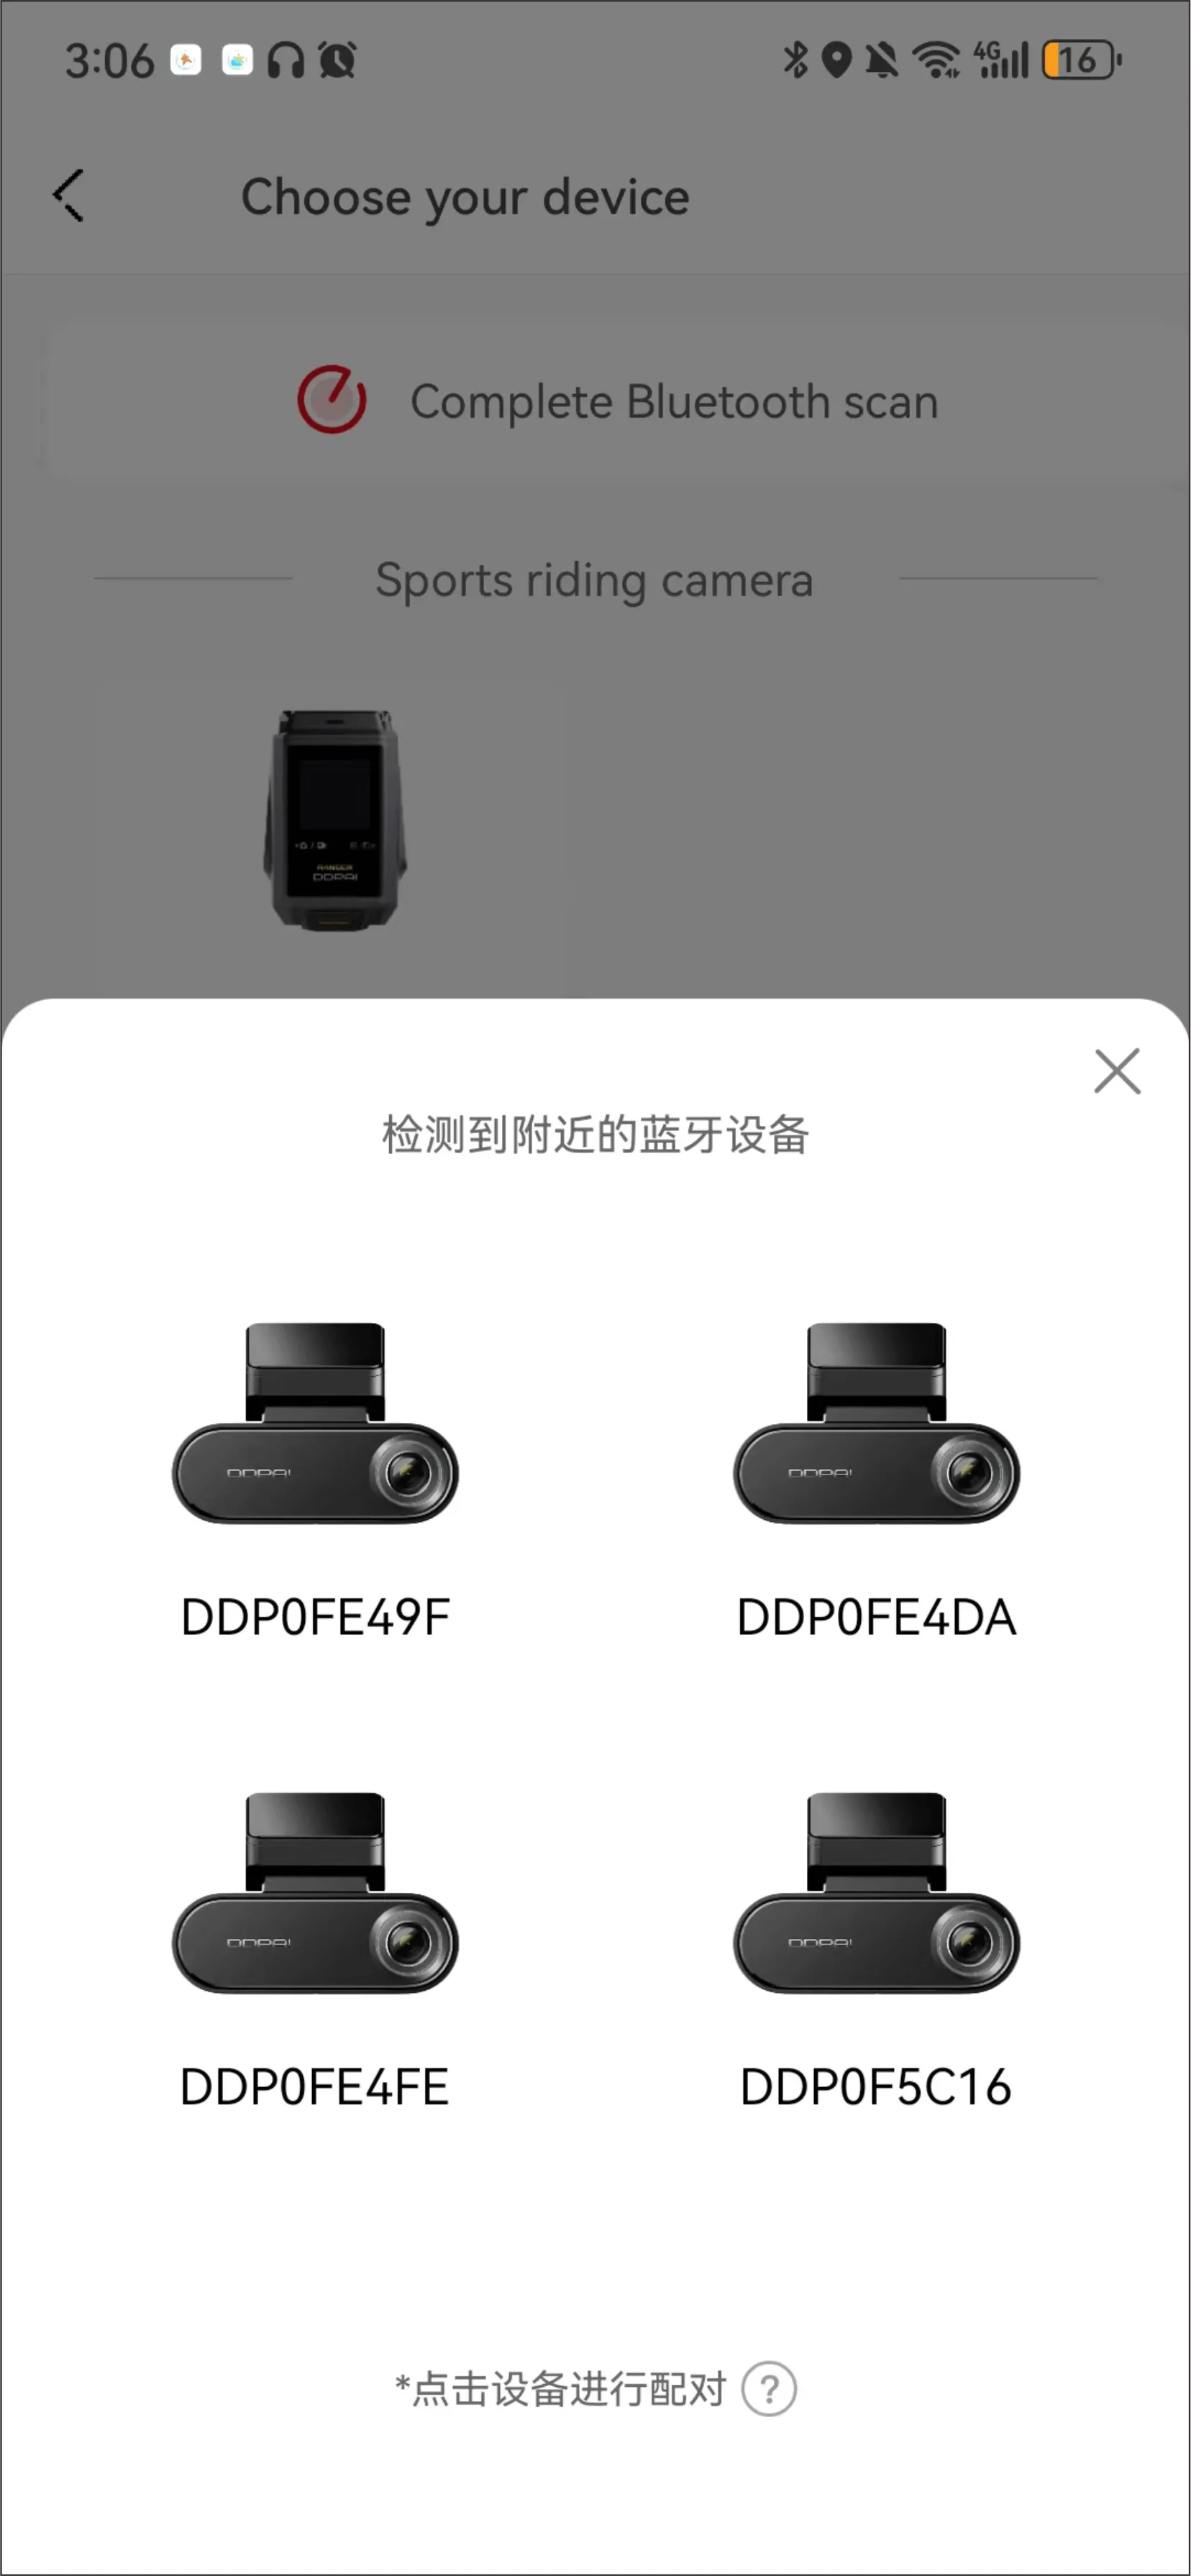
Bluetooth Connection
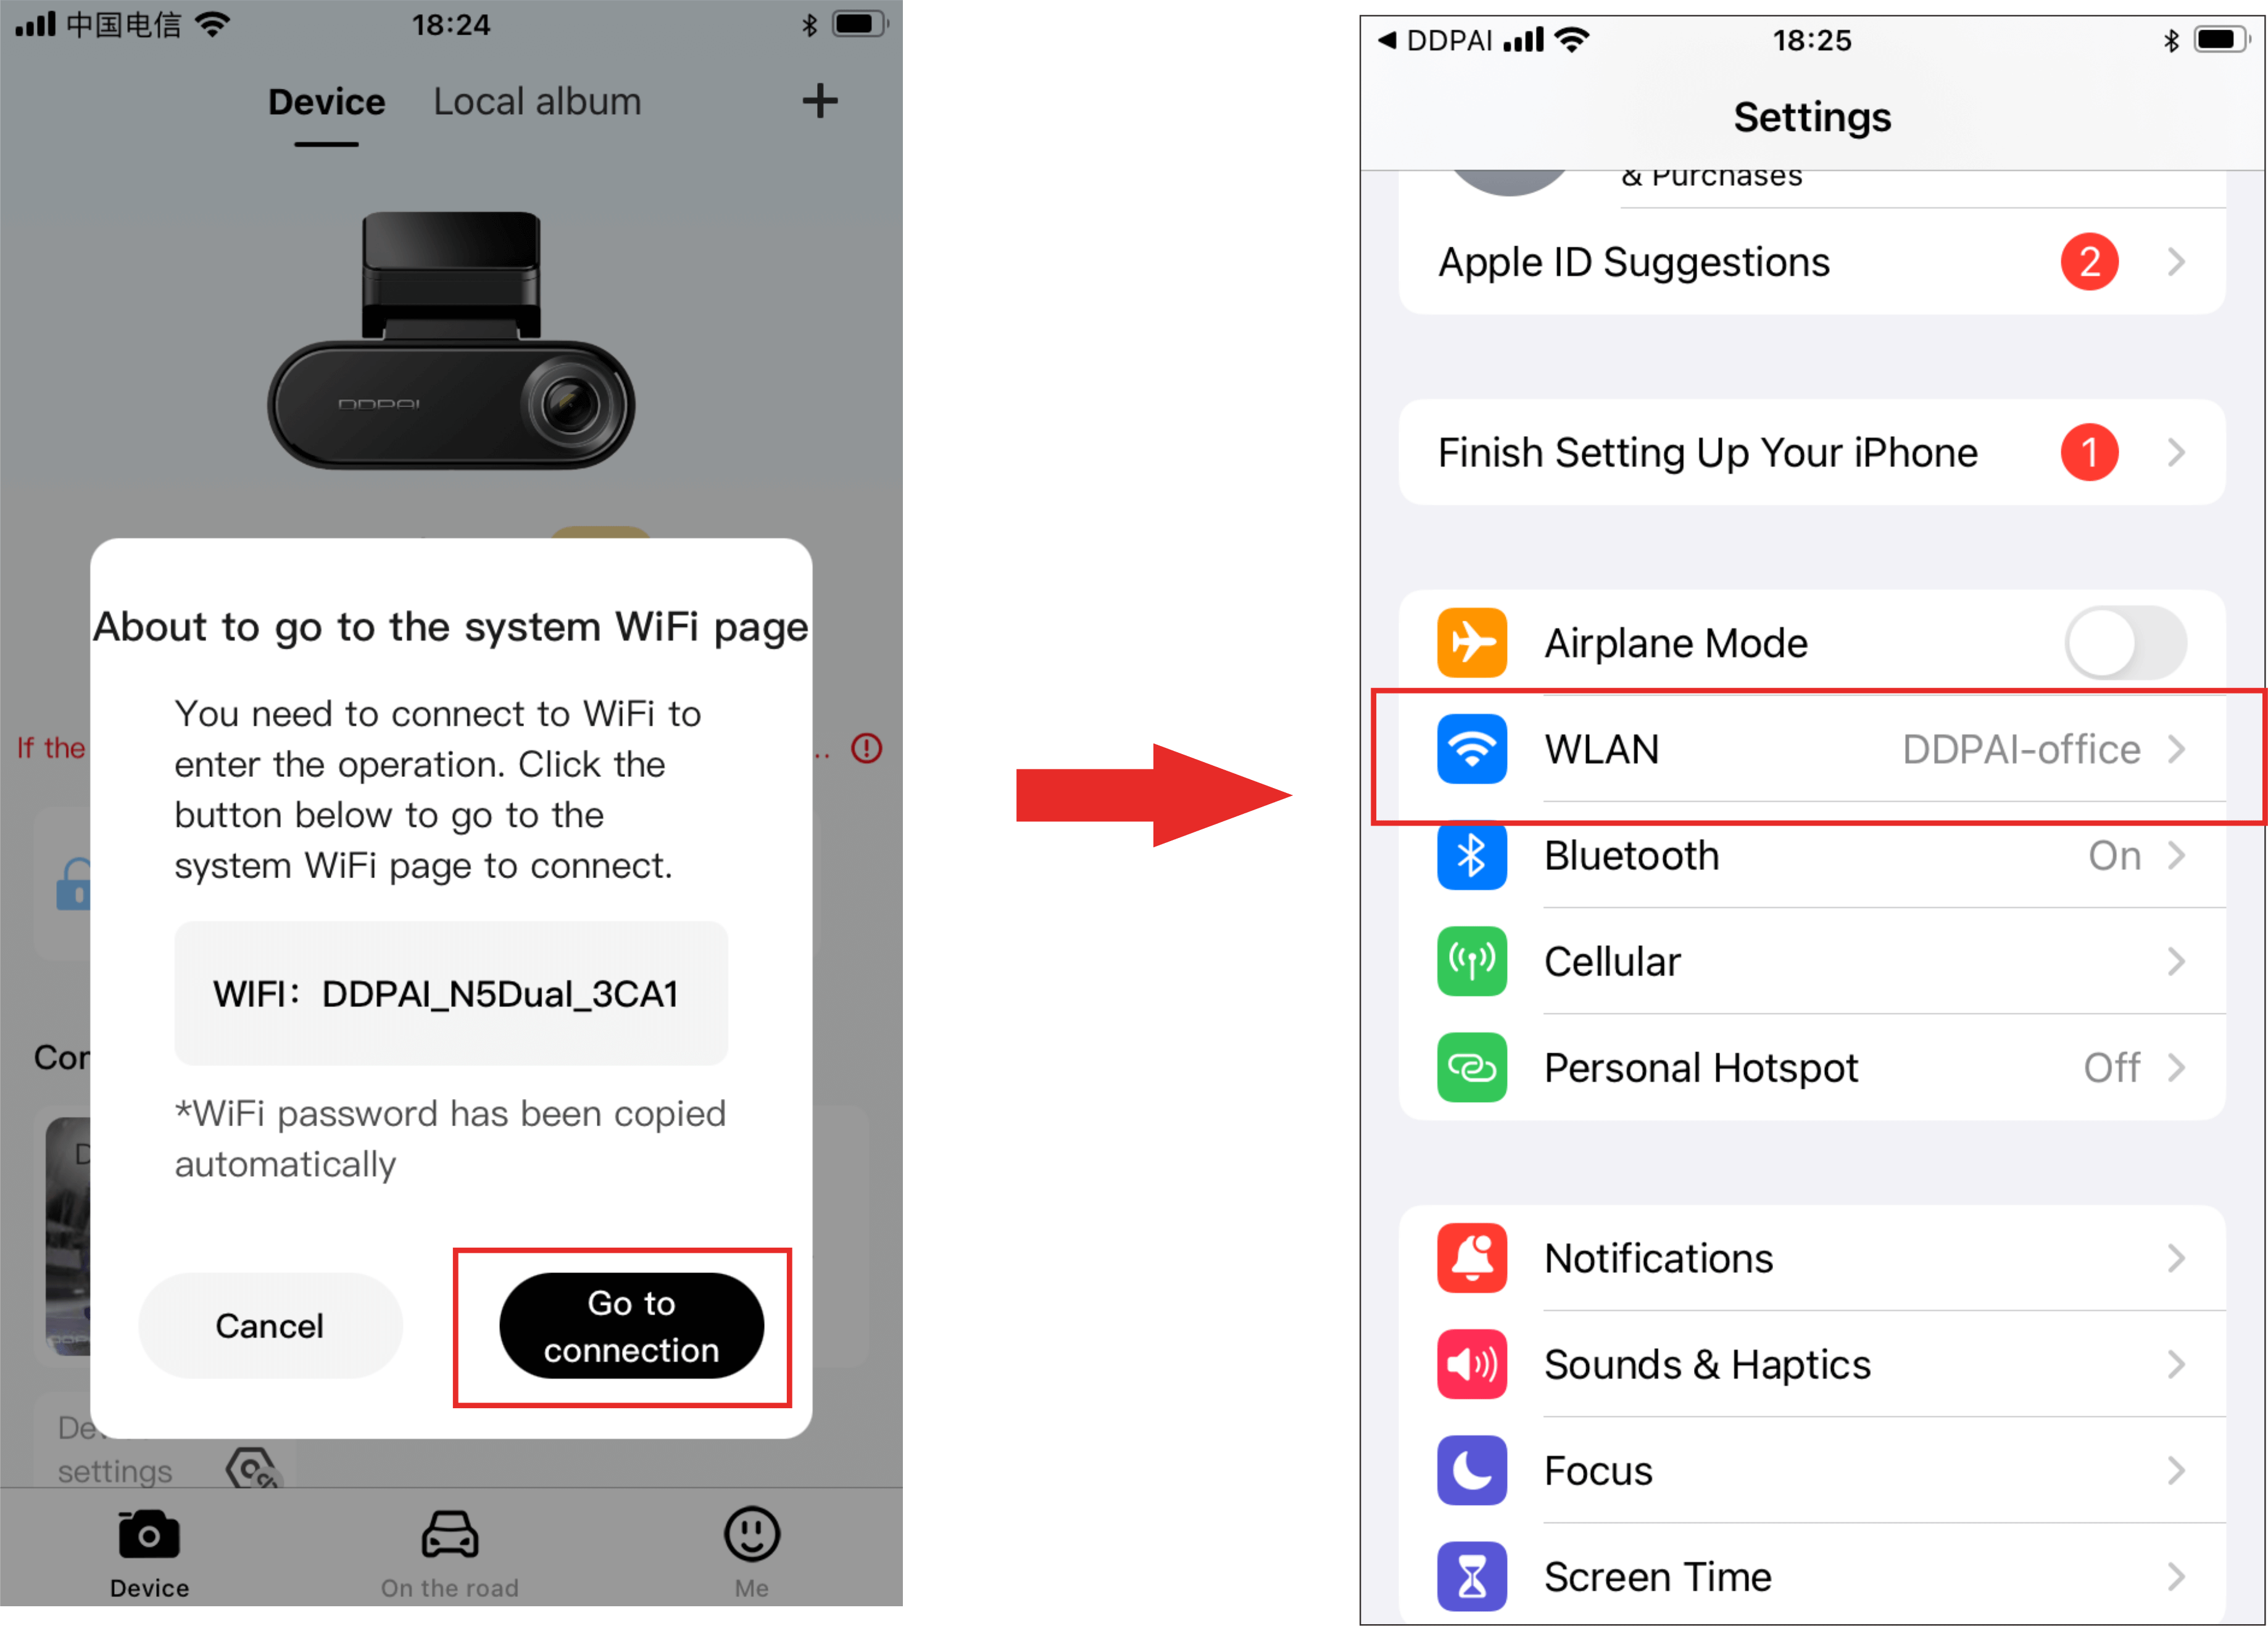
② Tap “Next” > “Connect to Wi-Fi” in turn, and the detected Wi-Fi of the Dash Cam will be displayed.
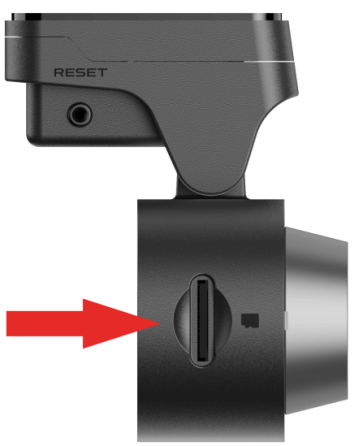
Memory Card Installation
Dash Cam Installation
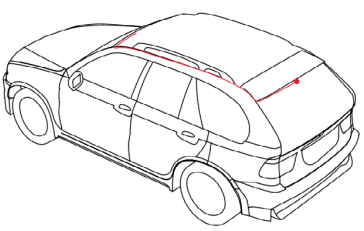
The wiring and power-taking installation method of the Dash Cam include the following three types. You can scan the QR code below for reference.

▶ Cigarette Lighter Power Supply
Insert the car charger into the cigarette lighter, and connect the car charger and the Dash Cam through the power cord. Most of the power cord will be embedded in the plastic guard plate of the car, and a small part will be exposed in the car. This wiring method is simple and easy to operate.
Step 1: Wipe the front windshield
Wipe the front windshield with a clean soft cloth to ensure that the bracket can stick firmly.
Step 2: Power on the Dash Cam
After inserting the car charger into the cigarette lighter, connect the Dash Cam to the car charger using the included Type-C power cord.
After the car starts, the Dash Cam will automatically start when it is powered on, and the start-up prompt tone “Hello, DDPAI” will be issued, and the Dash Cam will start recording at this time.
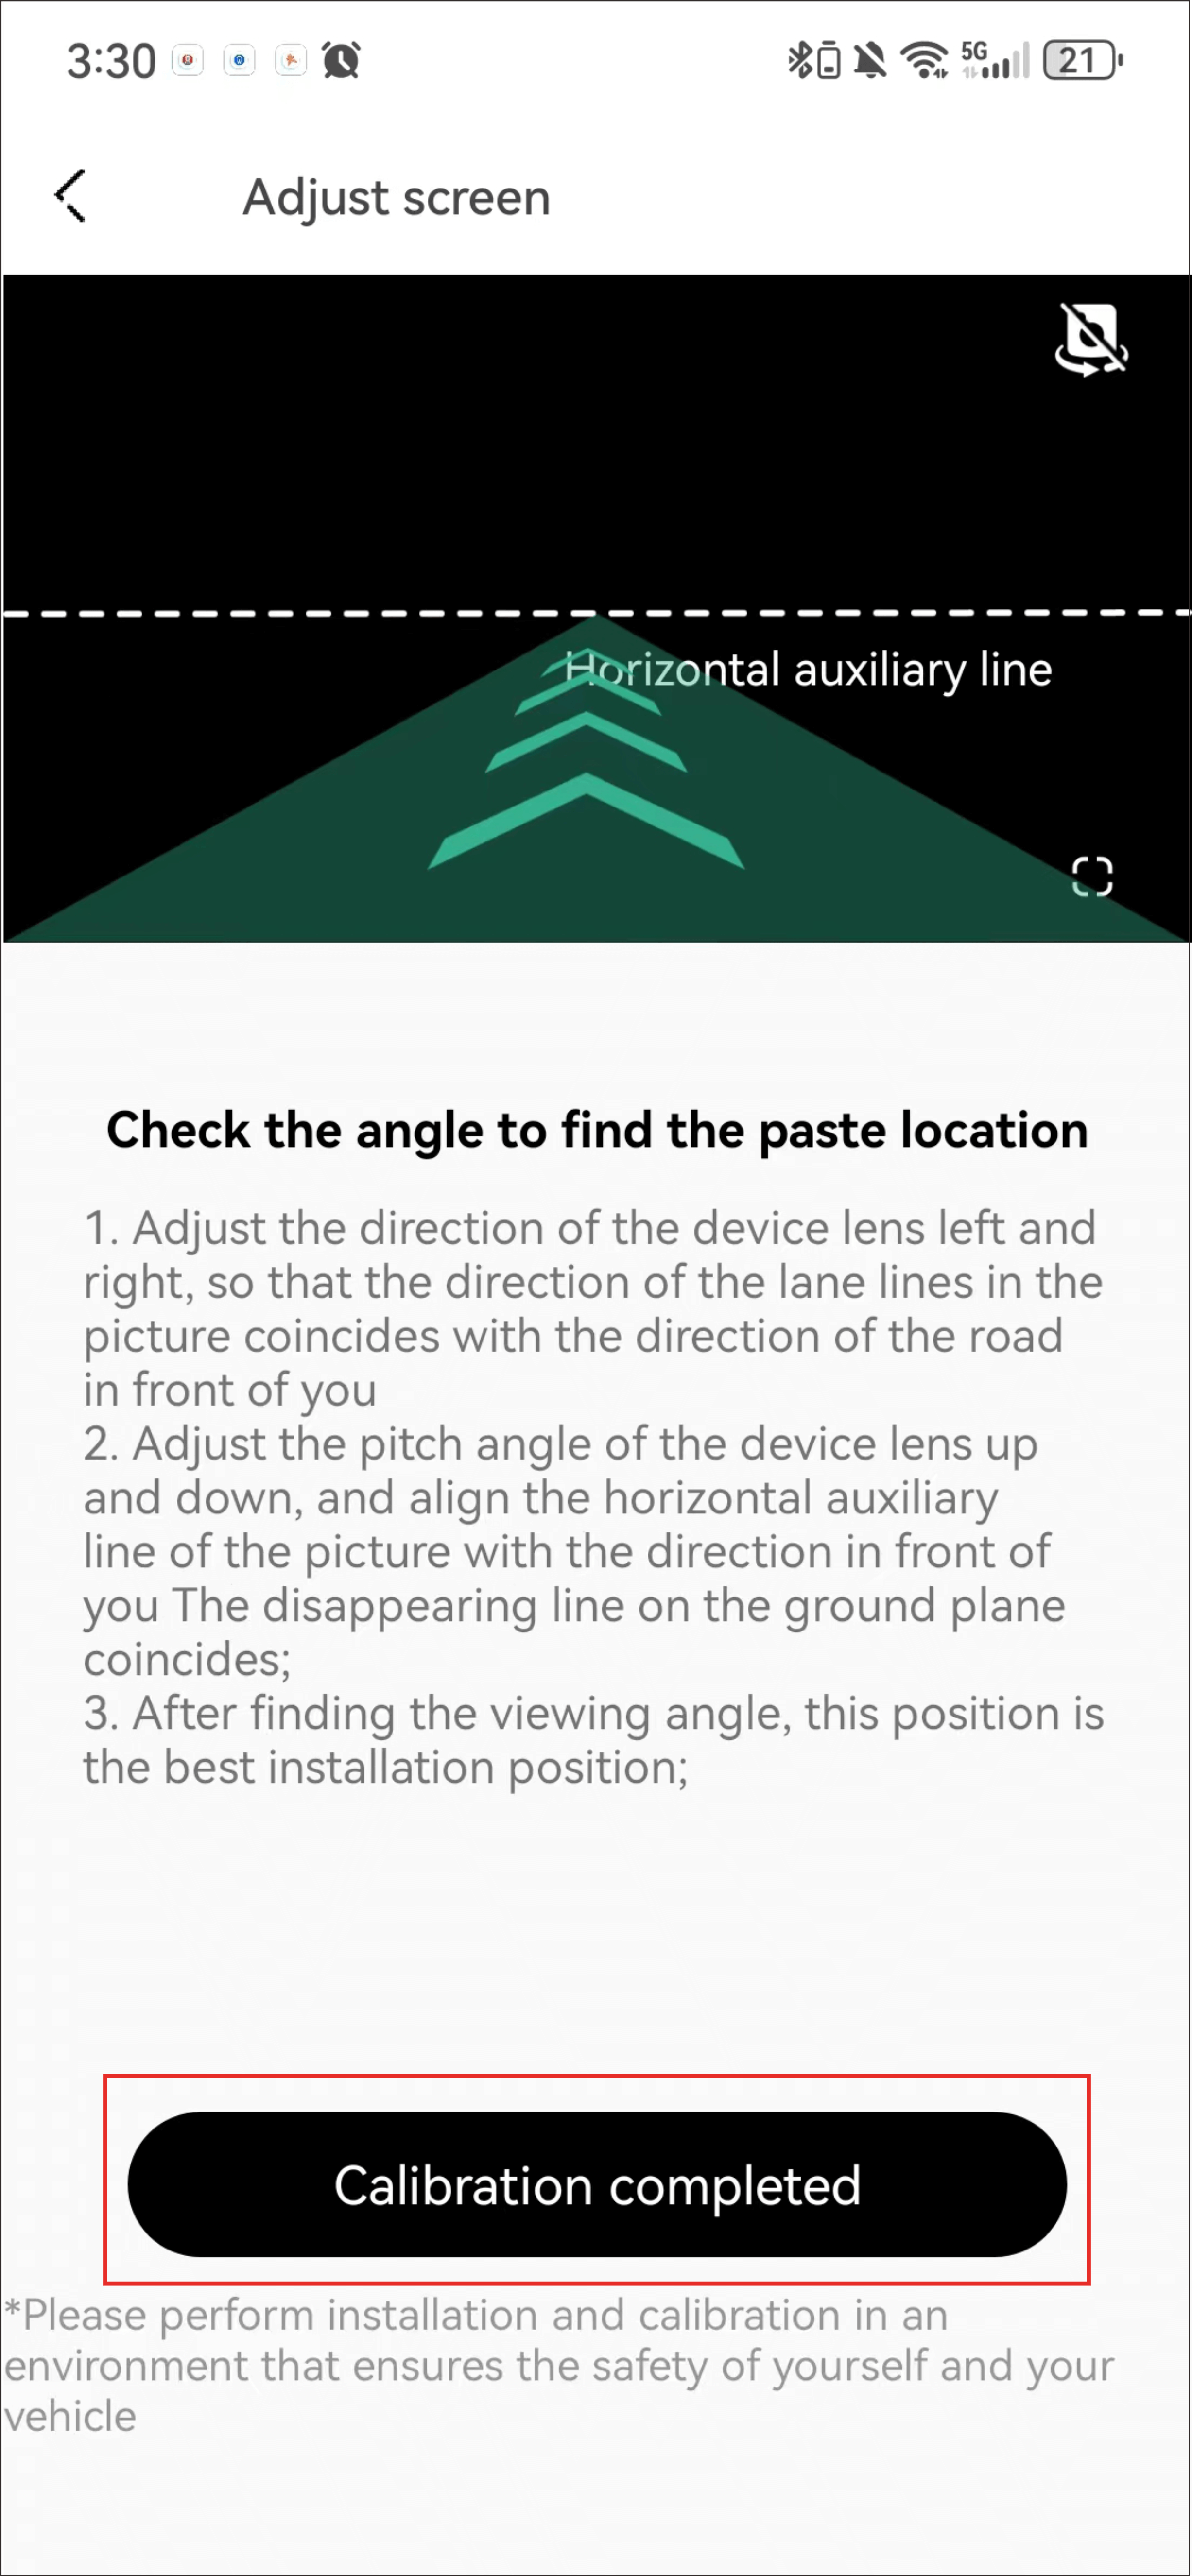
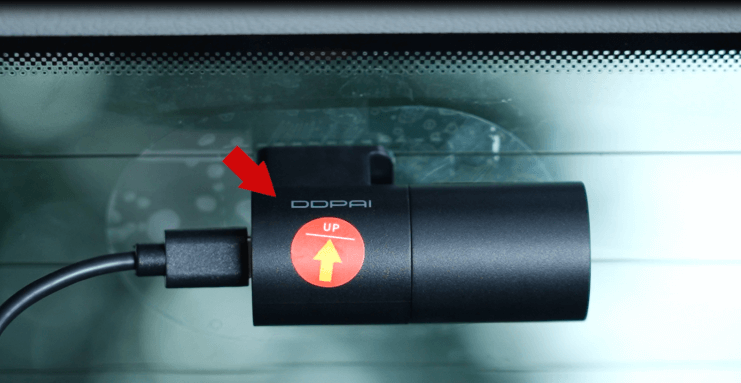
Step 3: Determine the installation position of the Dash Cam and adjust the lens angle
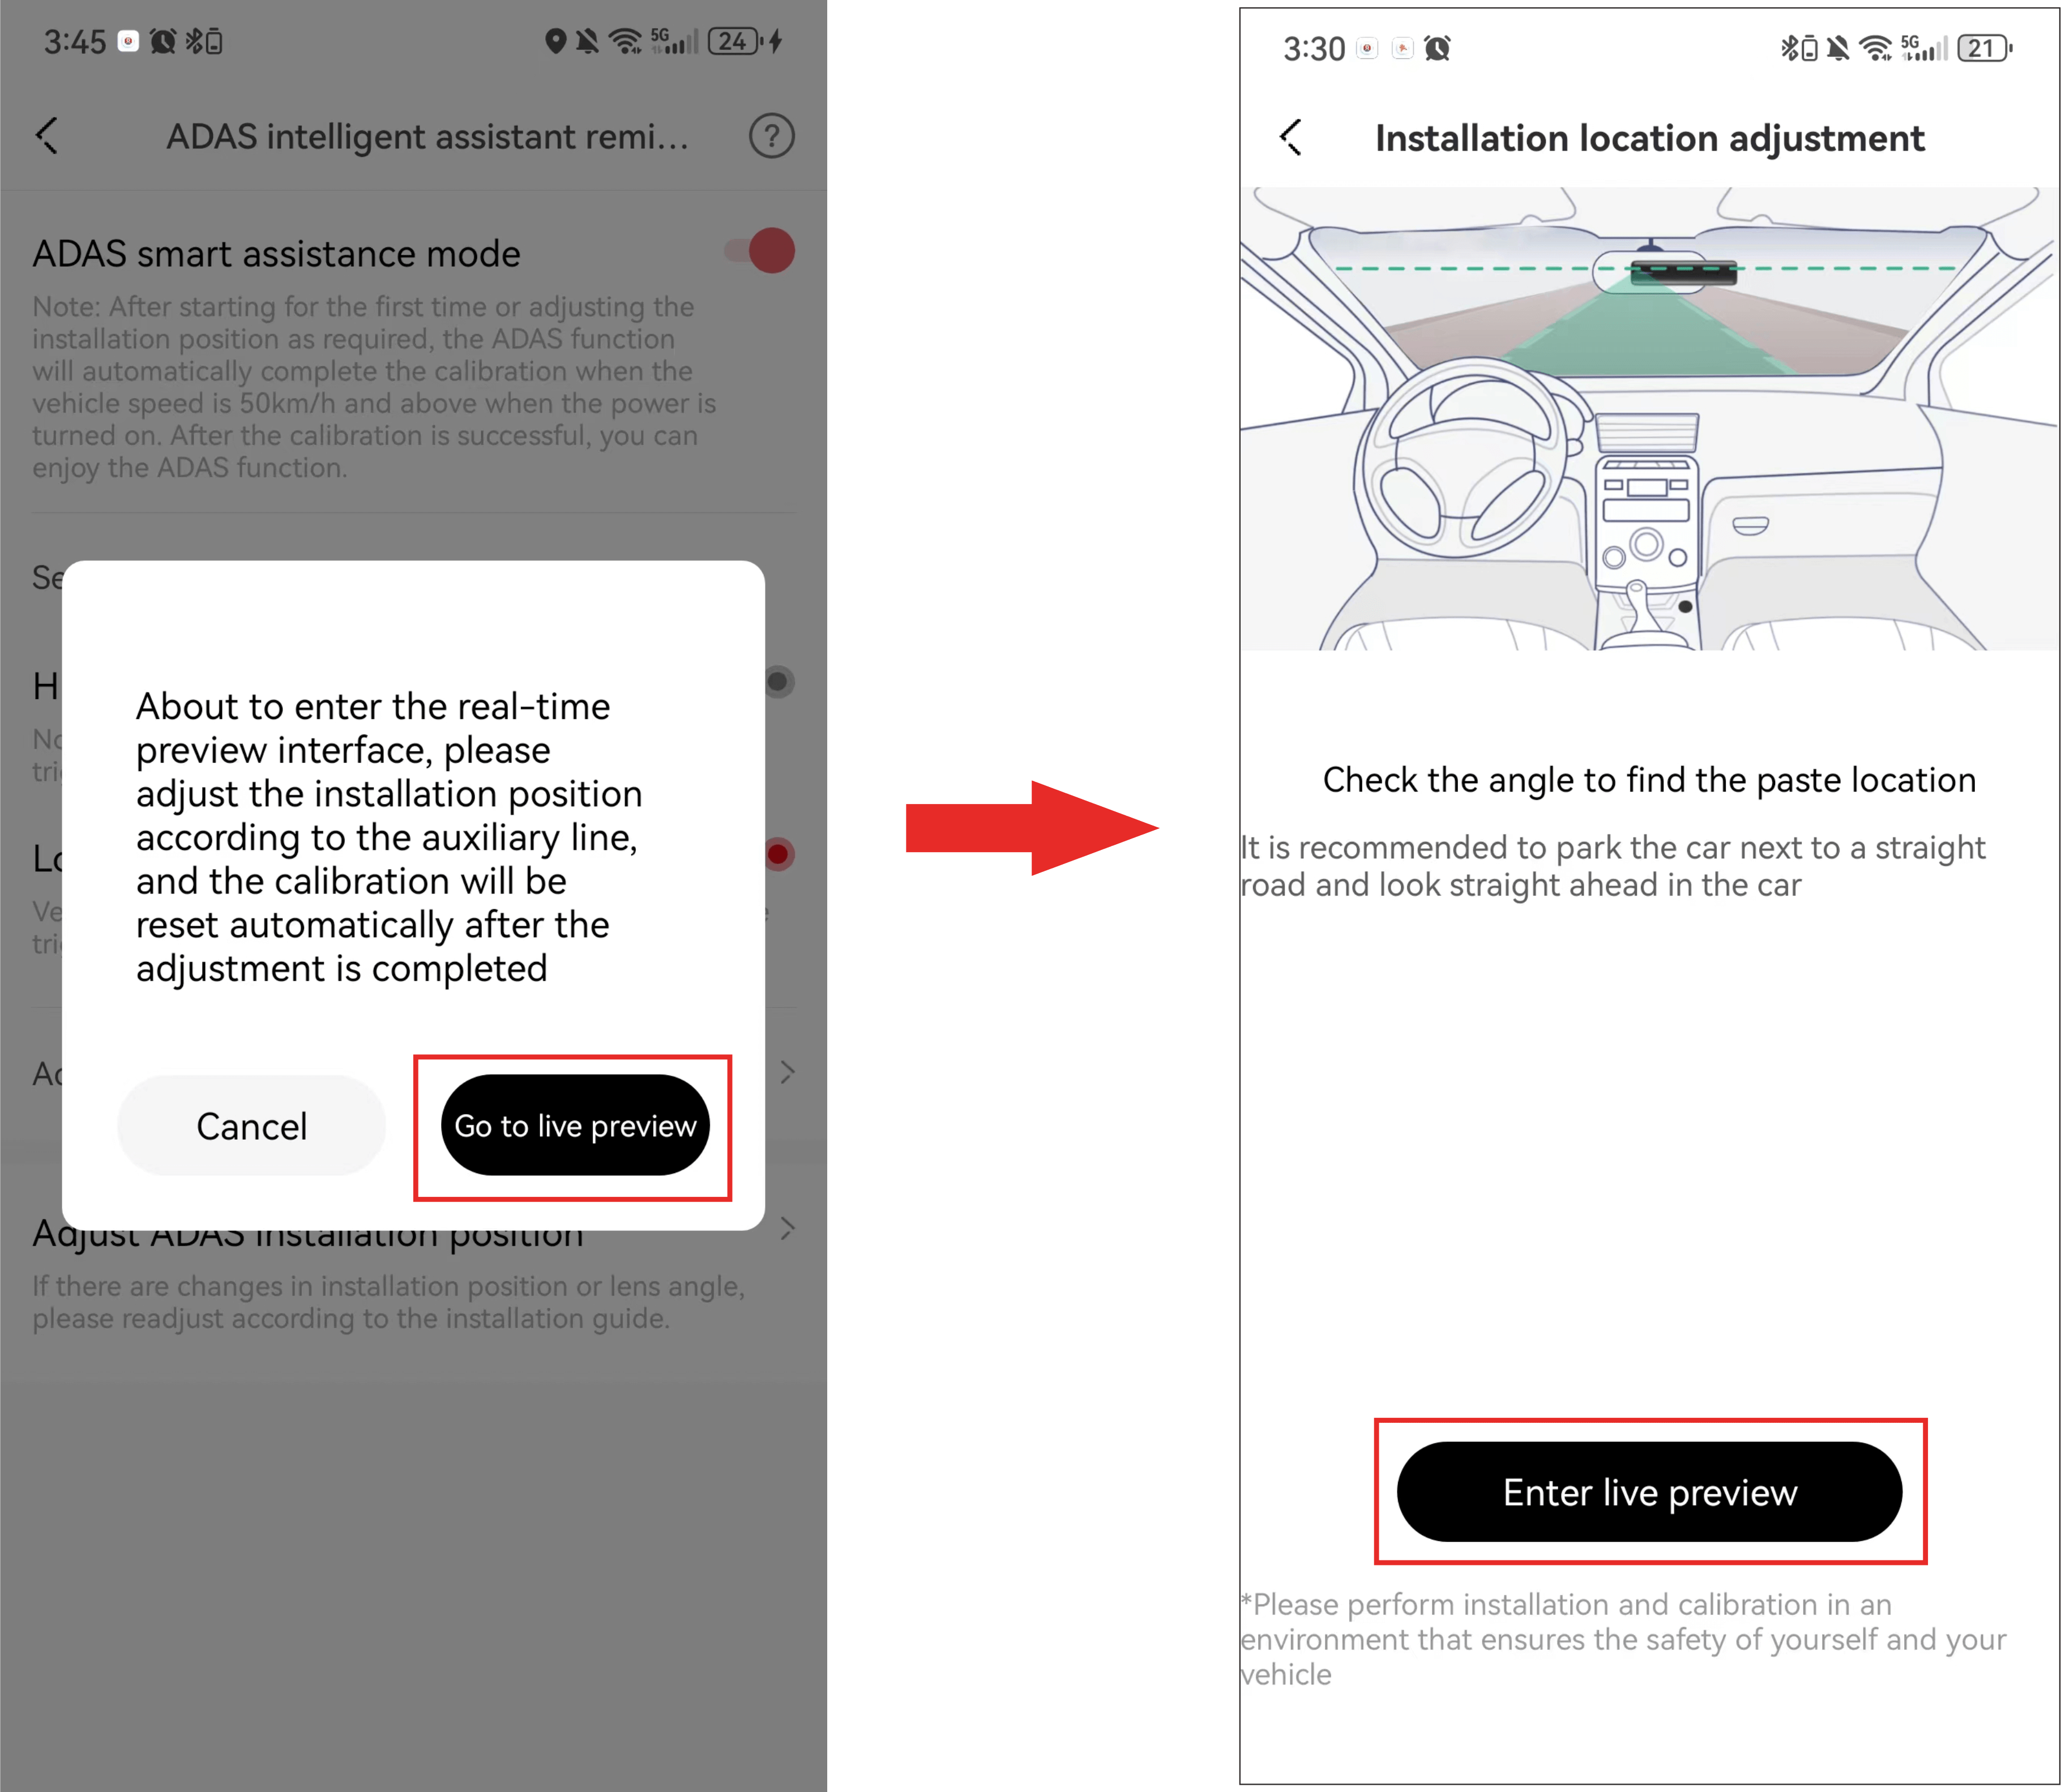
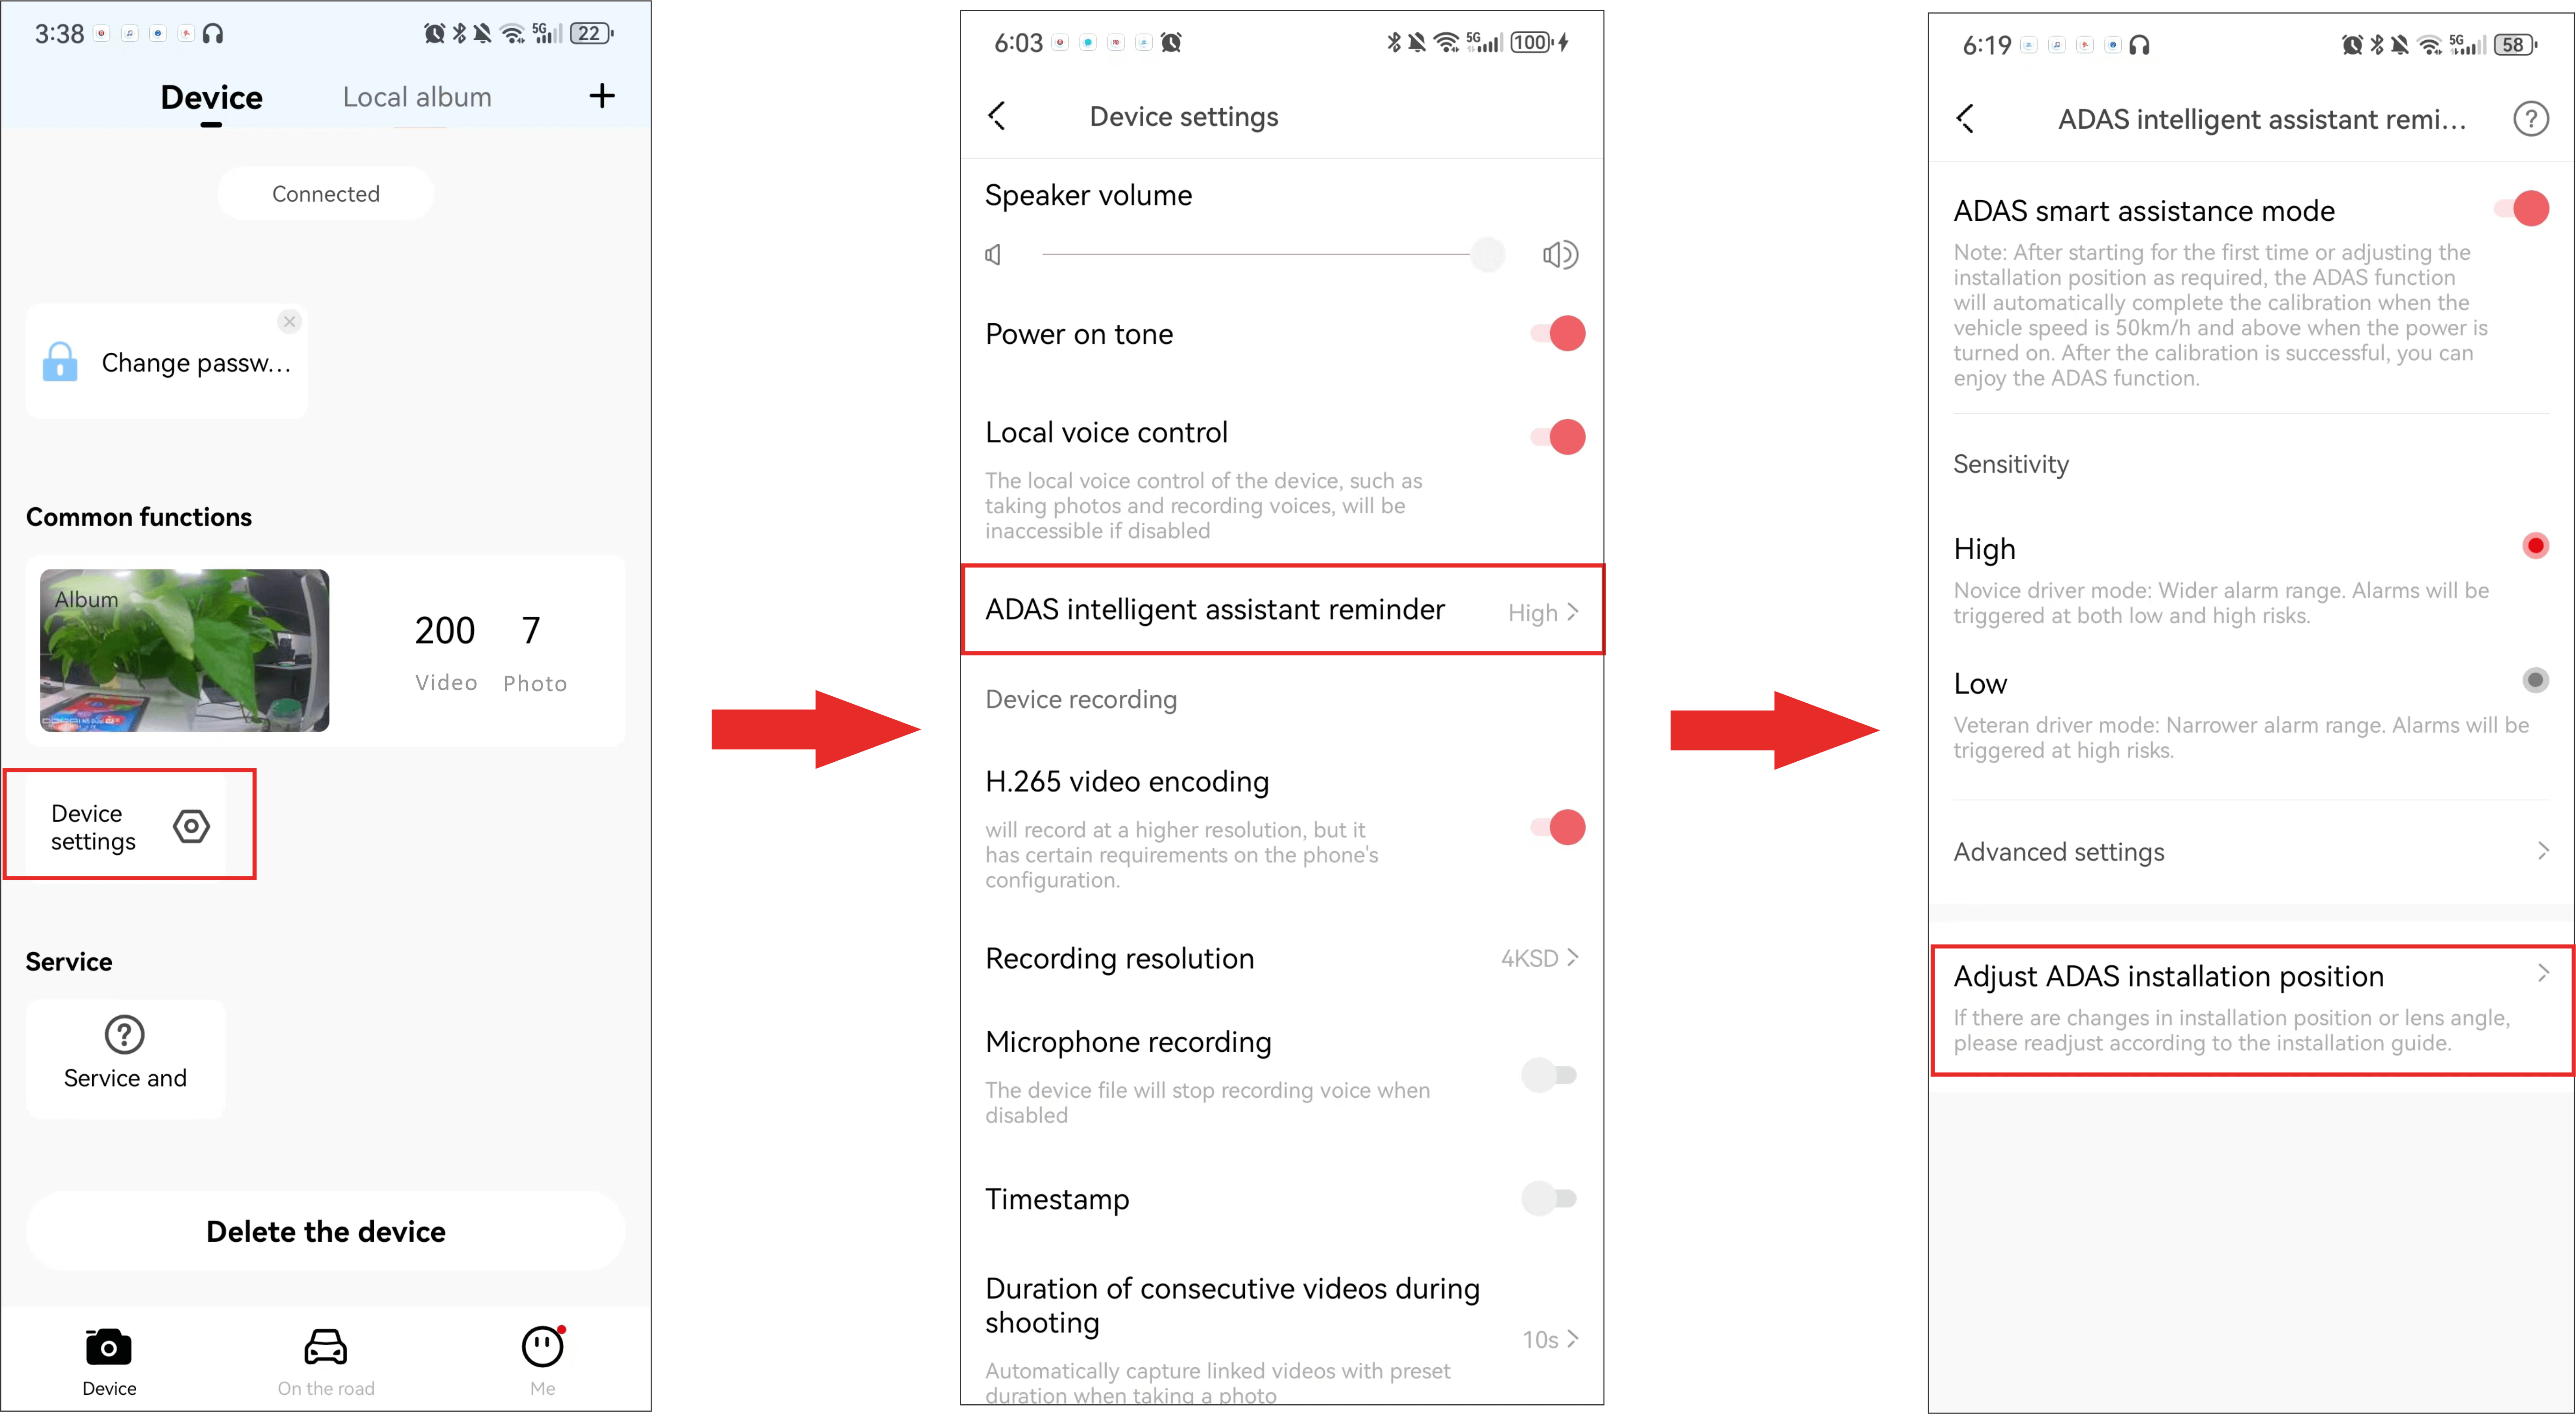
① After connecting the DDPAI App to the Dash Cam, launch the app, tap“Device Settings”> “ADAS intelligent assistance reminder”> “Adjust ADAS Installation position”.


Connect the Rear Camera (Optional)

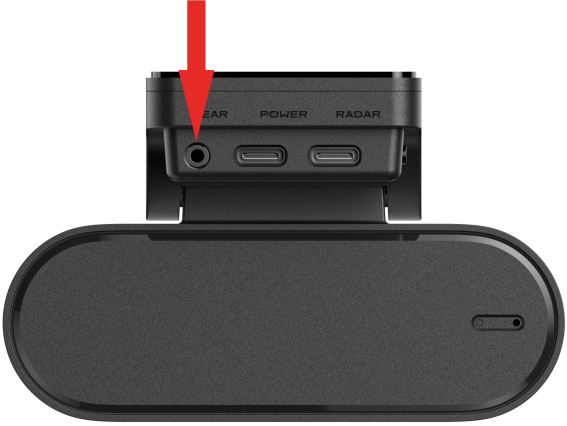
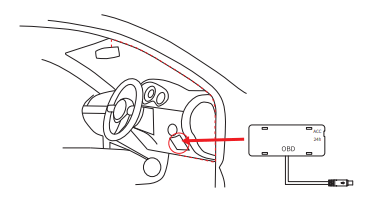
Connect the Radar Module (Optional)
Notes:
● Radar module and hardwire kit are not included in the package, please purchase separately if required.
● For detailed installation instructions, you can scan the QR code below to watch the installation video.

Connect the 4G-Cloud Box (Optional)

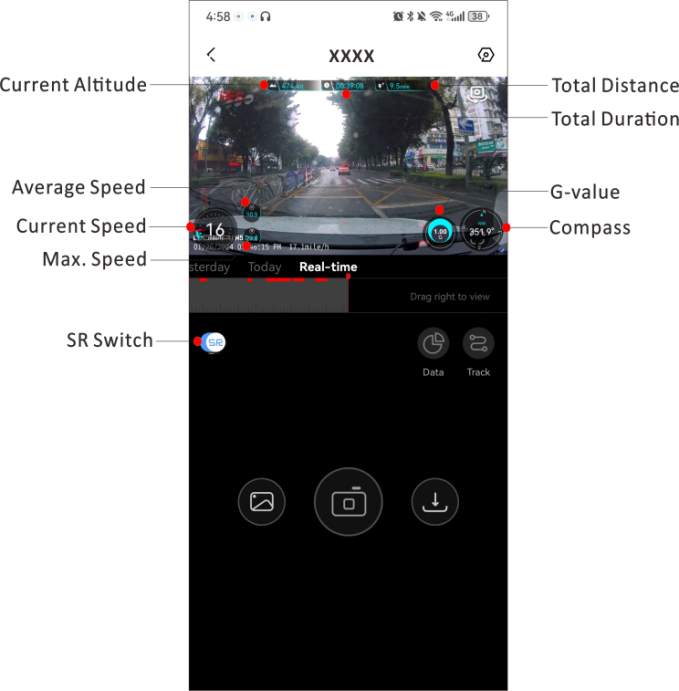
Video Function
▶ Preview video
After the app is successfully connected to the Dash Cam, tap “Enter Device”to enter the real-time preview interface, tap ![]() (Landscape Preview) or rotate your mobile phone horizontally (Your phone’s auto-rotate function needs to be turned on), and the real-time screen will automatically switch to the full-screen preview mode.
(Landscape Preview) or rotate your mobile phone horizontally (Your phone’s auto-rotate function needs to be turned on), and the real-time screen will automatically switch to the full-screen preview mode.
Color-coded timeline | Description |
| The video is triggered by an emergency event (such as a sudden braking or collision of a vehicle) |
| The video is recorded in parking monitoring mode |

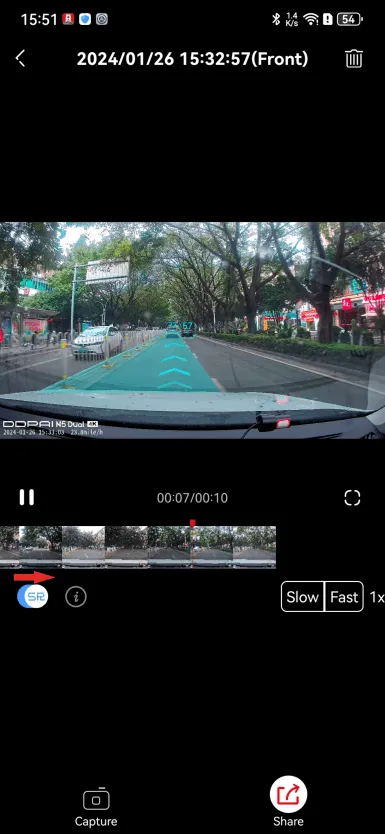
▶ Download video
● Method 1
- Drag the progress bar to select the time starting point to download.
- Tap
 to enter the downloading interface.
 - Tap“Complete”to complete the download. The file will be saved to the local album and can be shared and deleted.
Note:
The length of each video ranges from 5 seconds to 3 minutes.
● Method 2
- Tap
 on the “Device” interface.
 - Hold the video/photo file you want to download to enter the selection state.
- Select the video file you want to download and tap Download.
Taking Photos
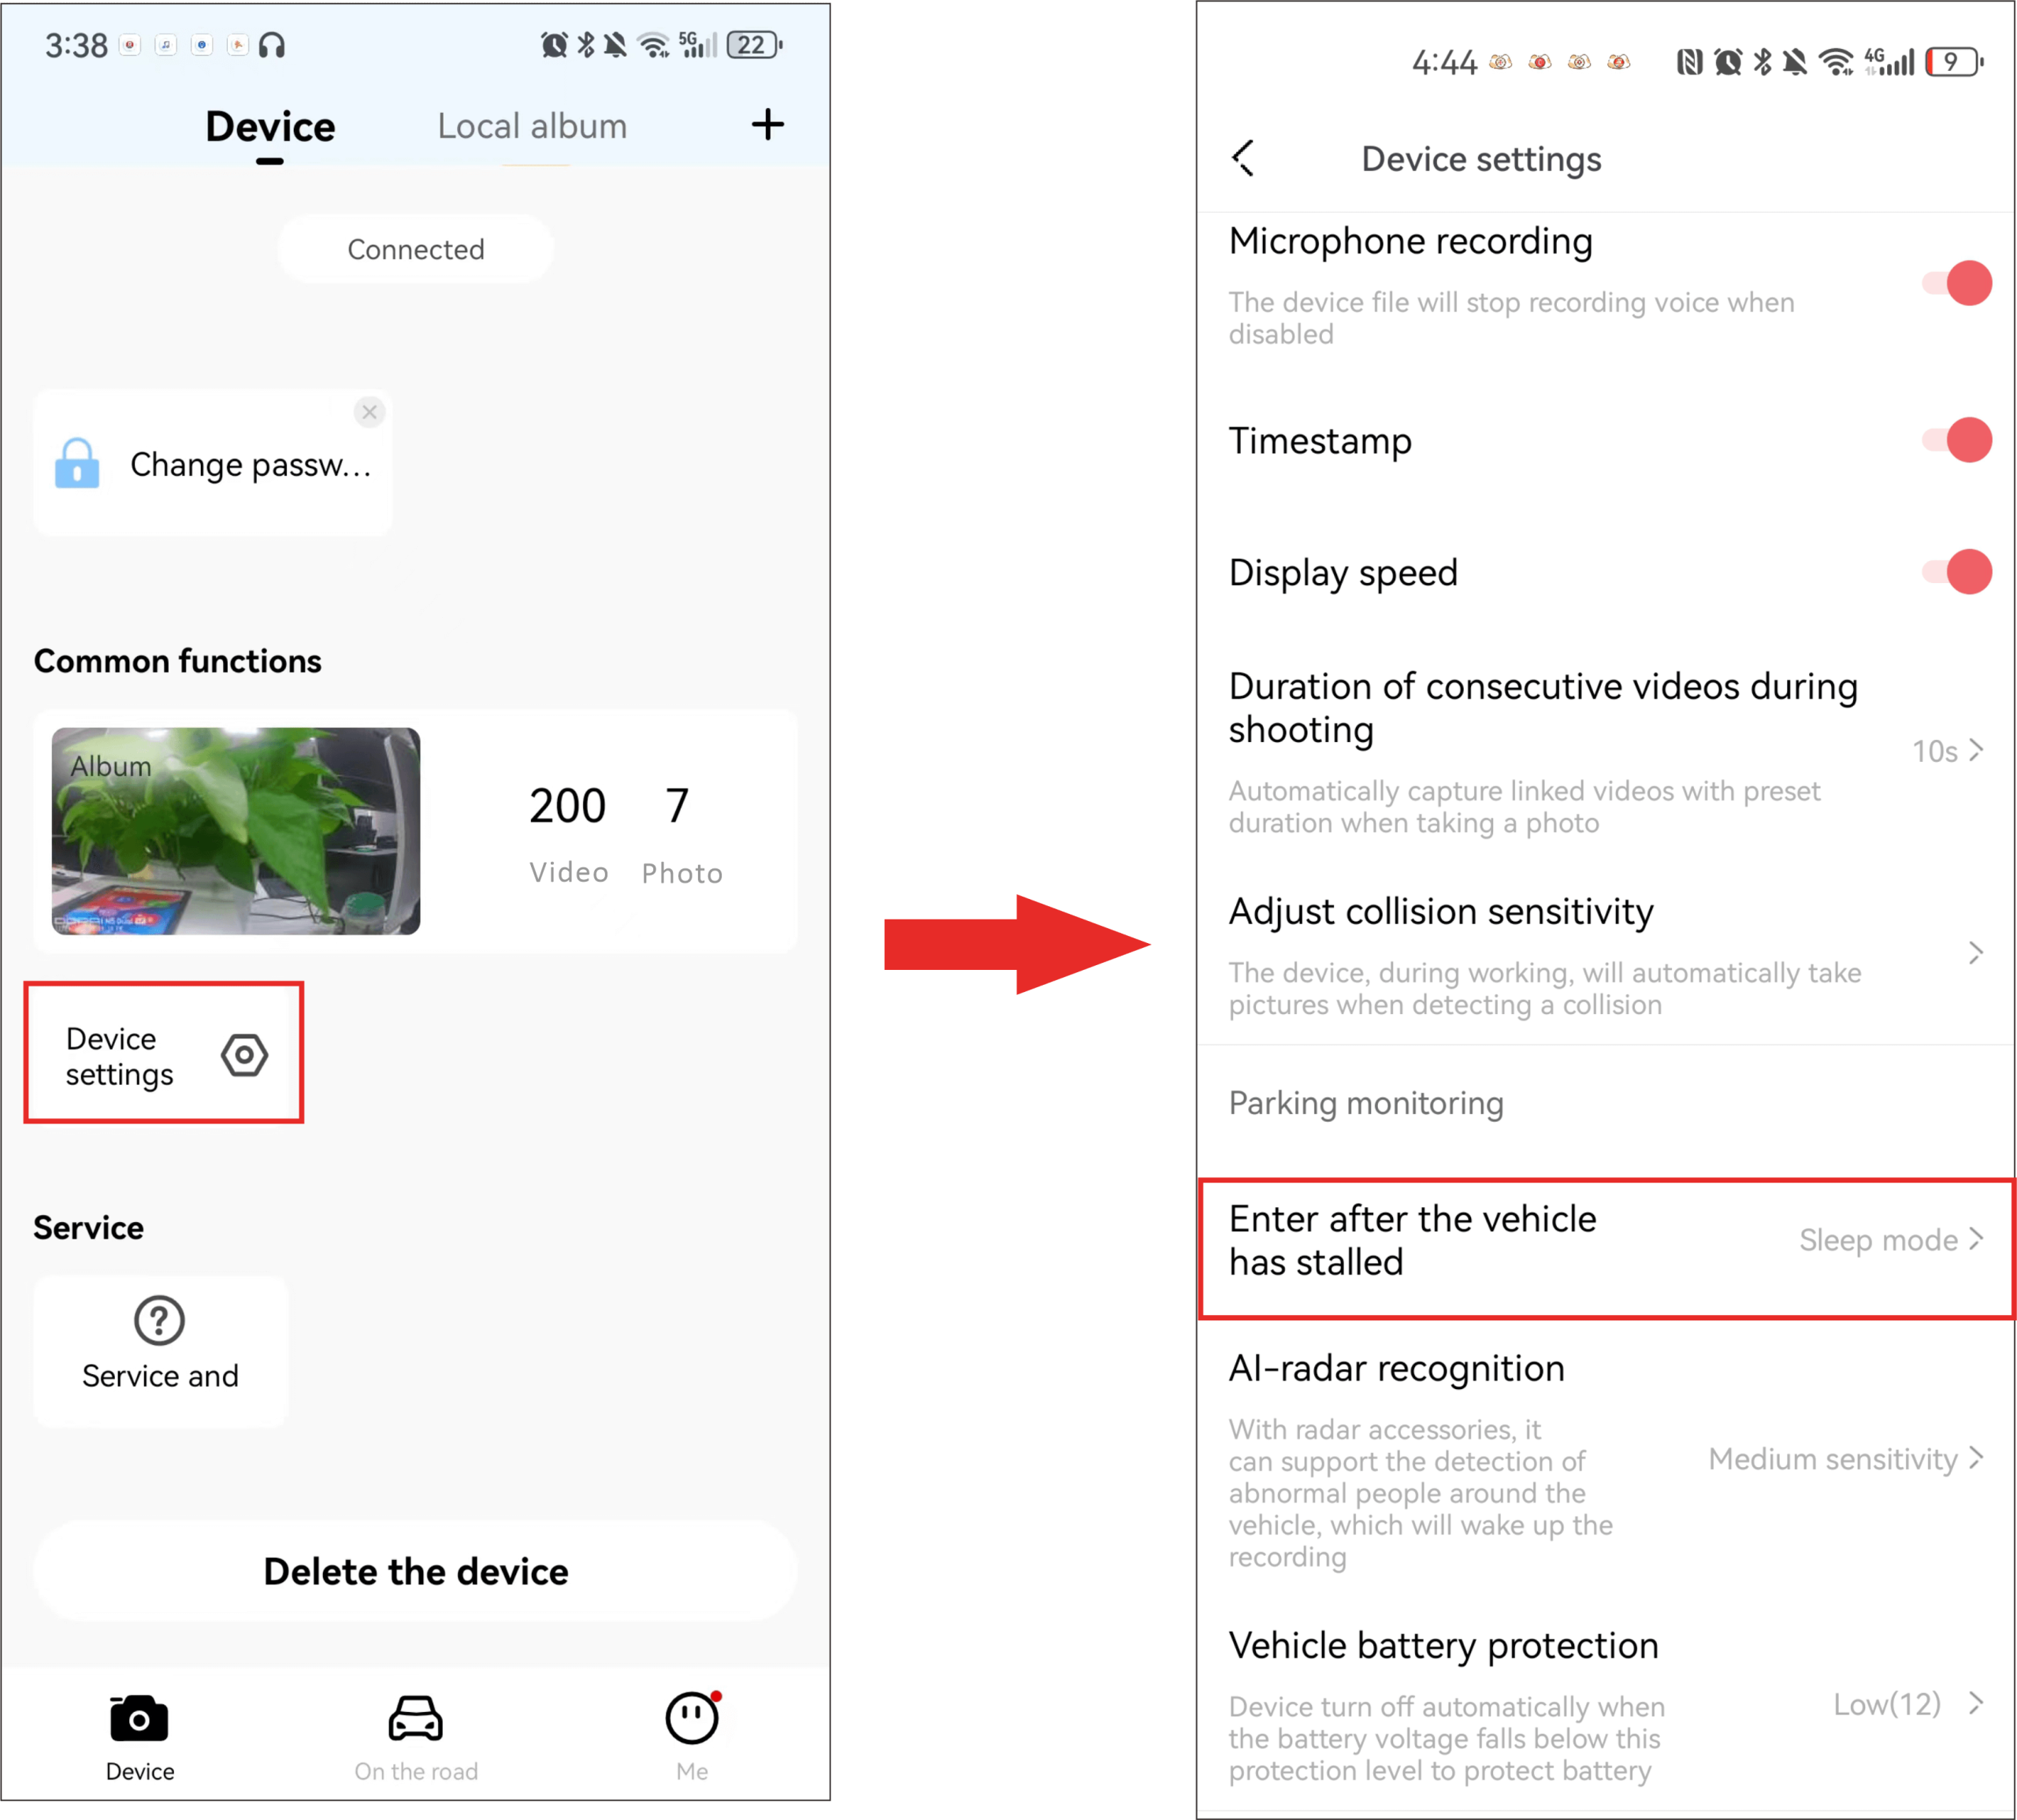
Parking Monitoring
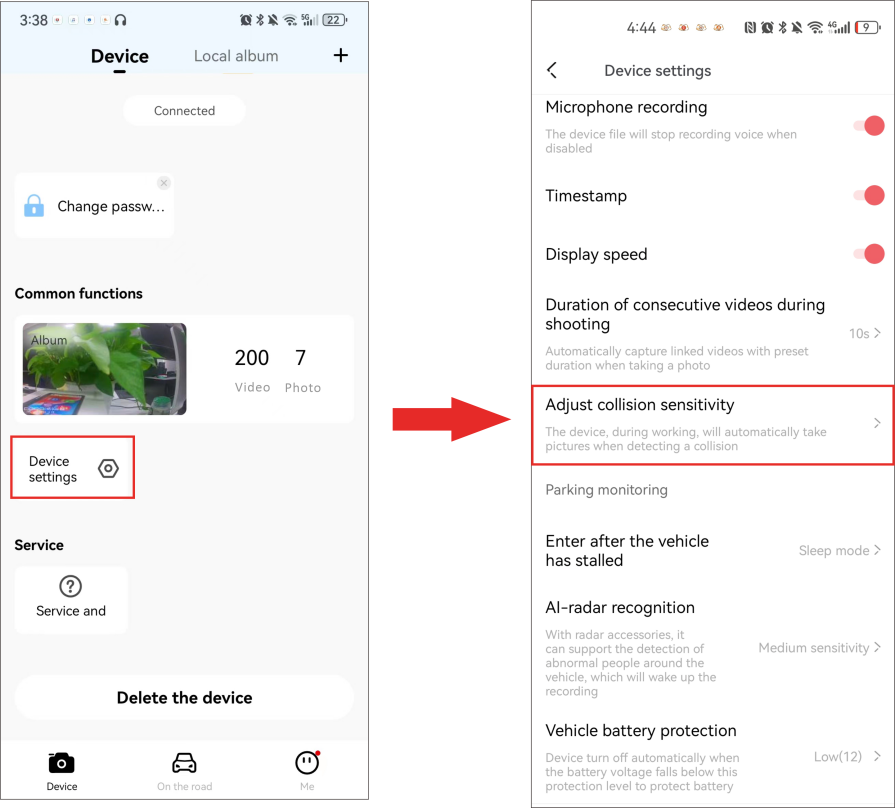
Collision Detection & Locked Videos
SR Function
The Dash Cam has a built-in SR function, which can overlay driving data into the real-time preview/playback footage and generate an exclusive cool video, giving you a better visual experience.
▶ View the real-time SR effects
- When the Dash Cam is connected to the DDPAI App, launch the app and tap “Enter Device”,you can enter the preview interface directly.
- There is an”SR” switch in the lower left corner of the preview screen. After turning it on, you can view the real-time SR effects on the screen.
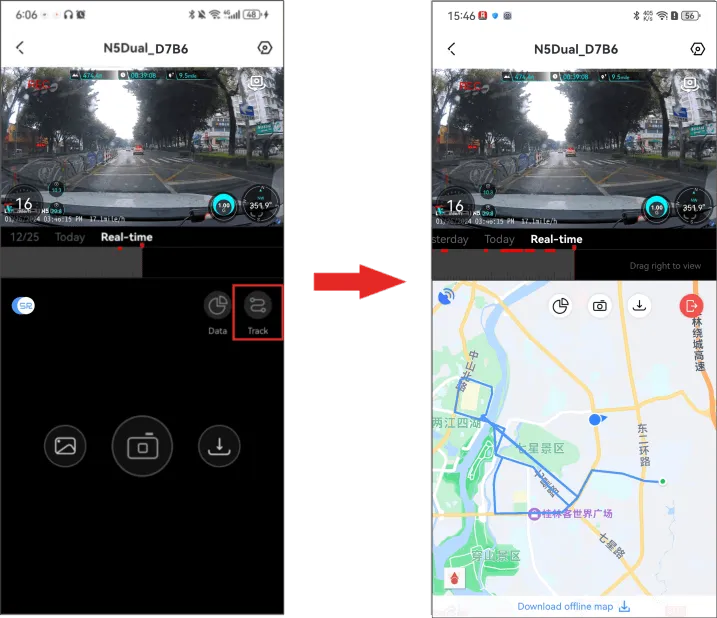
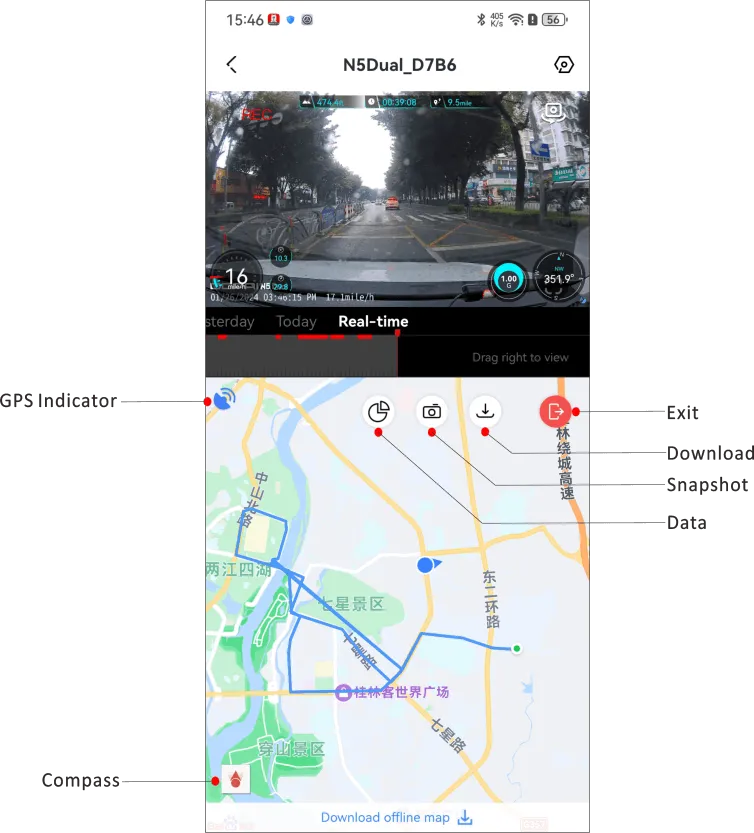
GPS Function
Advanced Driver Assistance System (ADAS)
▶ Enable the ADAS Function
After connecting the DDPAI App to the Dash Cam, launch the app, tap“Device Settings”, and turn on the “Advanced Driver Assistance System”switch.
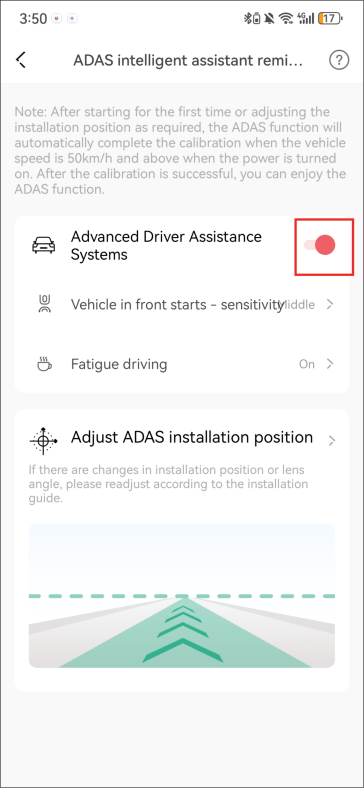
Enable “ADAS Intelligent Assistance Mode”: Voice prompts are triggered under specific speeds and conditions to assist driving.
The prompts and their activation criteria are as follows:
- Front Vehicle Start Reminder: In a stationary state, when the system detects the front vehicle moving, it provides a voice prompt“Front vehicle started.”
- Driver Fatigue Alert: After four consecutive hours of driving, a voice prompt“You have been driving for four hours, please take a rest”is issued to help reduce fatigue-related risks.
Disable “ADAS Intelligent Assistance Mode”: No intelligent assistance voice reminders.
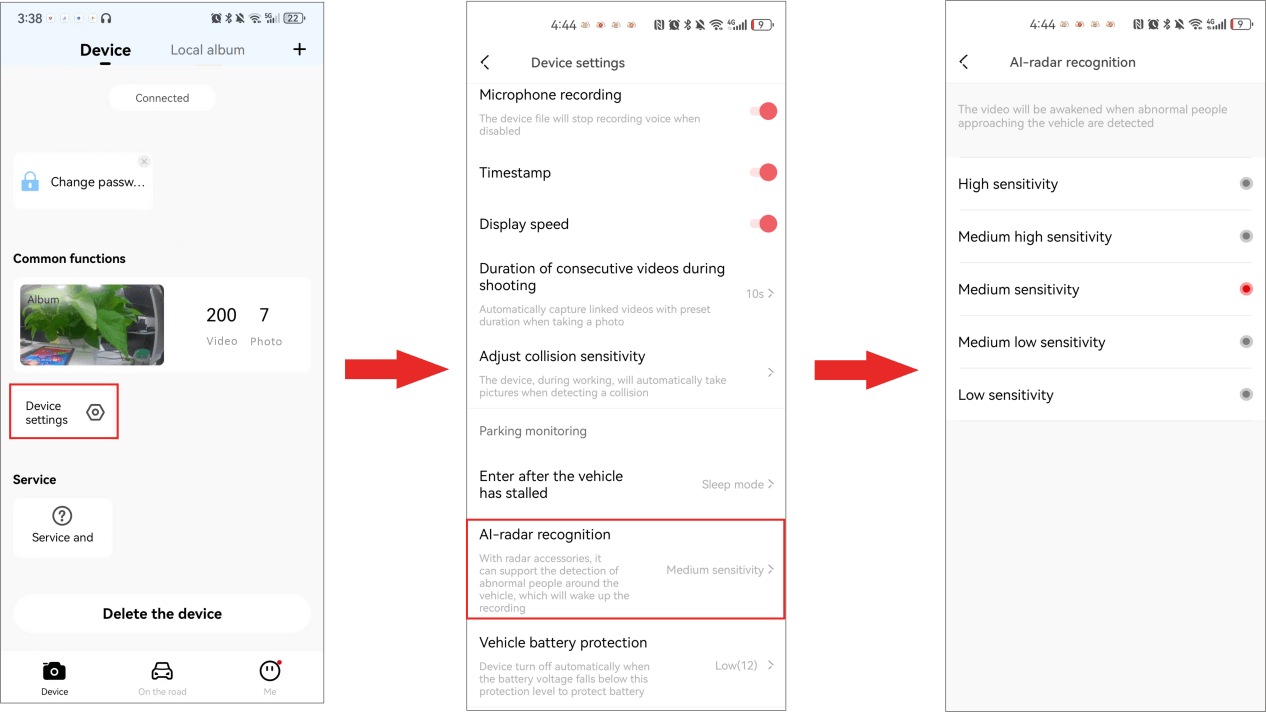
Radar Function
Remote Control
Once the dash cam is paired with its wireless remote control, you can capture a photo of the current driving scene during your drive by pressing the wireless remote. When the photo is taken, the dash cam will emit a shutter sound. If the associated video feature is enabled, an video clip before and after the photo will also be generated.
Note:
The wireless remote control is should be purchased separately.
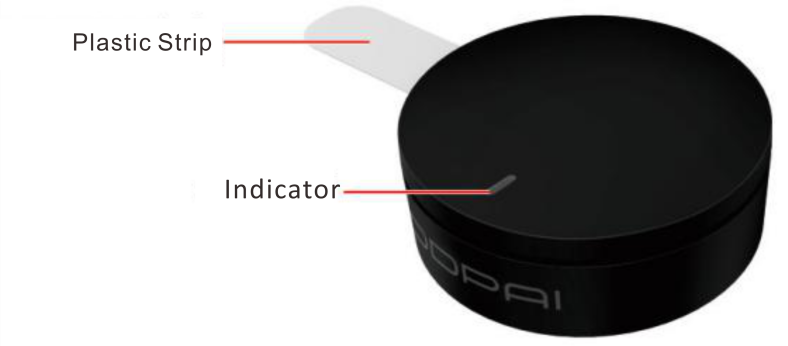
▶ Before First Use
Remove the transparent plastic strip from the wireless remote, press the remote, and the indicator light (blue) will turn on, indicating that the wireless remote is ready for use.
▶ Paring
Before using the wireless remote to capture photos, you must first pair the dash cam with the remote.
- After connecting the dash cam to the“DDPAI”app, enter the ‘Device’ Interfaceof the app, then tap “Device Settings” > “Remote Control Pairing”.
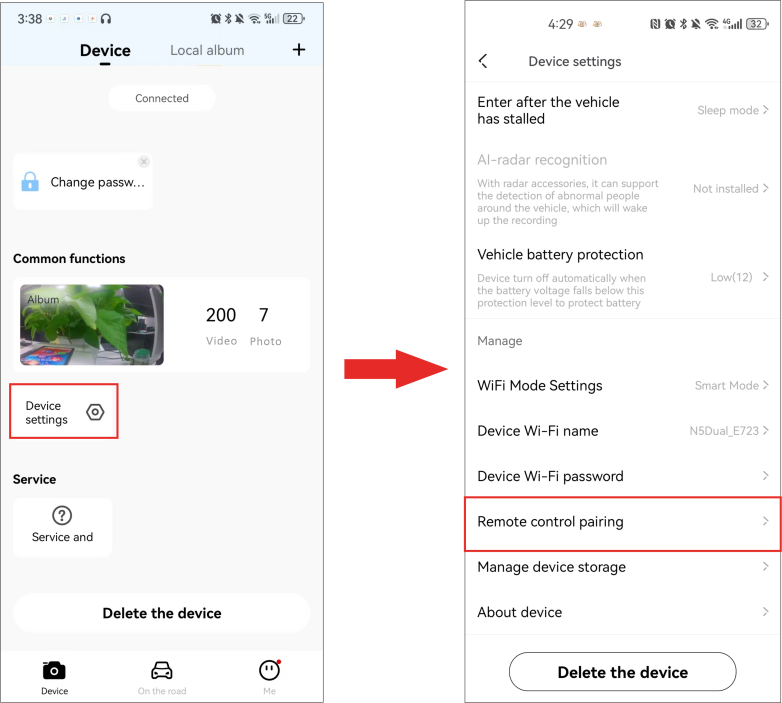
- After tappingthe ‘Pair’ button, bring the wireless remote close to the dash cam and press the button 3–5 times quickly. Once pairing is successful, the screen will display ‘Pairing Successful,’ and when you press the wireless remote, the dash cam will emit a photo capture sound.
Note:
After tapping ‘Pair,’ you must complete the pairing within 10 seconds. If pairing is not completed within 10 seconds, tap ‘Pair’ again and repeat the pairing process.
▶ Replacing the Wireless Remote Battery
The wireless remote uses a standard 3V CR2032 lithium-manganese button battery. If the indicator light does not turn on when pressing the remote, it indicates the battery is low and needs to be replaced.
- Hold the top and bottom of the remote with both hands and rotate it slightly counterclockwise until you hear a click, then open the remote.
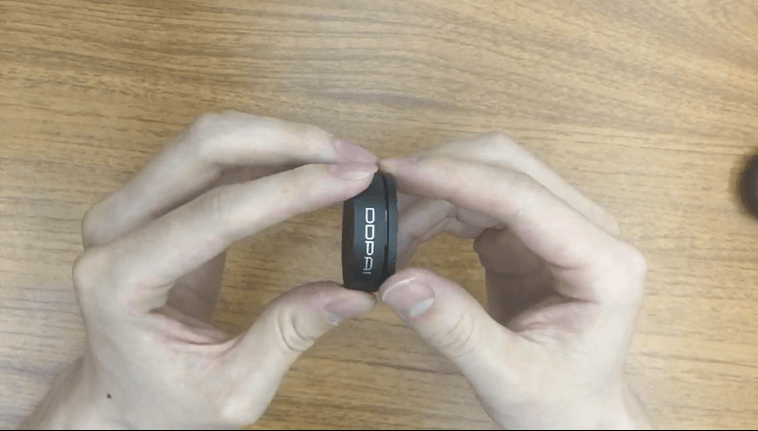
- Remove the old battery and insert a new 3V CR2032 lithium-manganese button battery, ensuring the correct polarity (the side with the text facing up). Close the lid and rotate it slightly clockwise until you hear a click, indicating the remote is properly assembled.

4G Interconnection
Data Transmission
FAQ
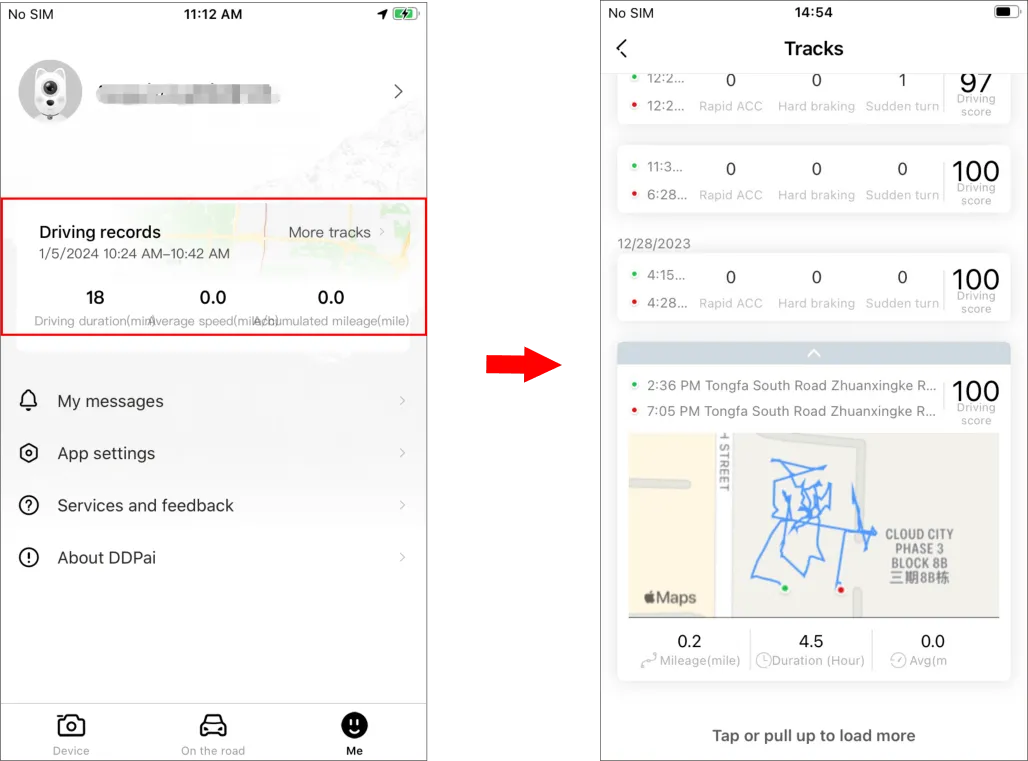
2. How to export the driving video in the memory card?
Use the card reader to connect the memory card with the computer, and you can export the driving video.
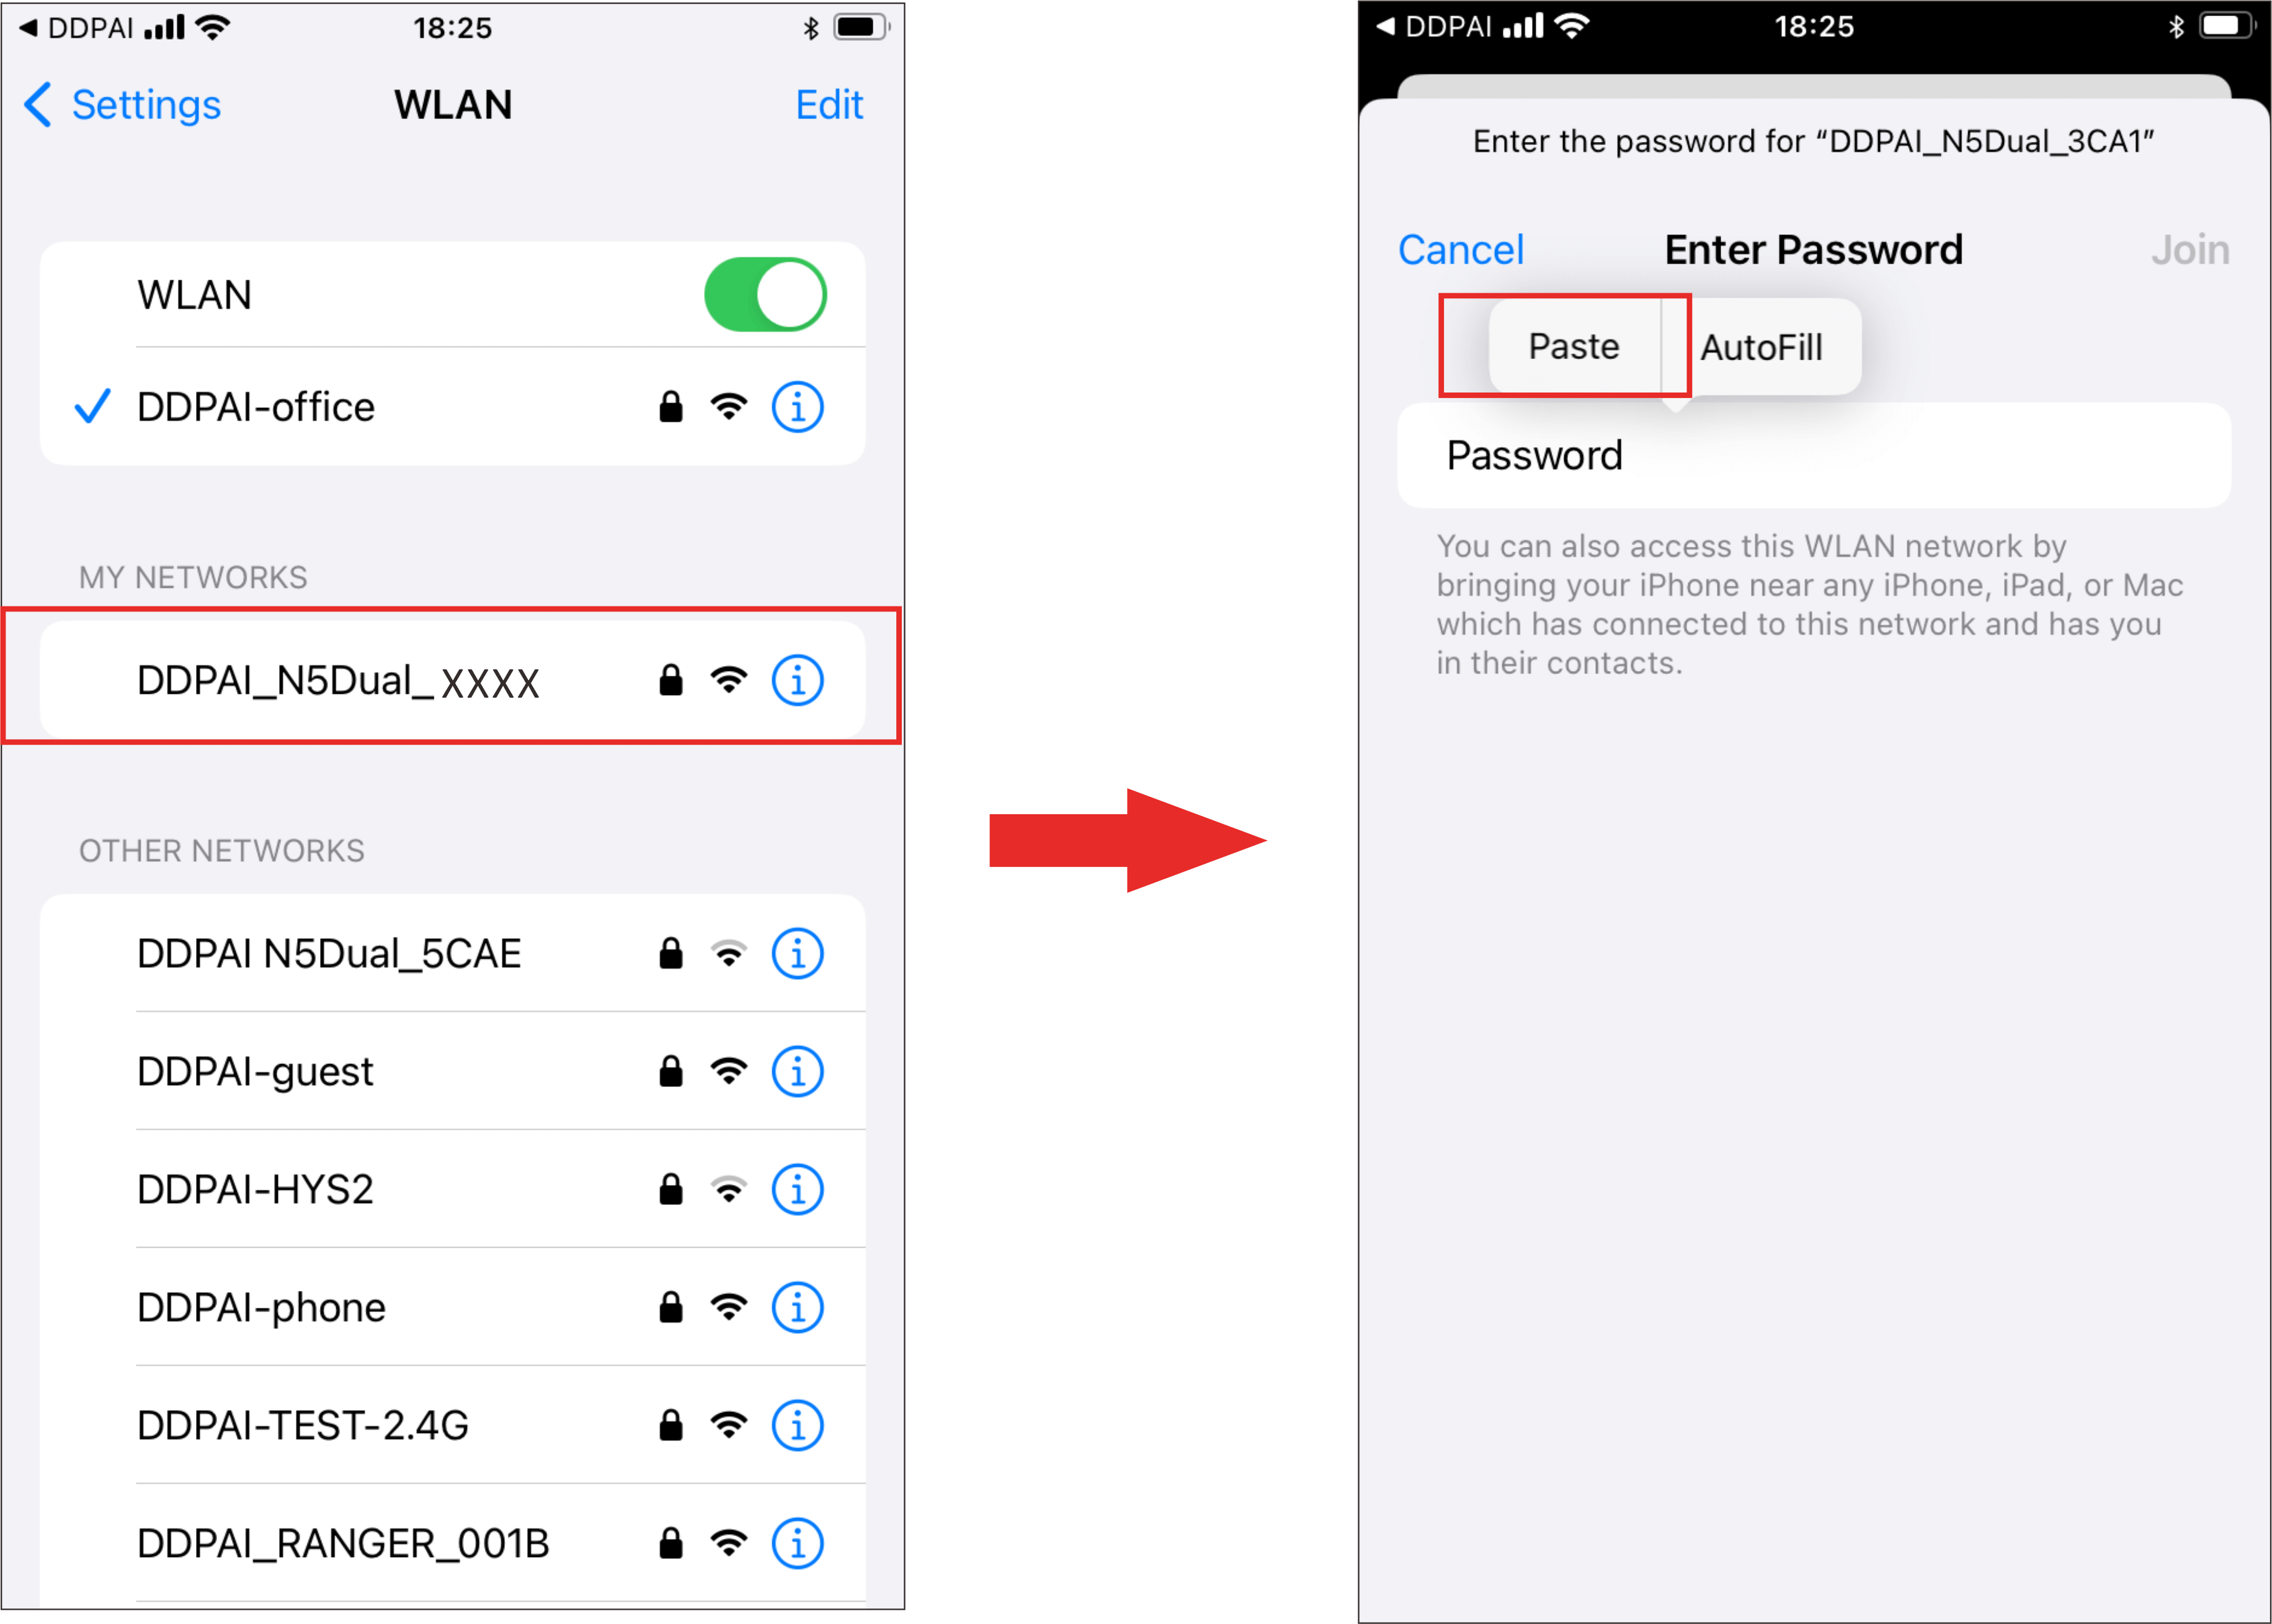
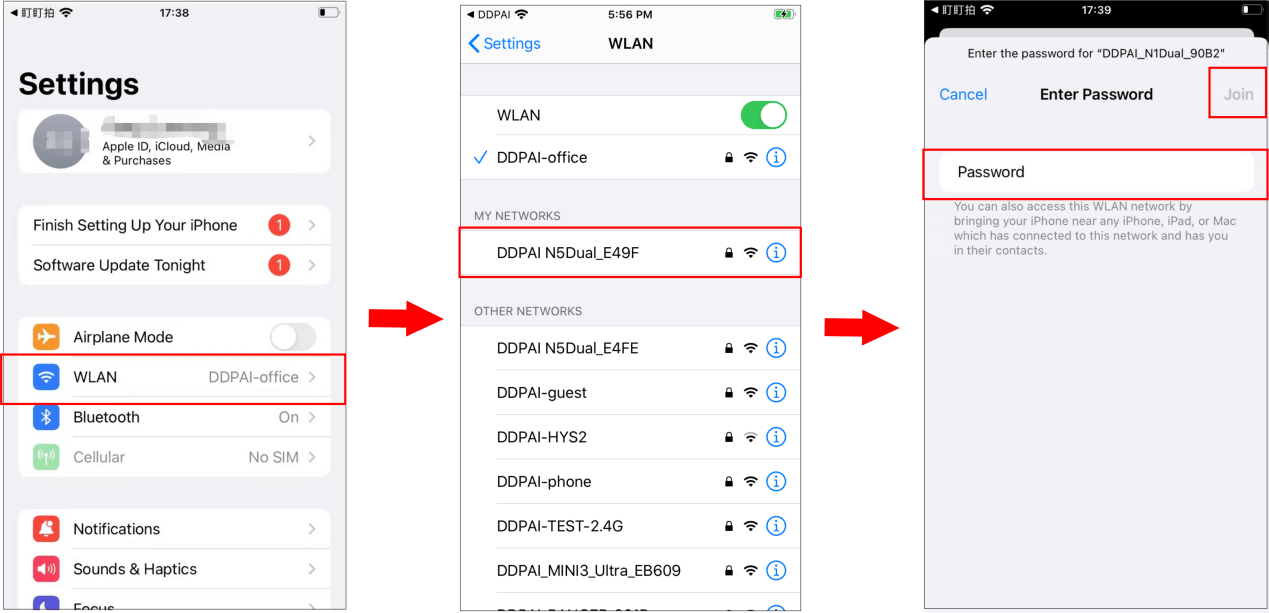
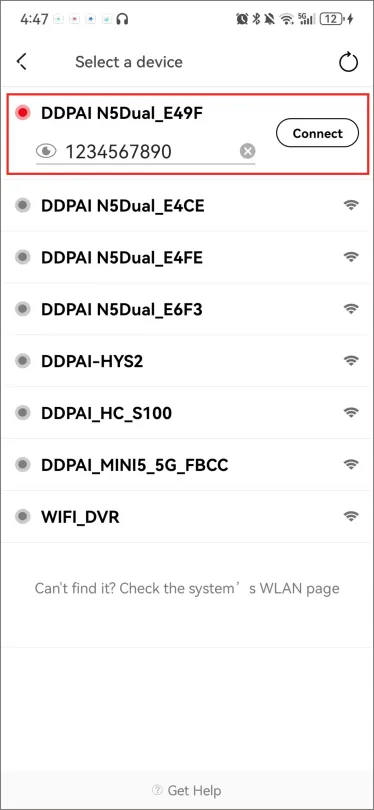
3. What is the Wi-Fi password of the Dash Cam?
The default Wi-Fi password of the device is “1234567890”. You can change the password, go to “Camera Settings” > “Set WIFI Password” after connecting the app with your mobile phone.
4. Can I change the Wi-Fi password of the Dash Cam?
It can be modified. The specific modification method is to enter “Device Settings” interface after the Dash Cam is connected to the mobile phone, select “Device Wi-Fi Password” after entering, enter a new password, confirm it, and save it.
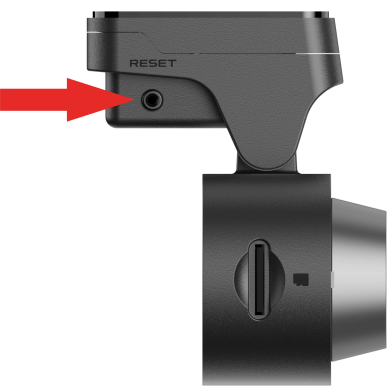
5. How do I reset the Dash Cam?
In case of abnormal state, press the function button for approximately 6 seconds to reset the device. After successful reset, the device will automatically restart.
6. What if I forget the Wi-Fi password?
Press the function button for approximately 6 seconds to reset the device, and then connect the Dash Cam again (default password: 1234567890).
7. Why can’t I see the image of my rear camera?
Please ensure that the rear camera cable is firmly connected to the front camera, and observe whether the rear camera indicator light is solid green. Then enter the preview interface of the app and tap ![]() to switch to view the image of rear camera.
to switch to view the image of rear camera.

